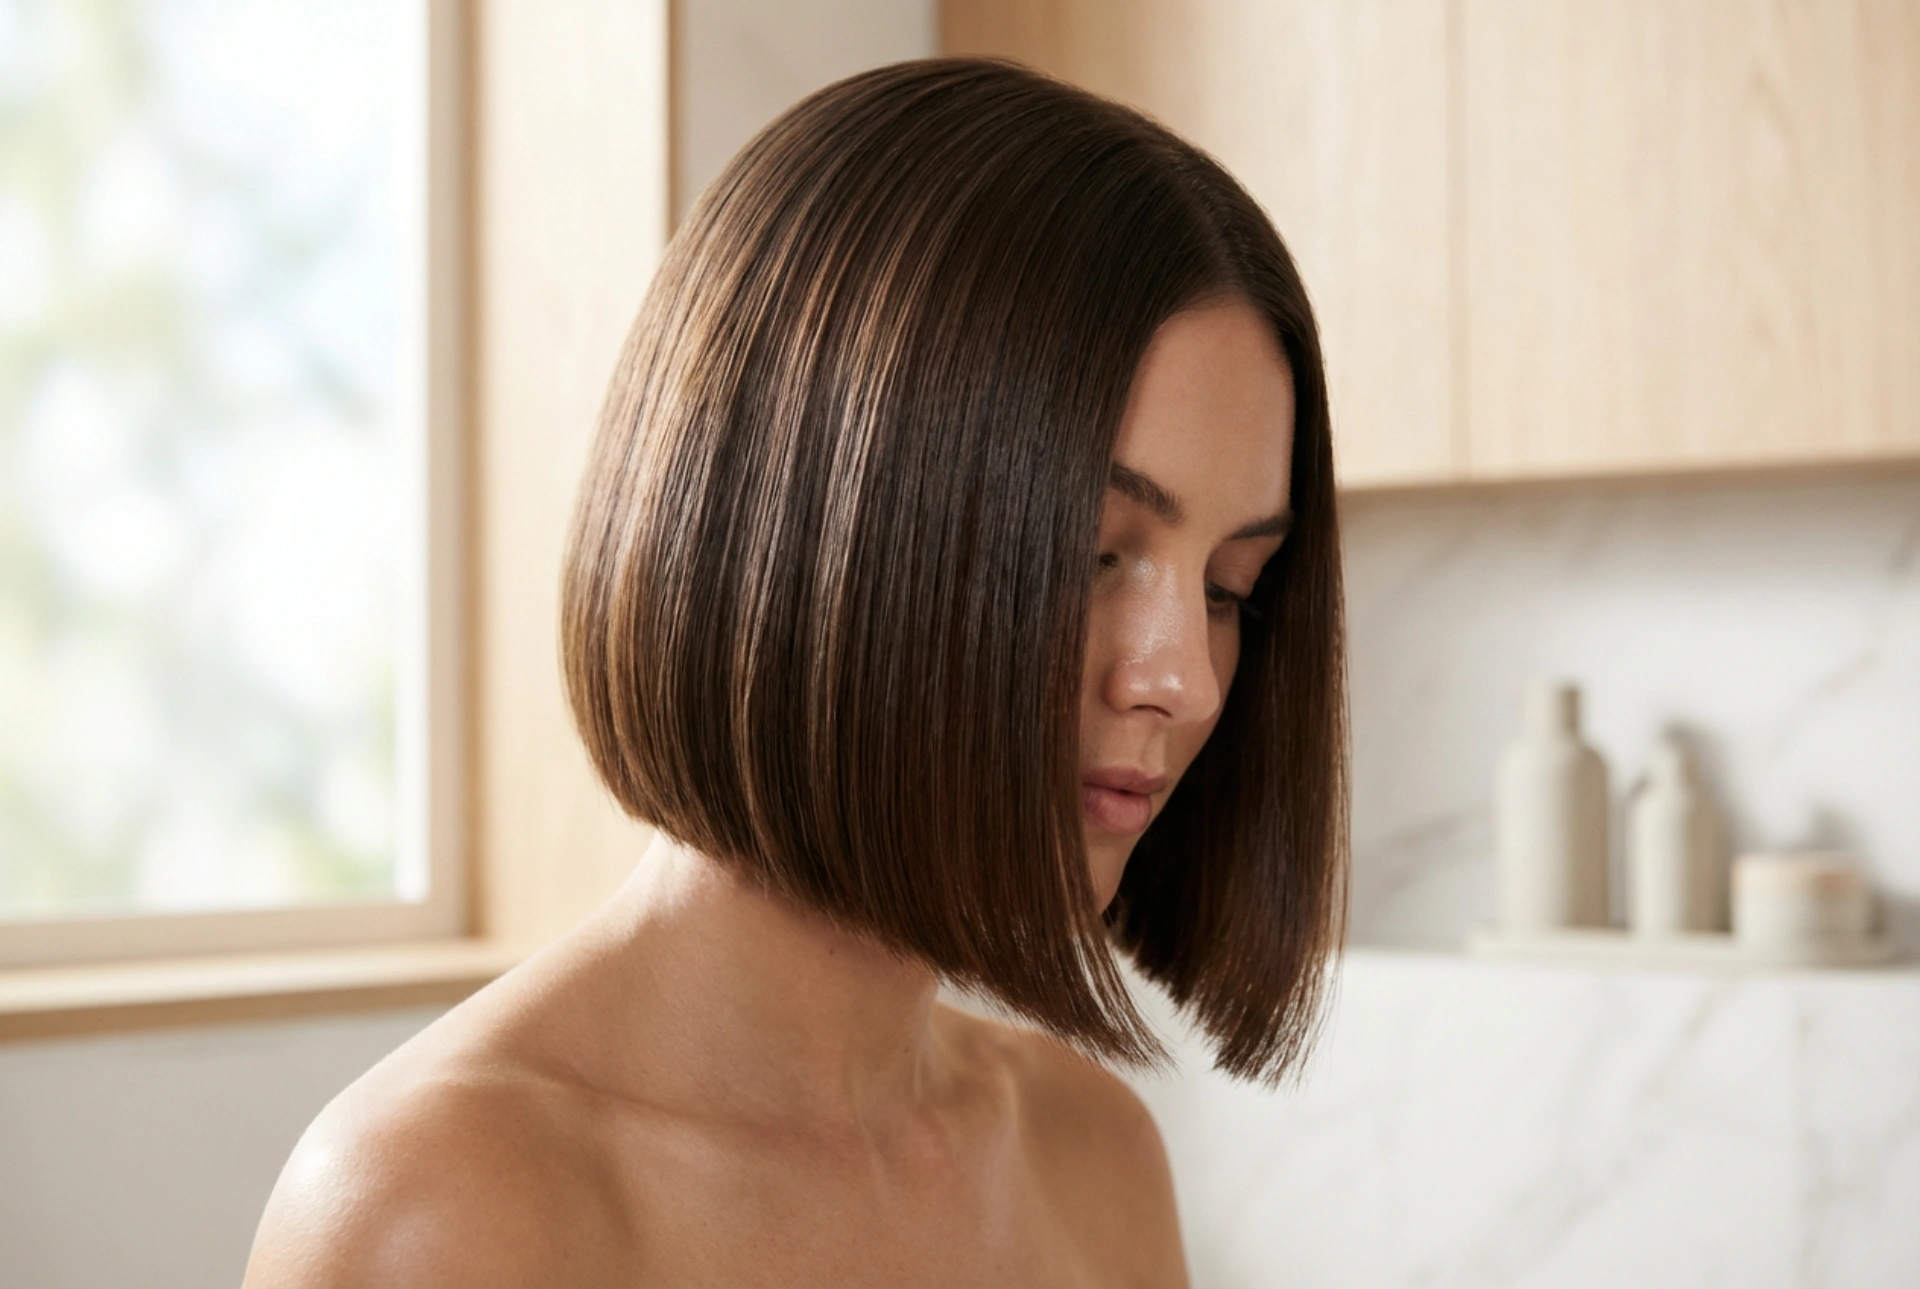


The bob is a timeless haircut, celebrated for its chic versatility and modern edge. Whether you have a classic blunt bob, a layered long bob, or a sharp A-line cut, the key to making it look polished and intentional lies in daily styling. Achieving that smooth, sleek finish with perfectly turned-in ends might seem like a salon-only feat, but with the right techniques and a little practice, you can master it at home. This guide will walk you through the steps to style your bob for a flawless, healthy-looking finish every day.
Preparation is Key: The Foundation for Smooth Hair
A great style starts long before you pick up a blow-dryer. The way you wash, condition, and prep your hair has a significant impact on the final result. The goal is to create a smooth, hydrated canvas that is ready for styling.
First, choose a shampoo and conditioner suited to your hair type. If your hair tends to get frizzy, look for smoothing or hydrating formulas. Be careful not to use products that are too heavy, especially near the roots, as this can weigh down a bob and make it look flat. After rinsing, gently squeeze the excess water from your hair with your hands, then pat it dry with a soft microfibre towel or an old cotton t-shirt. Avoid rubbing your hair vigorously with a rough towel, as this creates friction and disrupts the hair cuticle, leading to frizz and breakage.
Before any heat is applied, a heat protectant is non-negotiable. It creates a barrier between your hair and the heat, minimising damage. For a bob, a lightweight spray or lotion is ideal. You can also layer a small amount of a smoothing serum or leave-in cream, concentrating on the mid-lengths and ends to further combat frizz and add shine.
The Art of the Blow-Dry: Creating Shape and Smoothness
The blow-dry is the most crucial step for styling a sleek bob. This is where you create the shape and ensure the ends are smooth and uniform. Arm yourself with a good quality blow-dryer with a concentrator nozzle and a round brush.
Choosing Your Brush: The size of your round brush matters. A medium-sized barrel is generally a good all-rounder for a classic bob, as it helps to create a soft bend at the ends without adding too much curl. A larger brush will give you more volume and a straighter finish, while a smaller brush will create a more pronounced, rounded shape.
Step-by-Step Blow-Drying Technique:
- Rough-Dry First: Begin by blow-drying your hair without a brush, using just your fingers to move it around. Point the dryer's nozzle downwards to encourage the cuticles to lie flat. Continue until your hair is about 80% dry. It’s much easier and less damaging to style hair that is already mostly dry.
- Section Your Hair: Divide your hair into manageable sections using clips. A good starting point is to create four sections: two at the back and one on each side. Working in smaller sections gives you much more control and ensures every strand is properly dried and smoothed.
- Focus on the Roots and Mid-Lengths: Take one section and place the round brush at the root underneath the hair. Aim the blow-dryer's nozzle (which should be attached!) down onto the hair that is on the brush. Pull the brush through the hair from root to tip, following it closely with the dryer. This downward airflow is essential for a smooth, frizz-free finish.
- Shape the Ends: As you reach the ends, gently rotate the round brush inwards (towards your neck). This movement will create that classic, soft, bevelled edge that makes a bob look so polished. Hold the dryer on the ends for a few seconds to set the shape. For a sharper, straighter finish, you can pull the brush straight down instead of turning it.
- Cool Shot for Longevity: Once a section is dry and shaped, switch your dryer to the cool shot setting for a few seconds. This helps to set the style and adds shine by closing the hair cuticle.
Repeat this process on all sections, finishing with the front pieces that frame your face.
Finishing Touches for a Flawless Look
Once your hair is completely dry, you can add a few finishing touches to perfect the look. For an extra-sleek finish, especially if you have naturally wavy or thick hair, a flat iron can be your best friend. Use it sparingly and on a low to medium heat setting. Instead of clamping down and pulling straight, glide it quickly through the mid-lengths and then gently curve it inwards at the ends, mimicking the shape you created with the round brush. This prevents the ends from looking stiff and unnatural.
To tame any remaining flyaways and boost shine, apply a tiny drop of lightweight hair oil or anti-frizz serum. Warm the product between your palms and gently smooth it over the surface of your hair, focusing on the ends. Avoid the roots to maintain volume. A light mist of a flexible-hold hairspray can help lock everything in place without making your hair feel stiff or crunchy.
Common Mistakes to Avoid When Styling a Bob
Even with the right tools, small errors can sabotage your style. Being aware of common pitfalls is key to achieving consistent results.
- Using Too Much Heat: High heat settings can scorch your hair, leading to dryness and split ends. Always use a heat protectant and stick to medium heat settings.
- Applying Product to the Roots: Heavy creams, serums, or oils applied at the root will weigh your bob down, making it look greasy and flat. Focus all finishing products from the mid-lengths down.
- Forgetting Regular Trims: A bob is a precision haircut. Its shape relies on clean lines and healthy ends. Neglecting regular trims will cause the ends to split and the shape to become lost, making it much harder to style.
- Drying Upwards: Always direct the airflow of your blow-dryer downwards, from root to tip. Drying upwards or randomly will rough up the hair cuticle and create frizz.
- Over-drying the Hair: Styling hair that is already bone-dry with a hot brush can cause unnecessary damage. Ensure your hair still has a little moisture in it when you begin the round brush portion of your blow-dry.


