


Achieving perfectly uniform, bouncy curls can often feel like a challenge, but the right tool can make all the difference. A spiral curling iron, with its unique guided design, offers a straightforward way to create consistent, beautifully defined curls. If you've ever struggled with uneven results from traditional wands, this specialised tool might be the key to unlocking the elegant, springy hairstyle you desire. It’s designed for precision, helping you wrap each section of hair flawlessly for a polished finish.
What Makes a Spiral Curling Iron Unique?
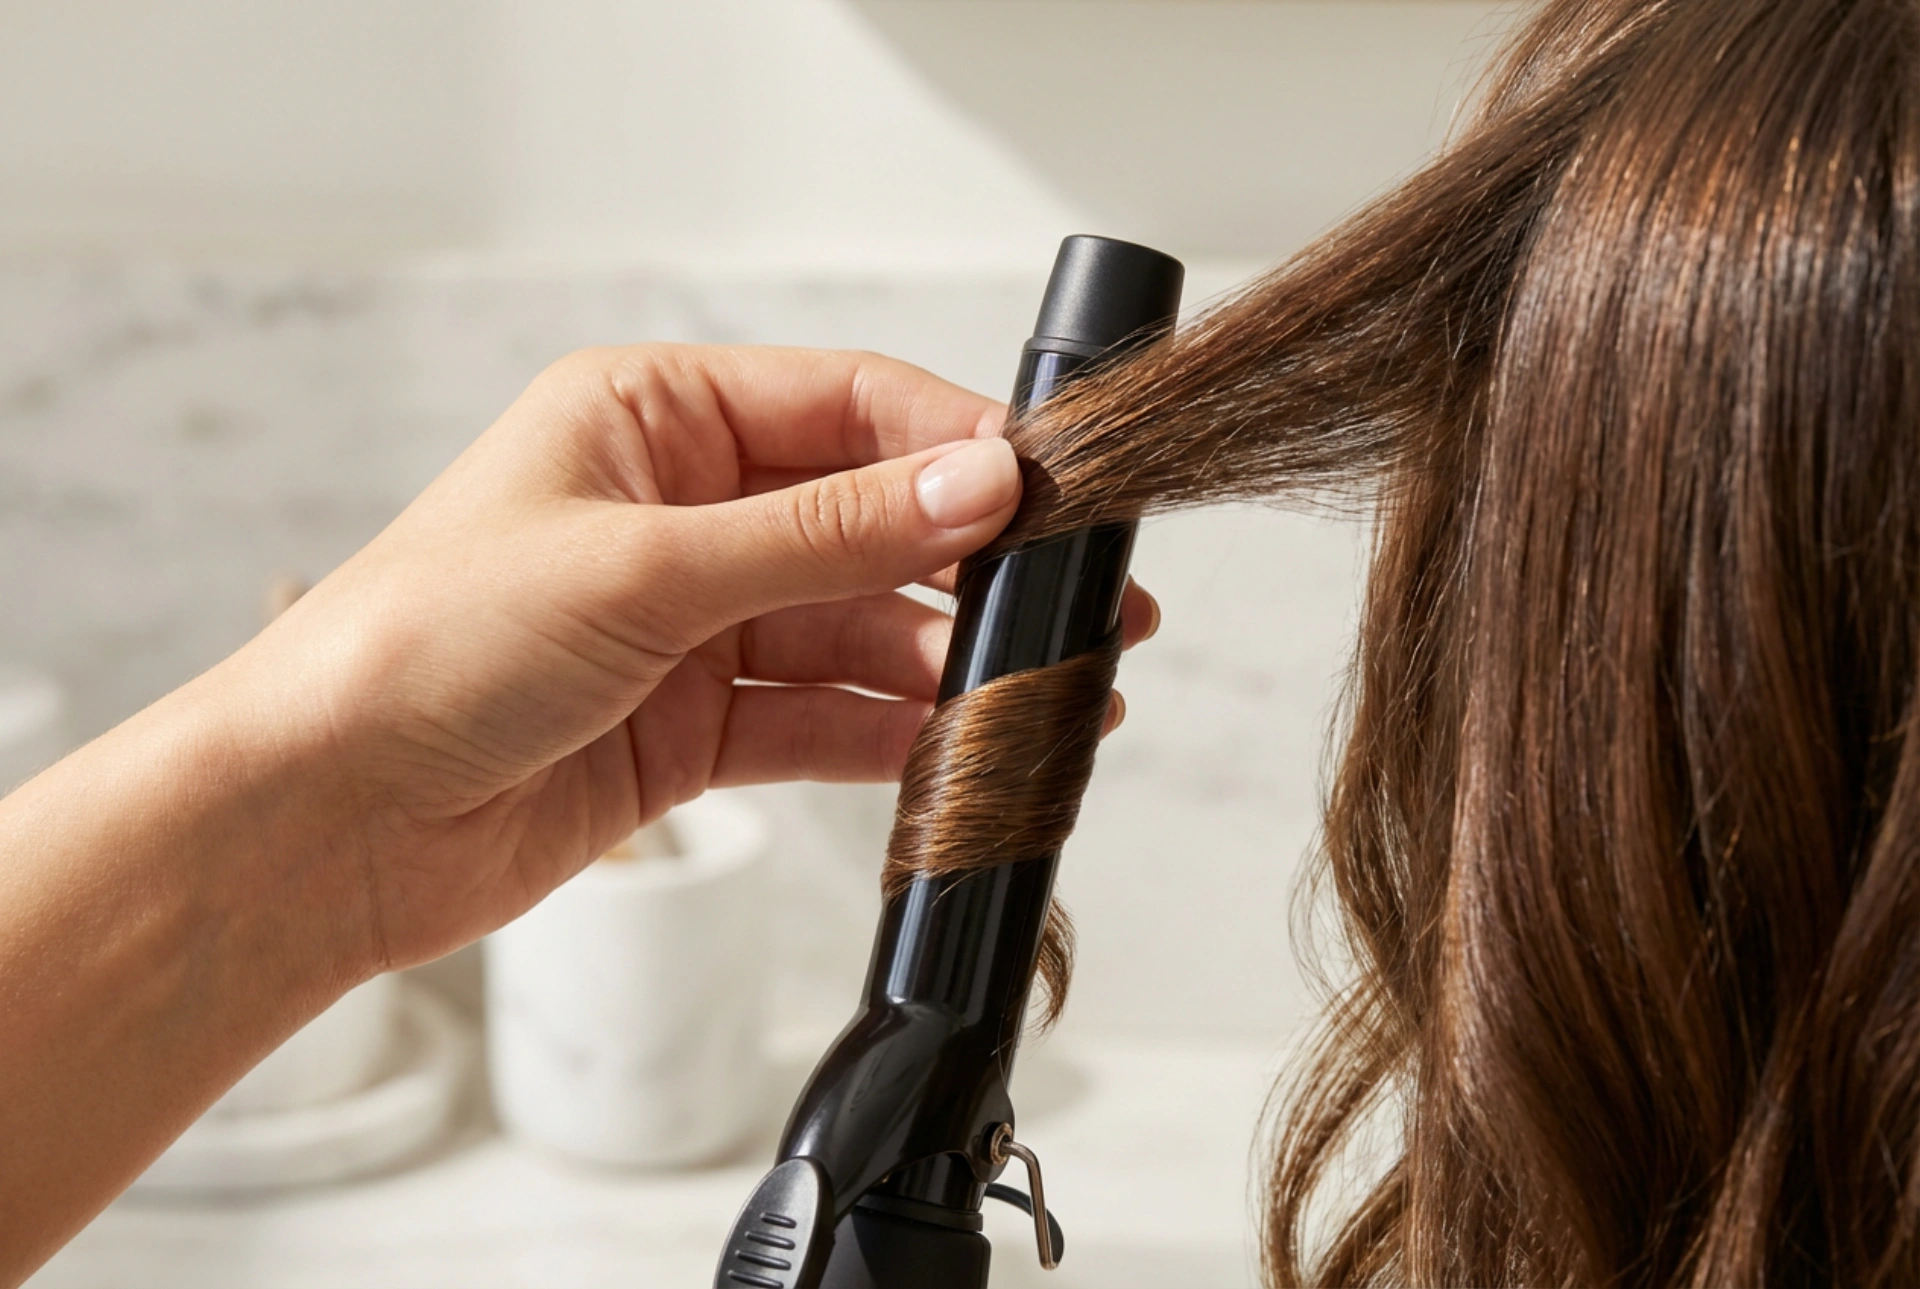
Unlike a standard curling wand or tong, a spiral curling iron features raised grooves or guides that spiral around the barrel. This design isn't just for looks; it serves a practical purpose. The guides create a clear path for you to wind your hair, ensuring each section is wrapped with the same tension and spacing. This eliminates the guesswork and helps produce incredibly uniform curls from root to tip. It's an ideal choice for beginners or anyone seeking a quick and reliable method for creating a structured, curly look without worrying about overlapping hair or inconsistent shapes.
Preparing Your Hair for Flawless Curls
Proper preparation is crucial for protecting your hair and achieving a long-lasting style. Before you even plug in your spiral curler, follow these essential steps.
Start with Dry, Clean Hair
For the best results, always work with hair that is 100% dry. Styling damp hair with a heat tool can cause significant damage. Ensure your hair is also clean and free from any heavy product build-up, which can weigh down curls and prevent them from forming properly. A light-volume shampoo and conditioner can provide a great foundation.
Always Use a Heat Protectant
This is a non-negotiable step in any heat-styling routine. A quality heat protectant spray creates a barrier between your hair and the high temperature of the curling iron, minimising potential damage, reducing moisture loss, and preventing split ends. Lightly mist it all over your hair, from roots to ends, and gently comb through to distribute it evenly.
Section Your Hair for Control
Styling your hair in one go is a recipe for a tangled, uneven mess. To ensure every strand gets styled correctly, divide your hair into manageable sections. Use clips to separate the top layers from the bottom. Working with smaller, 1-2 inch sections at a time will give you more control and result in more defined, consistent curls.
A Step-by-Step Guide to Using a Spiral Curling Iron
Once your hair is prepped, you're ready to start styling. The guided barrel makes the process simple and intuitive.
- Select the Right Temperature: Turn on your curling iron and choose a heat setting appropriate for your hair type. Fine or colour-treated hair requires a lower temperature, while thick or coarse hair may need a slightly higher setting to hold a curl.
- Position the Hair: Take your first small section of hair. Hold it taut and place the end of the section under the clip or at the base of the barrel, depending on your tool's design.
- Wind Along the Guide: Carefully wrap the section of hair around the barrel, following the spiral grooves. The guides will help you keep the hair flat and evenly spaced. Continue winding until you reach the end of the hair section.
- Hold and Heat: Hold the hair in place for about 5-10 seconds. The exact time will depend on your hair's thickness and the temperature you've selected. Avoid holding it for too long to prevent heat damage.
- Release the Curl: Gently unwind the hair or release the clip and slide the iron out. To help the curl set and last longer, you can catch it in your palm and hold it for a few seconds as it cools, or use a small clip to pin it to your scalp.
- Repeat the Process: Continue this process, section by section, until all your hair is curled. For a more natural look, you can try alternating the direction you wrap the hair around the barrel with each curl.
Tips for a Lasting, Natural-Looking Style
Creating the curls is only half the battle; making them last and look effortless is the final touch. Let the curls cool down completely before you do anything else. Running your fingers through warm curls will cause them to drop and lose their shape. Once cool, gently separate them with your fingers for a softer, more voluminous look. Avoid using a brush, as this can pull out the curls and create frizz. A light mist of a flexible-hold hairspray will provide hold without making your curls stiff or crunchy, allowing for natural movement.


