


A rotating curling iron can be a game-changer in your beauty routine, promising effortless, salon-worthy curls in minutes. However, the thought of an automated tool wrapping your hair can be intimidating, with the primary concern being the dreaded tangle. Fear not! With the right technique and a little practice, you can harness the power of your rotating curler to create flawless, smooth curls without any knots. This guide will walk you through everything you need to know to use your device confidently and effectively.
The Foundation for Flawless Curls
Start with Dry, Detangled Hair
The first and most critical rule for using any heated styling tool, especially a rotating one, is to start with completely dry hair. Using a curler on damp or wet hair can cause significant damage and will almost certainly lead to tangles and uneven results. Before you even plug in your tool, brush your hair thoroughly to remove any knots or snags. A smooth canvas is essential for the barrel to glide through and wrap the hair evenly.
Section Your Hair Properly
Working with manageable sections is the secret to success. Attempting to curl a chunk of hair that is too thick is the most common cause of tangles. The tool is designed to handle a specific amount of hair, allowing it to wrap neatly around the barrel. Divide your hair into at least four main quadrants and secure them with clips. From these quadrants, you will work with smaller, individual sections, typically between 1 and 2 inches in width. This not only prevents tangling but also ensures that heat is distributed evenly for a consistent curl pattern.
Always Use a Heat Protectant
Never skip the heat protectant. Spritzing a quality heat protection spray throughout your hair before styling creates a protective barrier between your strands and the high temperatures of the curler. This minimises potential damage, reduces frizz, and helps to smooth the hair's cuticle. Smoother hair will glide more easily around the barrel, further reducing the risk of snagging or tangling.
The Art of the Automated Curl
Correct Positioning and Direction
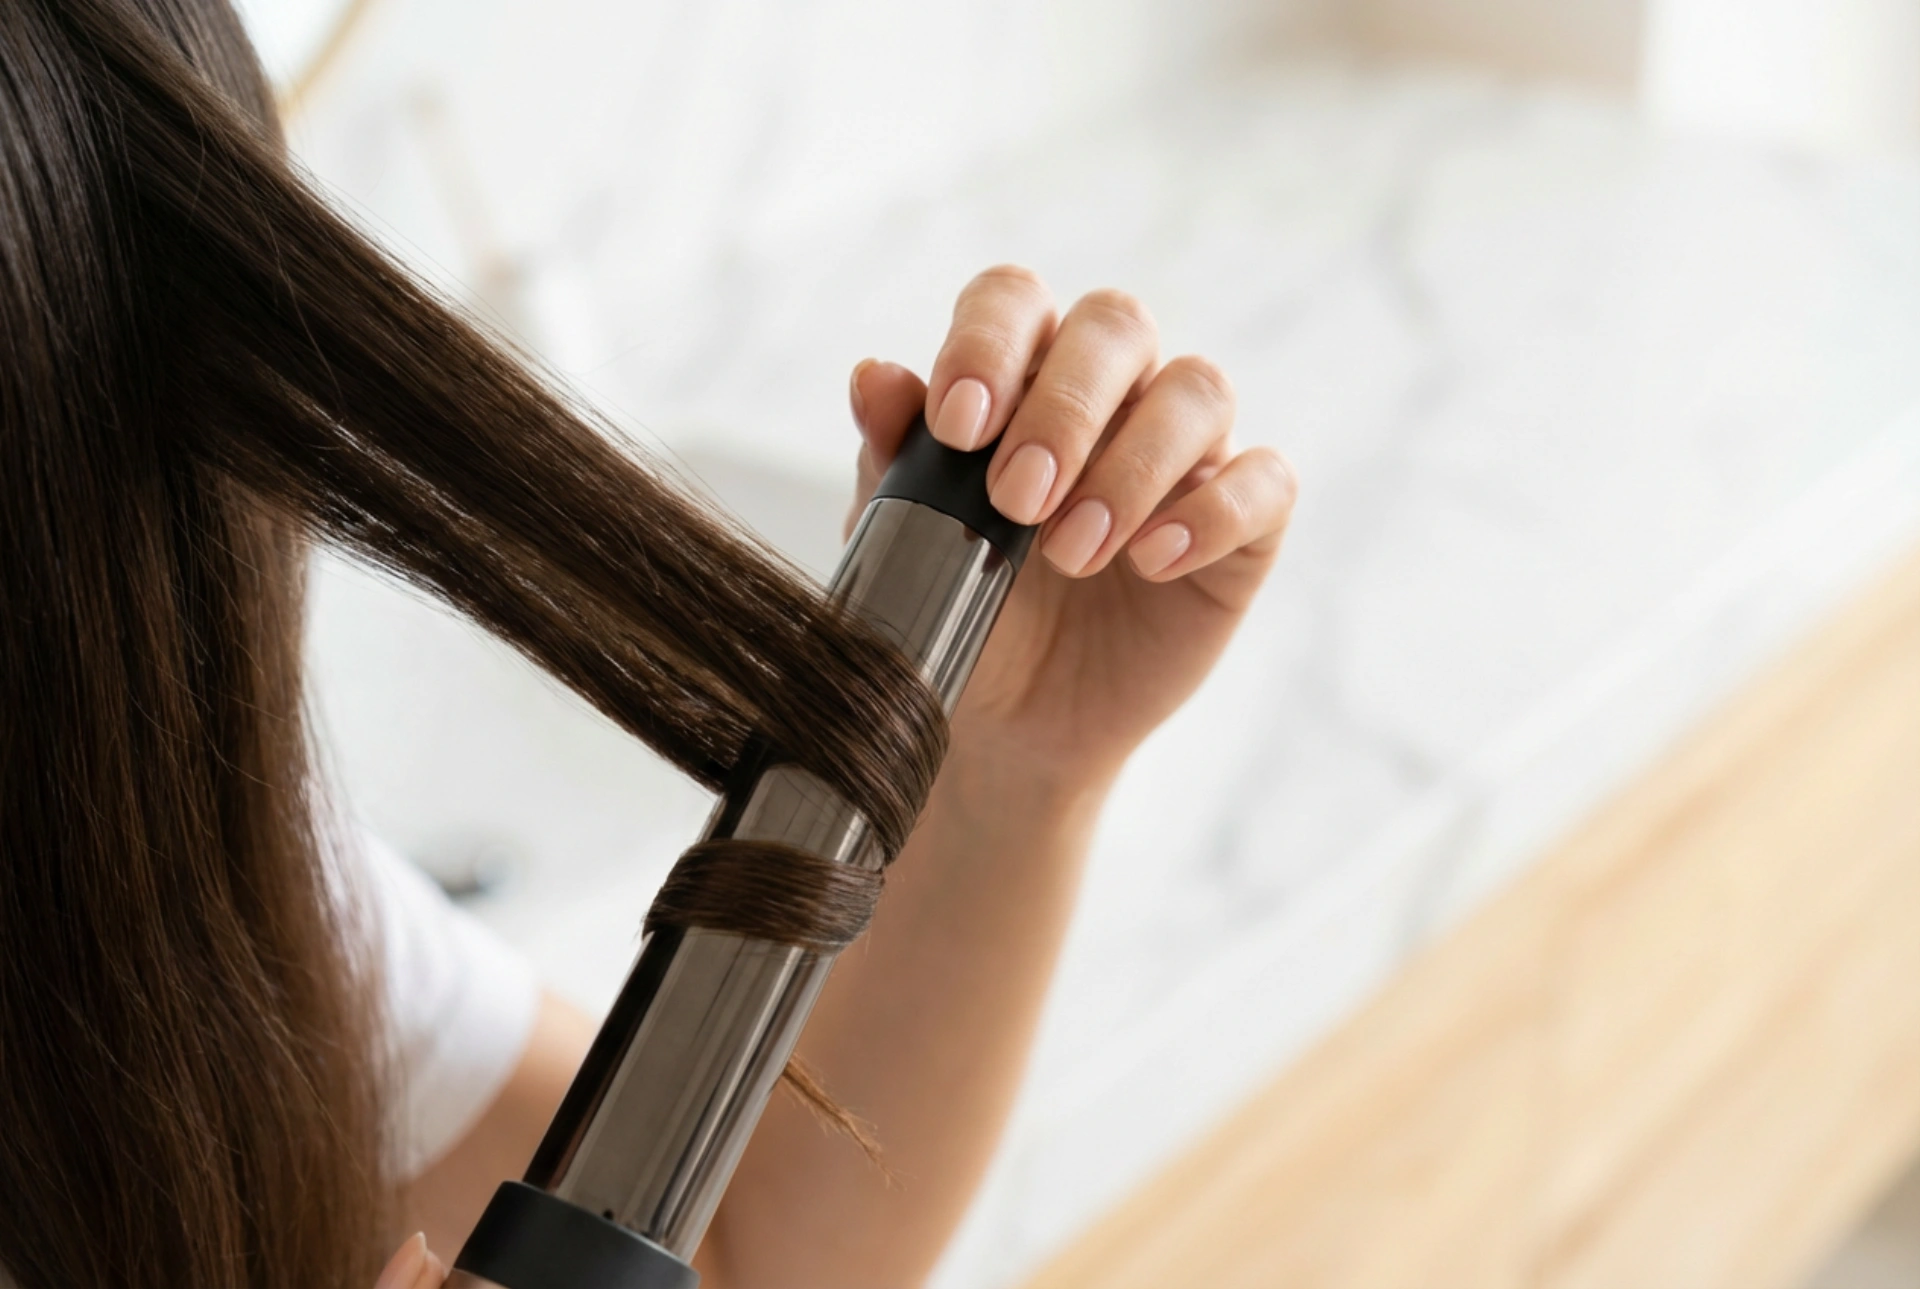
How you hold the tool and which direction you curl in makes all the difference. For a modern, flattering look, it's generally recommended to curl the hair away from your face. Most rotating curlers have two directional buttons (left and right). When styling the right side of your head, you'll typically use the button that rotates the barrel away from your face, and you'll do the opposite for the left side. Hold the curler vertically, take a prepared section of hair, and place it in the clamp or slot as indicated by the tool's design. Ensure the hair strand is held flat and straight as you position it.
Let the Tool Do the Work
The beauty of a rotating curler is its automation. Once your hair section is in place, simply press and hold the directional button. Allow the tool to gently draw the hair in and wrap it around the heated barrel. Resist the urge to manually twist or guide the hair yourself. Keep a light but firm grip on the handle and hold the tool steady. Pulling or moving the curler while the hair is wrapping is a surefire way to create a tangle. Trust the mechanism to do its job.
Your Step-by-Step Curling Process
Follow these simple steps for a smooth and successful styling session:
- Step 1: Take a clean, brushed section of hair no wider than 2 inches.
- Step 2: Position the rotating curler vertically, a few inches down from your roots. Place the mid-point or ends of your hair section into the designated clamp or opening.
- Step 3: Press the rotation button for your desired direction (usually away from the face). Hold the button as the barrel automatically wraps the entire length of the hair section.
- Step 4: Once the hair is fully wrapped, release the button and hold the curler in place for 5-10 seconds. The duration will depend on your hair type and the heat setting you've selected.
- Step 5: To release the curl, do not press any buttons. Simply pull the curling iron straight down in a smooth, fluid motion. The curl will slide off the barrel perfectly formed.
- Step 6: Allow the curl to cool completely in your palm or let it hang before you touch it further. This helps the curl to set properly and ensures it lasts much longer.
What to Avoid and How to Finish
Common Mistakes That Cause Tangles
Understanding what not to do is as important as knowing the correct technique. Avoid these common errors:
- Styling hair that is damp or not fully brushed.
- Taking sections of hair that are too thick or wide for the tool.
- Pulling or moving the curler while the hair is being wrapped.
- Pressing the opposite rotation button to try and 'unwind' the hair. Always release by pulling the tool straight down.
- Using a heat setting that is too high for your hair type, which can cause damage and make hair more prone to snagging.
Setting Your Style
Once all your hair is curled and has completely cooled, you can finish your look. For defined curls, you can leave them as they are. For a softer, more voluminous wave, gently run your fingers through your hair to break up the curls. A light mist of a flexible-hold hairspray can help to lock in your style for the day without making it feel stiff or crunchy. With these tips, your rotating curling iron will become your favourite tool for achieving beautiful, tangle-free styles.


