


The charm of vintage hairstyles lies in their timeless elegance and ability to add a touch of personality to any look. Drawing inspiration from past decades doesn't mean you need to spend hours in front of the mirror. Many classic styles can be beautifully adapted for a modern, everyday aesthetic, creating soft, graceful silhouettes that highlight your features. This guide will walk you through the fundamental techniques to achieve simple, retro-inspired hair at home, perfect for adding a sophisticated twist to your daily routine.
Preparing Your Hair for a Vintage Look
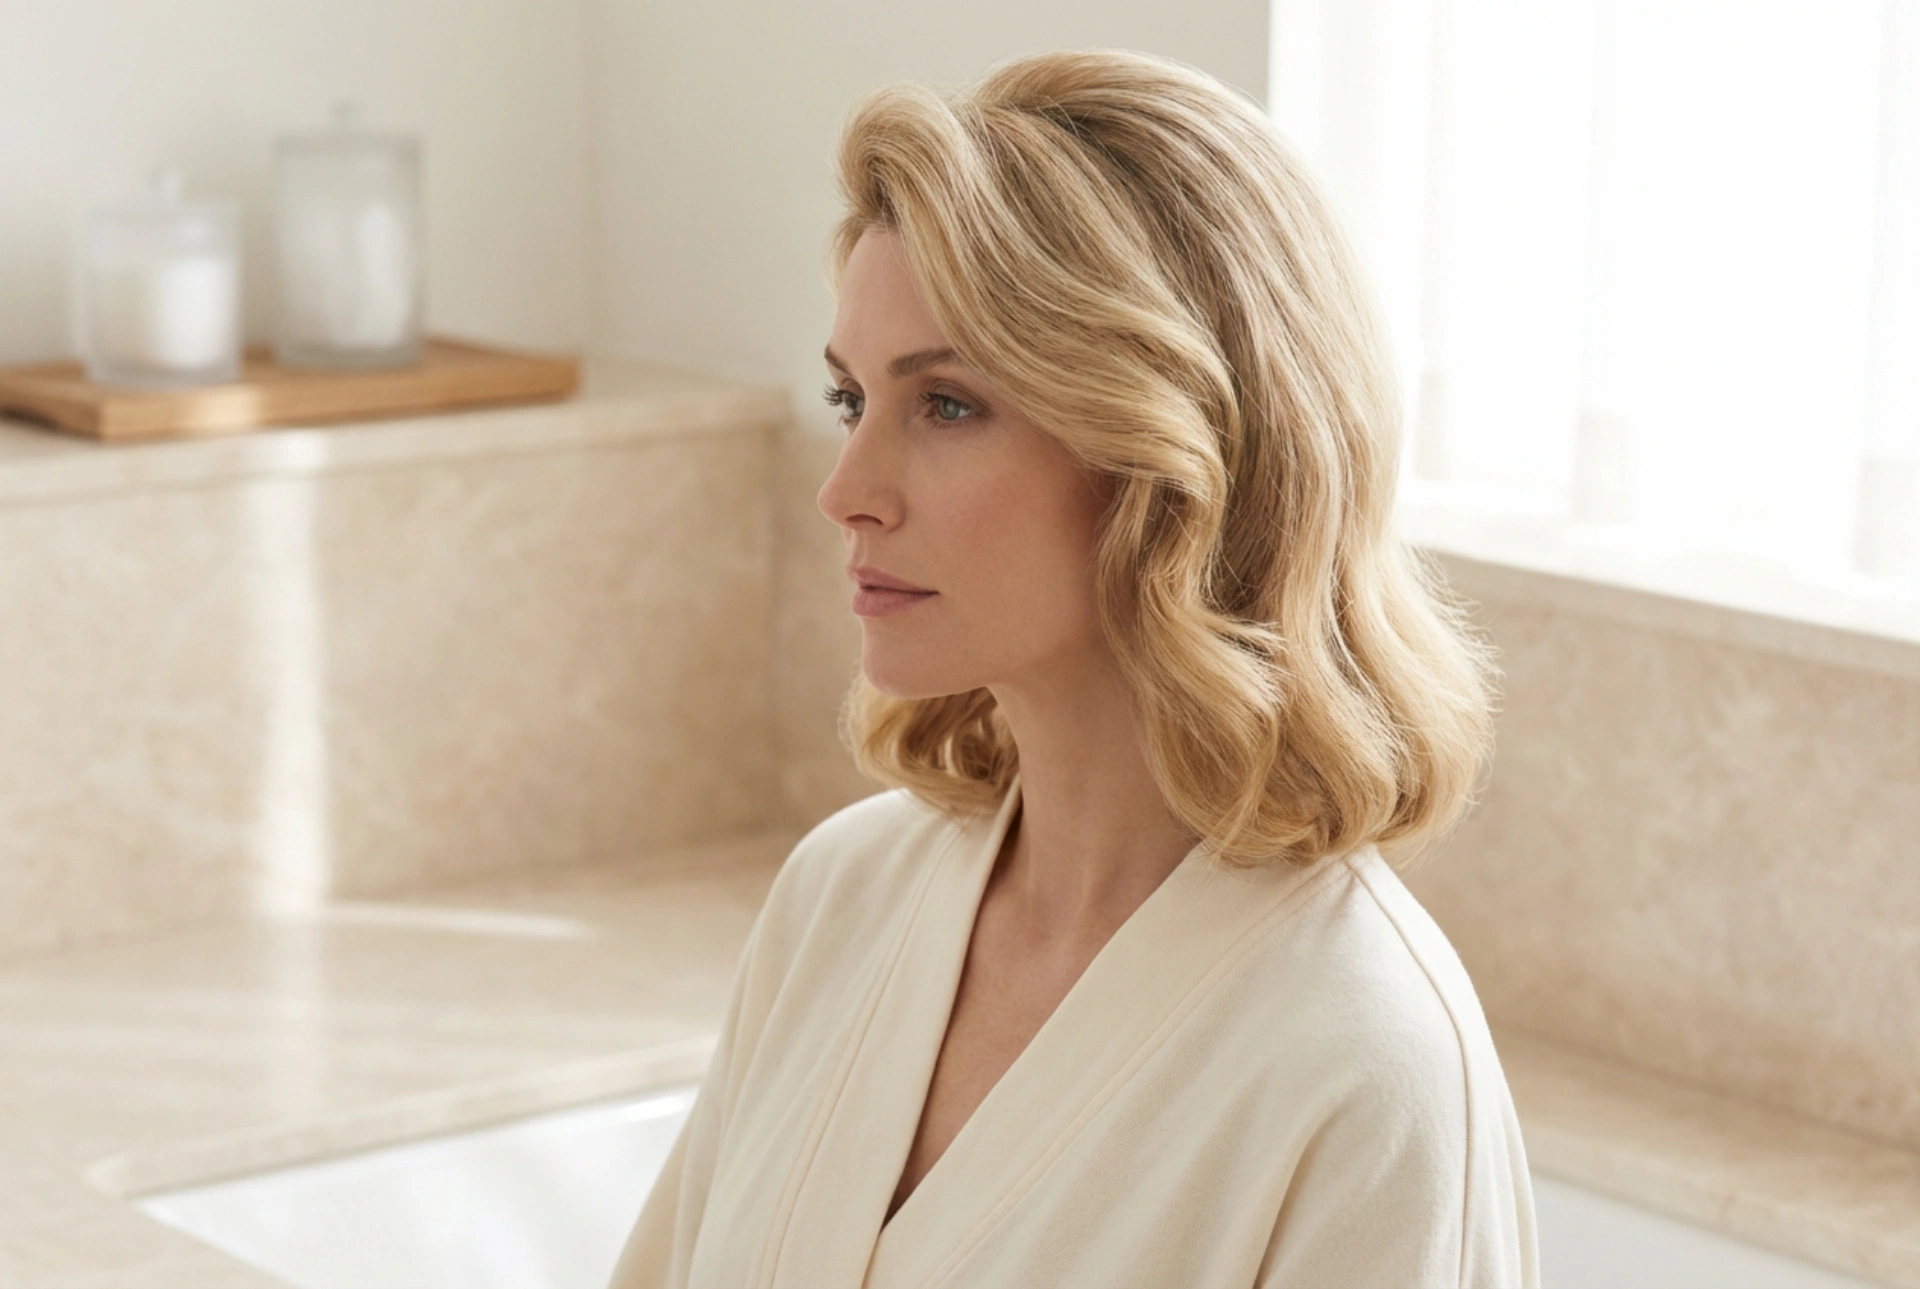
The secret to a successful retro hairstyle is in the preparation. Styles from the mid-20th century were all about structure and volume, which starts with a good foundation. Before you begin styling, it's important to ensure your hair is ready to hold a shape. Start with clean, conditioned hair. Using a volumising wash and care system can help provide a light, airy base, making the hair more receptive to styling. Always apply a heat protectant spray if you plan to use curling irons or straighteners to shield your strands from potential damage. The most crucial step in preparation is 'setting' the hair. This process creates the memory in your hair that allows the style to last all day. You can achieve this with hot rollers, velcro rollers, or a curling iron.
Step-by-Step Guide: The Soft Vintage Wave
This look is synonymous with classic glamour but is surprisingly easy to modernise for a softer, more casual feel. It’s all about creating a uniform wave pattern that flows beautifully.
The Technique
- Step 1: Section Your Hair. After applying a heat protectant, divide your dry hair into manageable sections, about one to two inches wide. The smaller the section, the tighter the curl will be.
- Step 2: Create the Curls. Take one section and wrap it around a medium-to-large barrel curling iron. Hold for a few seconds, then release. To ensure a uniform wave pattern, always curl each section in the same direction. Alternatively, use hot rollers, rolling each section neatly and securing it to your head.
- Step 3: Let It Cool. This is a vital step. Whether you've used a curling iron or rollers, you must let your hair cool down completely. This allows the cuticle to close and sets the curl shape, ensuring longevity.
- Step 4: Brush It Out. Once cool, gently brush through the curls with a paddle brush or a natural bristle brush. This might feel counterintuitive, but it's the key to transforming individual curls into a cohesive, flowing wave. Keep brushing until the desired softness is achieved.
Creating Subtle Volume: The Modern Bouffant
Volume at the crown was a hallmark of many vintage styles. A full bouffant might be too much for daily wear, but a subtle lift at the crown adds instant elegance and balances your profile. This technique, often called 'teasing' or 'backcombing', should be done gently to avoid tangles.
How to Add Crown Volume
- Step 1: Isolate the Crown Section. Take a section of hair from the crown of your head, where you want to create volume. The wider the section, the more dramatic the lift.
- Step 2: Gently Backcomb. Hold the section of hair straight up. Using a fine-tooth comb, gently push the hair down towards the roots in two or three short strokes. Focus the teasing close to the scalp. Avoid being aggressive, as this can cause breakage.
- Step 3: Smooth the Top Layer. Take the smooth, un-teased hair from the front of your section and gently comb it back over the teased area. This hides the backcombing and creates a sleek, voluminous bump.
- Step 4: Secure the Style. Use a light mist of hairspray to hold the volume in place. You can also use a couple of bobby pins discreetly at the base of the lift for extra security.
A Simple Retro Updo: The Polished Chignon
An updo is a practical and chic way to channel a vintage vibe. The chignon is a classic that can be styled in minutes for a look that is both polished and effortless. It works best on shoulder-length hair or longer.
Creating the Look
- Step 1: Create a Low Ponytail. Gather your hair at the nape of your neck and secure it with a hair tie. For a softer look, leave a few small pieces out to frame your face.
- Step 2: Twist and Wrap. Twist the ponytail tightly from the base to the ends. Then, wrap the twisted hair around the base of the ponytail, creating a neat bun shape.
- Step 3: Secure the Bun. Tuck the ends of your hair underneath the bun and secure it firmly with bobby pins. Insert the pins around the edges of the bun, pushing them into the base to ensure it stays in place all day.
- Step 4: Finishing Touches. Smooth any flyaways with a light touch of hairspray. You can gently curl the face-framing pieces for an even softer, more romantic finish.


