

Achieving beautifully defined, frizz-free curls can often feel like a challenge, but with the right tools and techniques, it's entirely possible to master at home. A hairdryer with a diffuser attachment is a game-changer for anyone with wavy or curly hair. This simple accessory helps to enhance your natural texture without the unwanted frizz that direct heat can cause. Learning how to use it correctly is the key to unlocking the full potential of your curls.
What is a Diffuser and How Does It Work?
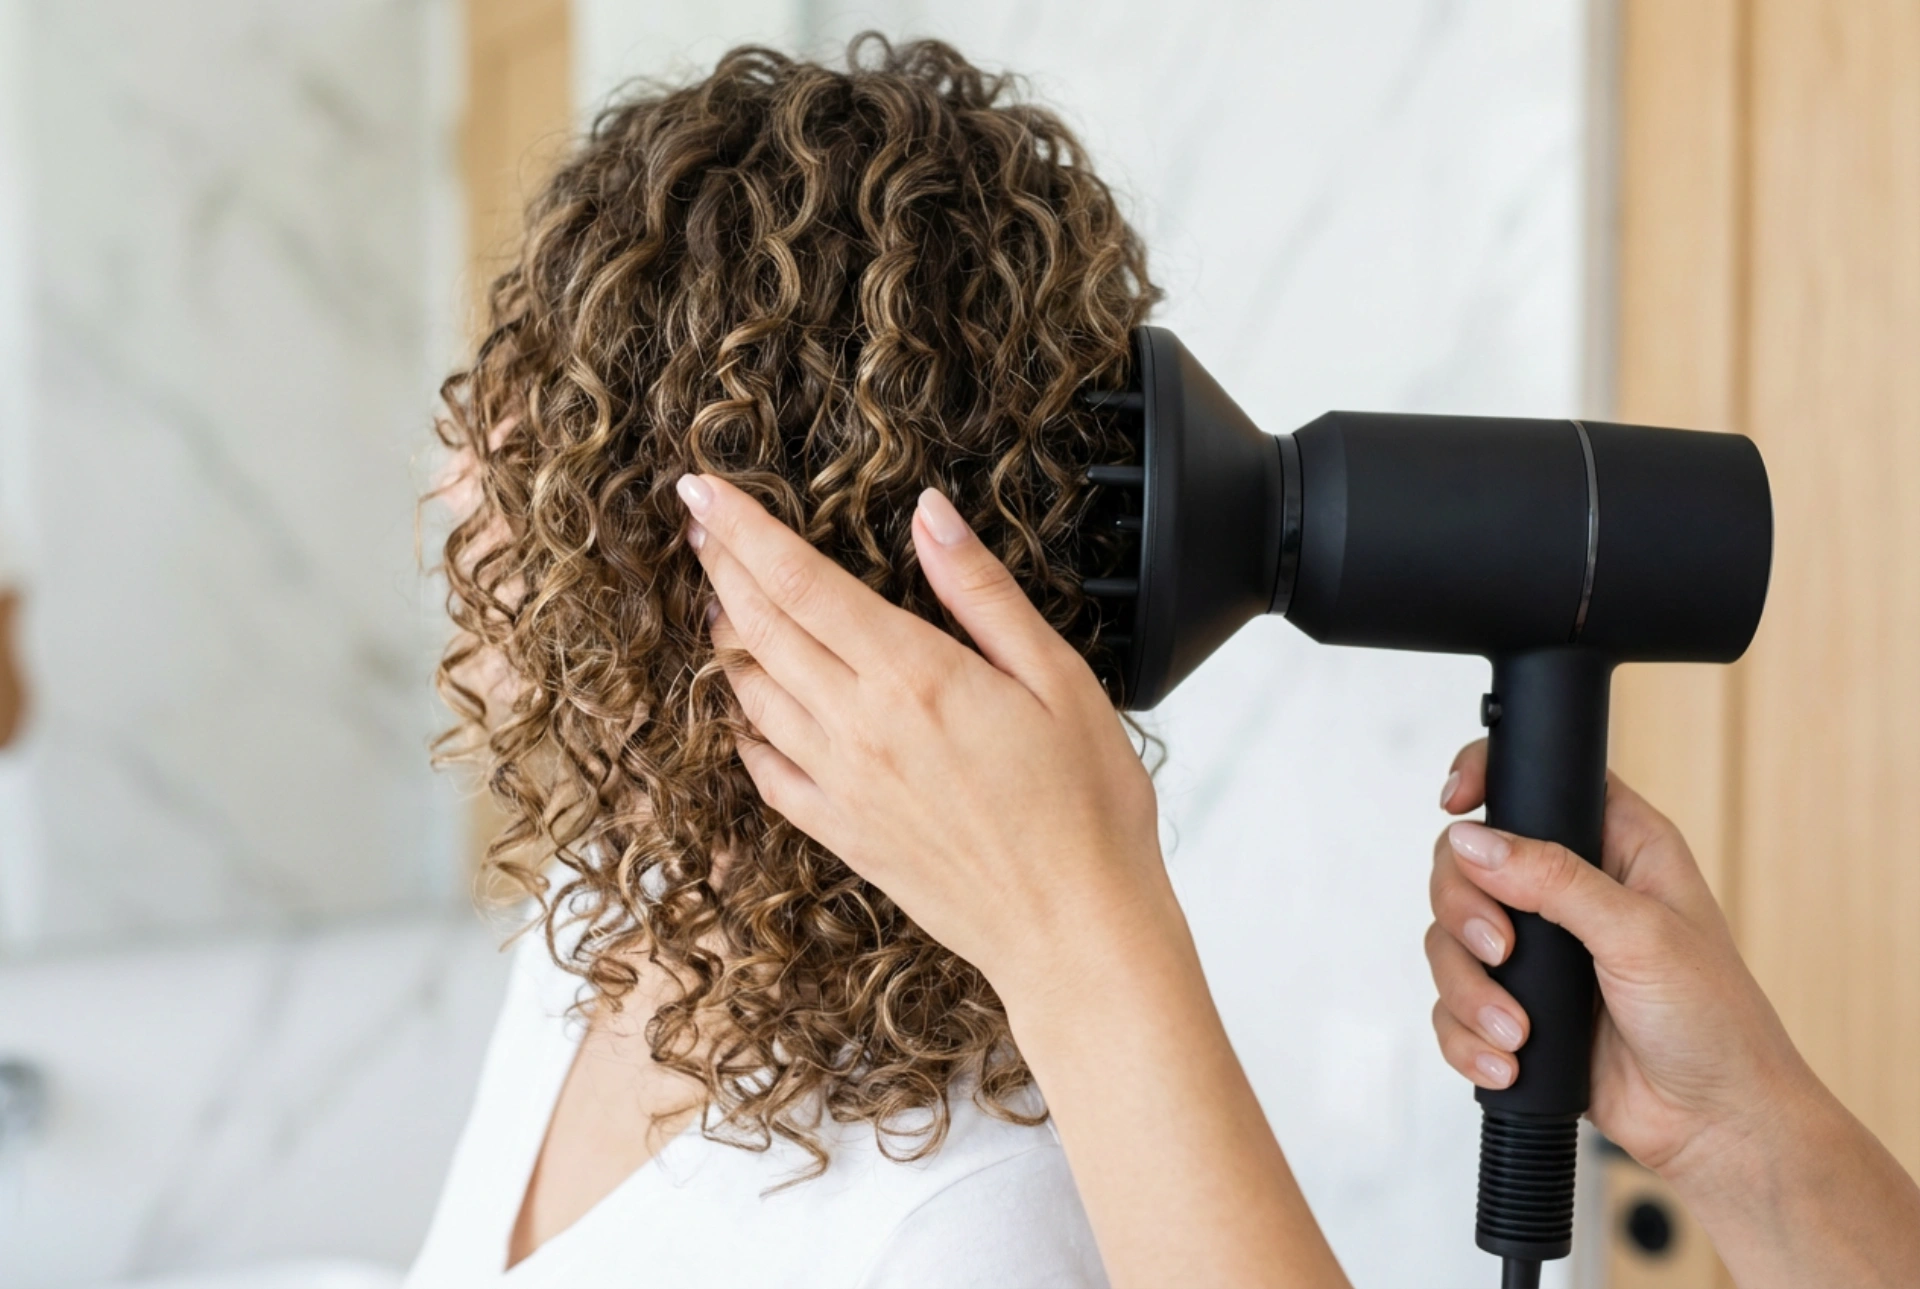
A diffuser is a bowl-shaped attachment that fits onto the end of your hairdryer. Its primary function is to disperse the airflow over a wider area, turning a harsh, concentrated jet of air into a gentle, distributed warmth. For curly hair, this is crucial. The powerful blast from a standard hairdryer nozzle disrupts the natural curl pattern, separating the hair strands and causing them to become frizzy. A diffuser, by contrast, allows you to dry your hair while keeping your curl clumps intact, resulting in better definition, less frizz, and enhanced volume.
Preparing Your Hair for Diffusing
The success of diffusing starts long before you even turn the hairdryer on. Proper preparation is essential for a smooth, defined finish.
Gentle Cleansing and Hydration
Begin with a gentle cleansing routine using products suited for curly hair. Curls thrive on moisture, so a hydrating shampoo and conditioner are non-negotiable. After rinsing, ensure your hair is well-conditioned and detangled. Squeeze out excess water gently with your hands before stepping out of the shower. Avoid rubbing your hair with a rough towel, as this creates friction and is a primary cause of frizz.
Applying Styling Products
With your hair still damp (but not dripping wet), it's time to apply your chosen styling products. This step is vital for providing hold, definition, and moisture. Depending on your hair type and desired result, you might use a leave-in conditioner, curl cream, mousse, or gel. Apply the product evenly throughout your hair. You can use the 'praying hands' method (smoothing the product down the hair shaft between your palms) or the 'scrunching' method (gently cupping and squeezing sections of hair towards the scalp) to encourage curl formation.
Removing Excess Water with Care
Before you begin drying, it's important to remove as much excess water as possible without disturbing your curls. Instead of a traditional terrycloth towel, opt for a microfibre towel or an old cotton t-shirt. Gently scrunch your hair upwards towards the scalp. This technique, sometimes called 'plopping', absorbs water without creating frizz and helps to pre-shape your curls.
The Step-by-Step Diffusing Technique
Once your hair is prepped, you're ready to start diffusing. Patience and the right settings are your best friends in this process.
- Use Low Speed and Low-to-Medium Heat: High heat can damage your hair and high speed will create frizz, defeating the purpose of the diffuser. Always start with the lowest settings on your hairdryer.
- Work in Sections: For even drying and better control, it helps to think of your hair in sections – left, right, back, and crown.
- Try the 'Pixie' Diffusing Method: This is a popular and effective technique. Place a section of your curls into the diffuser bowl. Move the diffuser up towards your scalp so the hair is gathered inside it. Now, turn the hairdryer on. Hold it in place for 30-60 seconds. Turn the hairdryer off *before* you move it away from your head. Repeat this process section by section. Turning the dryer on and off for each section minimises air movement and significantly reduces frizz.
- Boost Root Volume: To avoid flat roots, tip your head to one side and diffuse the hair, focusing on the root area. Then, switch to the other side. You can also flip your head upside down and gently diffuse the roots for maximum volume.
- Dry Until 80-90% Done: Avoid drying your hair completely with the diffuser. Over-drying can lead to frizz and strips moisture. Aim to get it about 80-90% dry and let the rest air-dry naturally. This helps the curls set in a more natural, relaxed way. A final 'cool shot' from your hairdryer can help close the hair cuticle and lock in the style.
Finishing Touches for Lasting Curls
Just a couple of small steps after drying can make all the difference to your final look.
Break the Cast
If you used a gel or mousse, your dry hair might feel slightly crunchy. This is called a 'cast', and it's a good thing – it means your curls are well-defined. Once your hair is 100% dry, you can gently 'scrunch out the crunch'. Simply cup your hair and squeeze upwards to break the cast, revealing soft, bouncy curls. You can do this with bare hands or with a tiny amount of a lightweight hair oil on your palms to add shine and reduce any remaining frizz.
Protect Your Style
To make your beautiful curls last, protect them while you sleep. A silk or satin pillowcase reduces friction, and a loose 'pineapple' ponytail on top of your head or sleeping in a silk bonnet can preserve your curl pattern for days.