


A beautifully crafted updo can be the crowning glory of a wedding guest's attire, exuding elegance and sophistication. While complex hairstyles might seem reserved for salon professionals, many stunning looks are surprisingly achievable at home. With a bit of practice and the right techniques, you can create a gorgeous updo that will not only complement your outfit but also last throughout the celebration. This guide will walk you through the process step-by-step, helping you achieve a polished look for that special day.
Preparing Your Hair for Styling
The foundation of a successful updo is properly prepared hair. Starting with hair that's too clean and silky can make it difficult to hold a style. It's often best to wash your hair the day before the event. This allows some natural oils to build up, providing better grip and texture. When you do wash it, focus on a volumising or smoothing shampoo and conditioner, depending on your hair's needs.
Before you begin styling, ensure your hair is completely dry. To add texture and hold, you can work a small amount of mousse or a texturising spray through your locks. This will give your hair more 'grit' and make it easier to shape and pin. Gather your tools beforehand: a good quality brush, a comb for sectioning, clear elastics or hair ties that match your hair colour, plenty of bobby pins, and a reliable hairspray. Setting up two mirrors—one in front and one behind—can also be incredibly helpful for seeing your work from all angles.
Step-by-Step: The Classic Low Bun
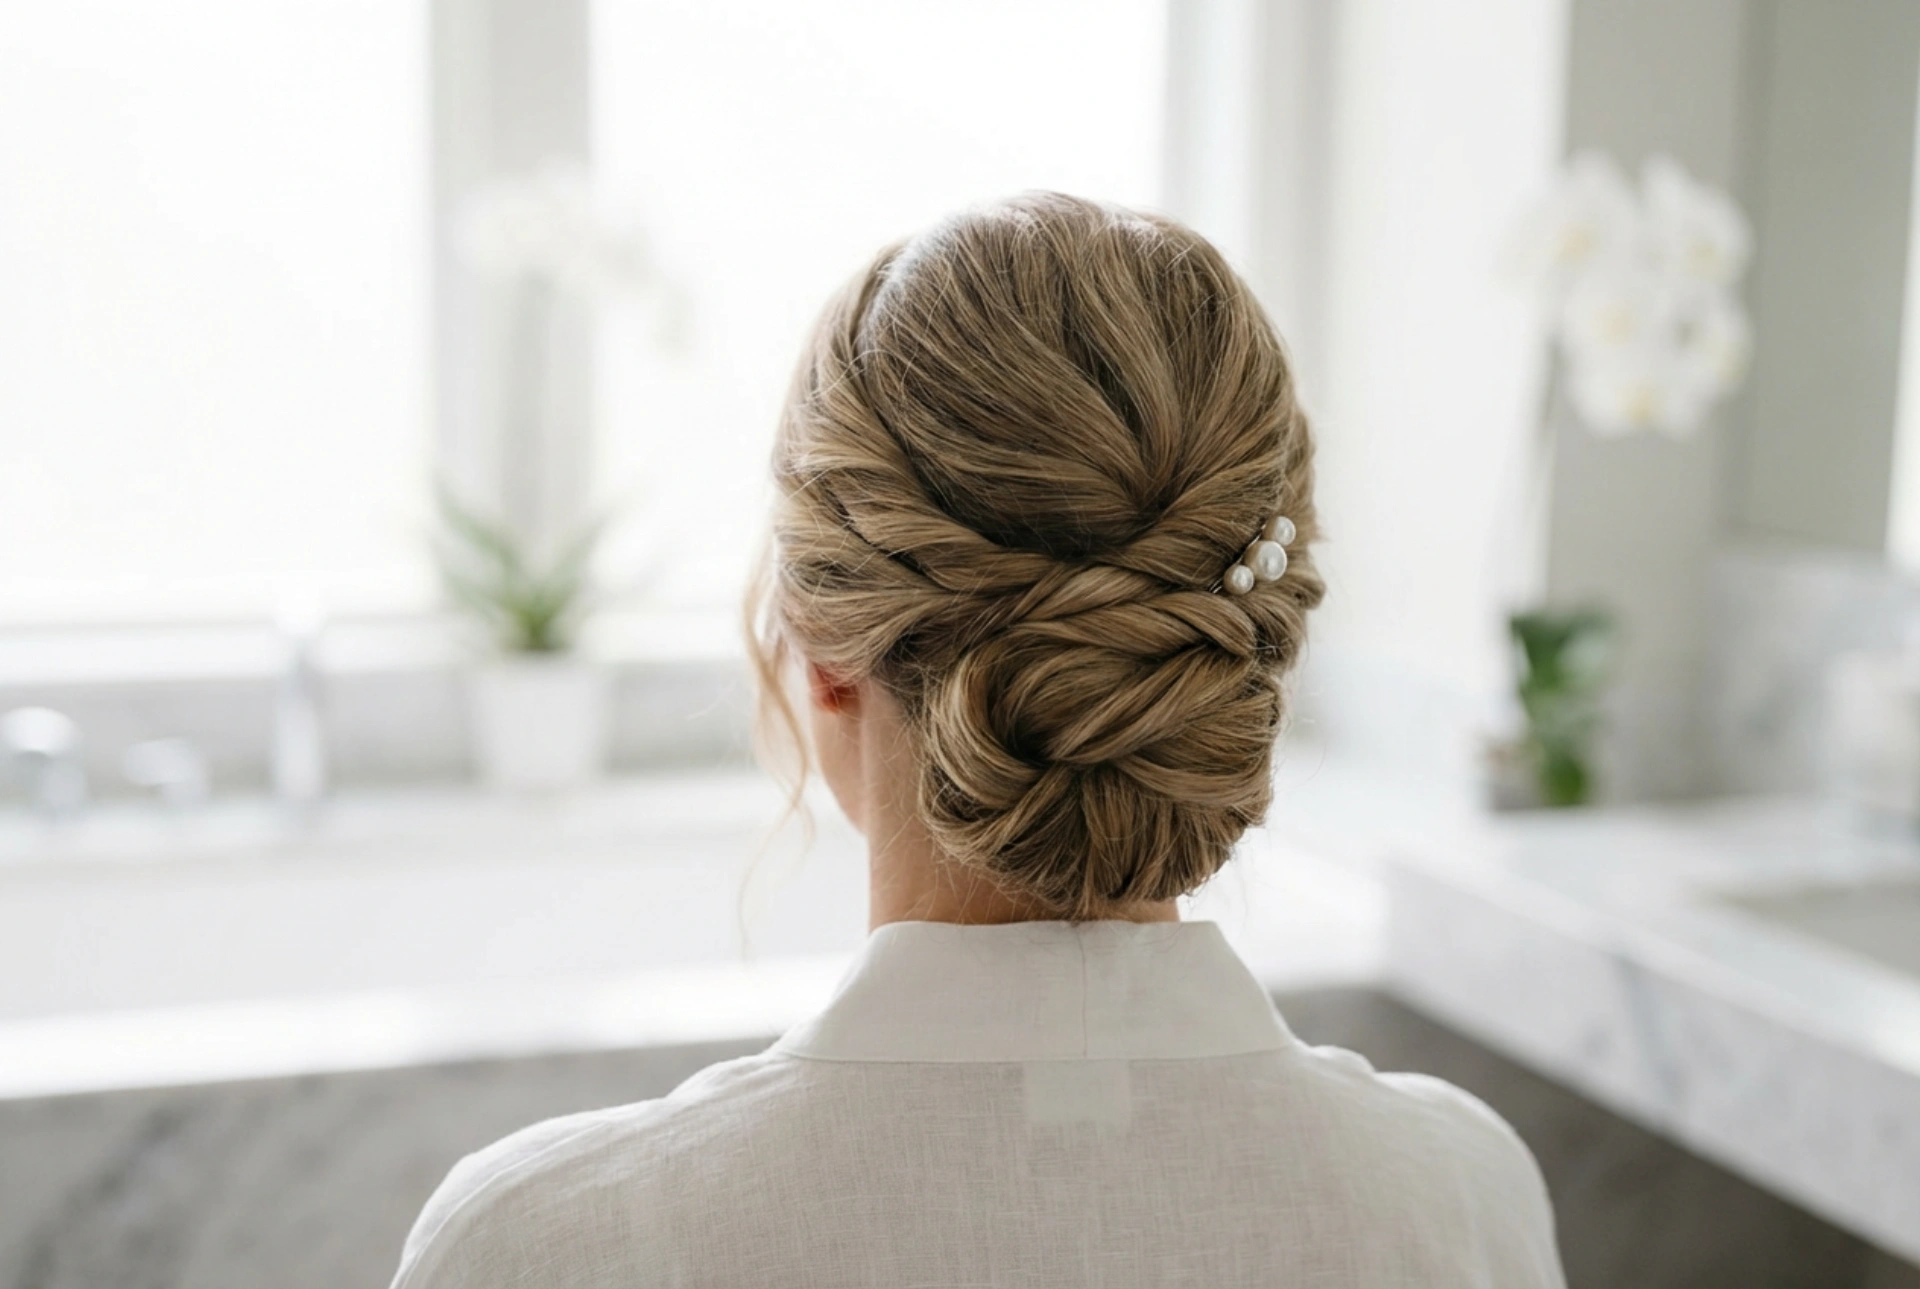
The low bun is a timeless choice that works for almost any dress code, from formal to semi-formal. It's chic, sophisticated, and surprisingly simple to create.
- Step 1: Create a Low Ponytail. Start by brushing your hair to remove any tangles. Gather all your hair at the nape of your neck and secure it with a hair tie. For a sleeker look, use a fine-tooth comb to smooth down any bumps before securing.
- Step 2: Twist and Wrap. Take the ponytail and twist it from the base to the ends. The tighter you twist, the more compact your bun will be. Then, wrap the twisted ponytail around its base, creating the bun shape.
- Step 3: Secure the Bun. Tuck the ends of your hair under the bun and begin securing it with bobby pins. Place pins vertically around the base of the bun, pushing them into the base of the ponytail. Use as many as you need to feel secure. Don't be afraid to use plenty; they will be hidden within the style.
- Step 4: Refine the Look. Once the bun is secure, you can gently pull at sections to add volume or create a softer, more 'undone' look. Smooth any flyaways with a light mist of hairspray.
Variations for a Personal Touch
For a more romantic feel, leave a few tendrils of hair out around your face before creating the ponytail, and gently curl them afterwards. For a modern, sleek version, use a smoothing serum before you start and ensure every strand is perfectly in place.
Creating a Beautiful Braided Updo
Incorporating braids into an updo adds intricate detail and a touch of romance. This style looks more complex than it is and is perfect for a wedding atmosphere.
- Step 1: Section Your Hair. Create a centre or side parting. Section off two front pieces of hair, one on each side of your parting, about two inches wide. Clip them out of the way for now.
- Step 2: Create a Low Bun. Gather the rest of your hair at the back and create a simple low bun, following the steps from the previous section. This will be the anchor for your braids.
- Step 3: Braid the Front Sections. Unclip one of the front sections. Create a simple three-strand braid (plait) and secure the end with a small, clear elastic. Gently pull on the sides of the braid to 'pancake' it, making it look fuller and softer. Repeat on the other side.
- Step 4: Wrap and Pin. Take one of the braids and drape it over the top of your bun, tucking the end underneath and securing it with bobby pins. Take the second braid and drape it in the opposite direction, crossing it over the first one or placing it just behind it. Tuck the end and pin it securely.
Tips for Different Hair Textures
If you have fine hair, use a texturising powder at the roots before braiding to add volume. For very thick hair, you might consider making the braids a little tighter to ensure they stay in place, or even creating multiple smaller braids to wrap around the bun for a more detailed look.
Ensuring Your Updo Lasts All Day
The final step is to lock your creation in place. A good quality hairspray is your best friend. Hold the can about 10-12 inches away from your head and spray a light, even mist all over. Avoid spraying too close, as this can make the hair look stiff or wet.
For extra security, you can use a technique called 'locking' bobby pins. This involves inserting one pin, then crossing another one over it in an 'X' shape to hold sections more firmly. To tame any stubborn flyaways around your hairline, spray a little hairspray onto a clean toothbrush or a spoolie brush and gently smooth them down. Finally, consider adding a subtle accessory. A few delicate pearl pins, a simple decorative comb, or a sprig of baby's breath tucked into the side of the bun can elevate the entire look without overpowering it.


