

Achieving perfectly defined, bouncy curls without a halo of frizz can feel like a constant challenge. While air-drying is an option, it isn't always practical. This is where a hair dryer with a diffuser attachment becomes an essential tool. Unlike a standard nozzle that blasts concentrated heat, a diffuser gently cradles your curls, helping them dry in their natural shape while enhancing definition and minimising frizz. Understanding how to use this tool correctly can transform your hair-drying routine and give you the flawless results you desire.
What is a Diffuser and How Does It Work?
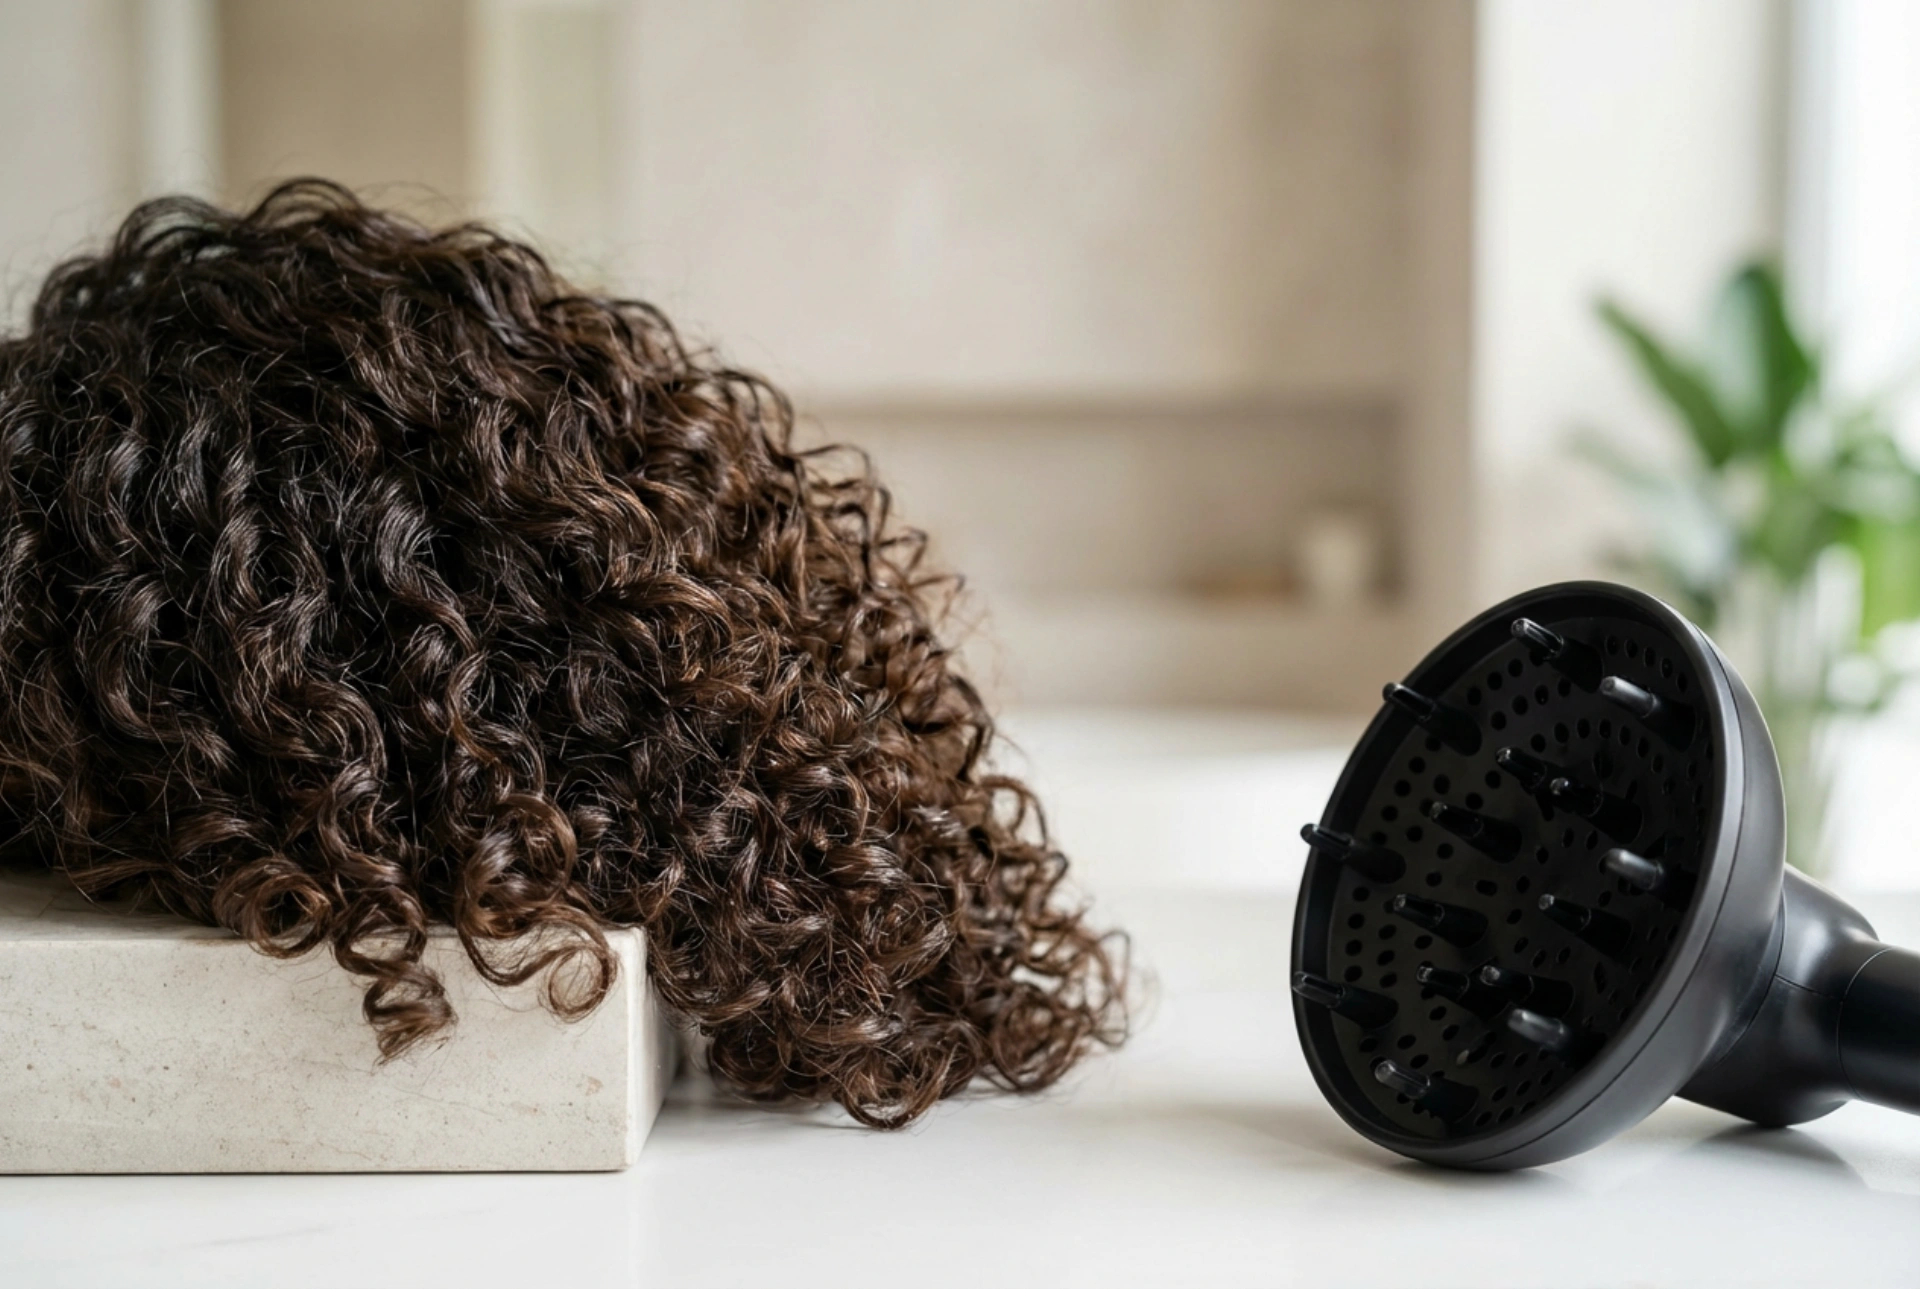
A diffuser is a round, often bowl-shaped, attachment that clicks onto the end of your hair dryer. Its surface is typically covered in prongs or 'fingers' that help lift the hair, while vents disperse the air over a much wider area than a traditional concentrator nozzle. The primary purpose of a diffuser is to slow down and spread out the airflow from the dryer. This gentle distribution of air helps to dry your curls without blowing them around, which is a major cause of frizz and disruption to the curl pattern. By drying sections of hair in a controlled way, the diffuser encourages curls to clump together, resulting in better definition and a smoother finish.
Preparing Your Curls for Diffusing
The success of your diffusing routine begins long before you even switch the hair dryer on. Proper preparation is crucial for protecting your hair and achieving the best possible results.
Washing and Conditioning
Start your routine with hydrating, moisture-rich cleansing and conditioning products formulated for curly hair. Curls are naturally drier than straight hair, so replenishing moisture at this stage is key. Ensure you rinse your conditioner out thoroughly, but gently, to avoid creating tangles.
Applying Styling Products
Applying products to soaking wet hair is one of the most important steps for frizz-free results. Do not towel-dry your hair before this step. While your hair is still dripping, apply your chosen styling products in layers. A common method is to start with a leave-in conditioner to lock in moisture, followed by a curl cream to encourage curl clumps, and finally a gel or mousse to provide hold and create a 'cast'. This cast is a slightly stiff coating that forms around the curls as they dry, protecting them from frizz. It can be scrunched out later.
Removing Excess Water
Traditional terrycloth towels are too rough for curly hair and can cause frizz and disrupt your curl pattern. Instead, use a microfibre towel or a simple cotton t-shirt to gently squeeze out excess water. A popular technique is 'plopping'. To do this, lay the t-shirt or towel on a flat surface, flip your product-coated hair forward onto it, then wrap the fabric around your head like a turban. Leave it on for 10-20 minutes to absorb water without using friction.
The Diffusing Technique: A Step-by-Step Guide
Once your hair is prepped, it’s time to start diffusing. Patience and a gentle approach are key. Always remember that the goal is to minimise hair movement.
- Select the Right Settings: Before you begin, set your hair dryer to a low or medium heat setting and the lowest possible speed setting. High heat can cause damage and frizz, while high speed will blow your curls apart.
- Position Your Head: For added volume, it's best to diffuse with your head tipped to the side or completely upside down. This helps to lift the roots as they dry.
- Cup the Curls: Gently gather a section of your hair and place it into the bowl of the diffuser. Bring the diffuser up towards your scalp, 'cupping' the curls inside it.
- Hold and Dry: Hold the diffuser still against your scalp for 1-2 minutes, allowing the section to dry without movement. Avoid jiggling or moving the diffuser around, as this can create frizz.
- Switch Off to Move On: To prevent blowing your hair around when moving to a new section, turn the hair dryer off completely. Gently release the dried section, gather a new one, position the diffuser, and then turn the dryer back on.
- Dry to 80-90%: Continue this process, working in sections around your entire head. It's often best to stop diffusing when your hair is about 80-90% dry and let the rest air-dry. Over-drying with heat can lead to frizz and dryness.
Common Mistakes to Avoid
If you're not getting the results you want, you might be making one of these common diffusing mistakes. A few small adjustments can make a big difference.
- Using High Heat/Speed: This is the most common error. It disrupts curl patterns and causes frizz. Always stick to low-and-slow.
- Touching Your Hair: Resist the urge to run your fingers through your hair while it's drying. This will separate the curl clumps and create frizz.
- Skipping Products: Diffusing without styling products offers no hold or frizz protection, leaving hair fluffy and undefined.
- Constant Movement: Moving the diffuser around like a regular hair dryer will negate its purpose. The key is to hold it still on each section.
Finishing Touches for Perfect Curls
Once your hair is 100% dry (either from diffusing or the final air-dry), it’s time for the final steps. If you used a gel or mousse, your hair might feel slightly crunchy. This is the 'cast' that protected your curls. To release it, gently 'scrunch out the crunch' by cupping your curls in your hands and squeezing upwards. You can do this with bare hands or by applying a drop or two of a lightweight hair oil to your palms first. For extra volume, you can gently use your fingertips to shake out and lift the roots, being careful not to rake through and separate the curls themselves.