


Multi-functional hair stylers have revolutionised at-home hairstyling, offering the power of several tools in one sleek device. These versatile gadgets promise to take your hair from damp to impeccably styled, whether you desire a pin-straight, glossy finish or a head full of voluminous, bouncy curls. Mastering this all-in-one tool can feel daunting at first with its array of attachments, but understanding how each component works is the key to unlocking endless styling possibilities while keeping your hair healthy and strong. This guide will walk you through the process, transforming you into your own personal stylist.
Understanding Your Multi-Styler: The Attachments and Their Uses
A typical 5-in-1 hair styler comes with several interchangeable heads, each designed for a specific purpose. Getting to know them is the first step towards achieving salon-worthy results. While exact attachments may vary, most sets include the following:
- Pre-styling Dryer: This small, nozzle-like attachment functions as a mini hairdryer. Its purpose is to take your hair from wet to damp (about 80% dry) before you begin precision styling. Using this first reduces the overall time you expose your hair to focused heat and prepares the strands for shaping.
- Smoothing Brush: Often a flat, paddle-style brush with firm bristles, this attachment is your go-to for creating a sleek, straight look. As you brush it through your hair, it simultaneously dries and straightens, using a controlled airflow to align the hair cuticles and reduce frizz.
- Round Volumising Brush: This circular brush attachment is designed to create volume, shape, and a gentle bend at the ends of your hair. It’s perfect for giving life to flat roots and achieving that classic bouncy blowout look. It directs air into the root area for lift and shapes the hair as it dries.
- Curling Barrels: Usually coming in a pair (for creating symmetrical curls on both sides of your head), these are the star attachments for creating waves and curls. Many modern stylers use airflow technology to wrap the hair around the barrel automatically, creating a curl with less extreme heat and minimal manual effort.
Achieving a Sleek, Smooth Finish: A Step-by-Step Guide
For a polished, straight style that looks naturally smooth rather than flat, the smoothing brush attachment is essential. Follow these steps for a frizz-free finish.
Step 1: Preparation is Key
Start with freshly washed, towel-dried hair. Never use a hot styler on dripping wet hair, as this can cause significant damage. Apply a heat protectant spray evenly from roots to ends to shield your strands. For extra smoothness, you can also work a small amount of anti-frizz serum through your mid-lengths and ends.
Step 2: Pre-Dry Your Hair
Attach the pre-styling dryer and, using a medium heat and speed setting, rough-dry your hair until it is about 80% dry. Focus on the roots first. Your hair should feel damp to the touch, not soaking wet. This step significantly cuts down on your styling time and heat exposure.
Step 3: Section and Smooth
Divide your hair into manageable sections using clips. The smaller the sections, the smoother your result will be. Attach the smoothing brush. Take one section of hair and, starting from the roots, slowly glide the brush down to the ends. The bristles will create tension, while the airflow dries and straightens the hair shaft. Keep the tool moving to avoid concentrating heat on one spot for too long. Repeat this on all sections until your entire head of hair is dry and smooth.
Step 4: The Finishing Touch
For a final touch of polish, you can use the cool shot function on your styler if it has one. A blast of cool air helps to seal the hair cuticle, locking in shine and making your style last longer. A light mist of shine spray or a drop of hair oil on the ends can complete the look.
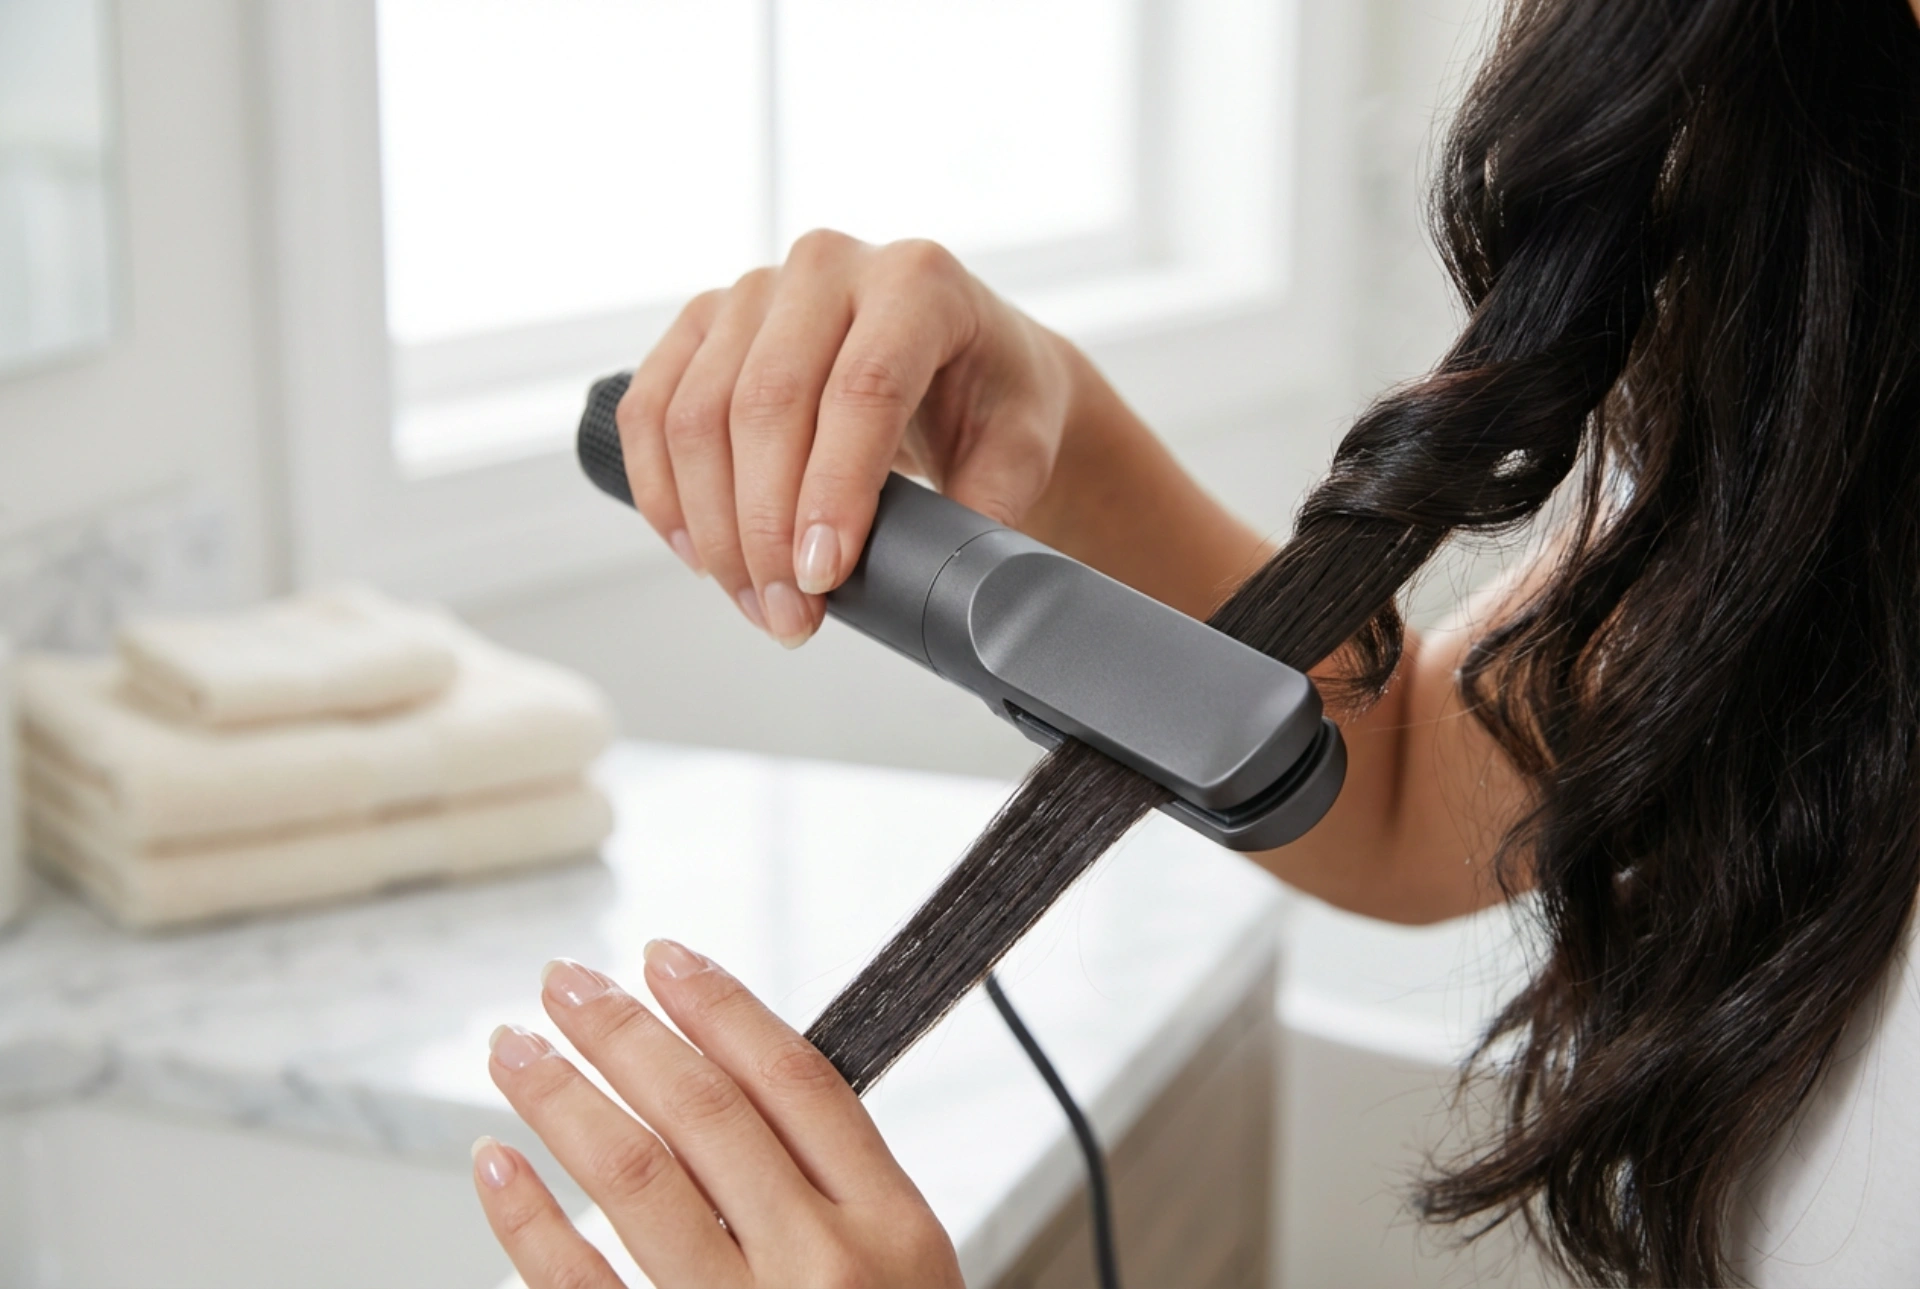
Creating Bouncy Curls and Waves
The curling barrels are perfect for crafting everything from gentle waves to defined curls. The technique is slightly different from a traditional curling wand but is easy to master with practice.
Step 1: Prep and Pre-Dry
As with straightening, start with clean, damp hair that is approximately 80% dry and has been treated with a heat protectant. For curls that last, consider applying a lightweight styling mousse to your damp hair before you begin drying.
Step 2: Choose Your Barrel and Section Your Hair
Select the barrel attachment. Remember that most sets provide barrels for clockwise and counter-clockwise curls to create a more natural, symmetrical look. Divide your hair into small sections, about one to two inches wide. Smaller sections will create tighter curls, while larger ones will result in looser waves.
Step 3: Wrap, Hold, and Set
Take the first section of hair and hold it a few inches from the end. Bring the styler barrel close to the hair tip; the airflow should catch the end and begin to wrap the strand around the barrel automatically. Guide the styler towards your roots without twisting your wrist. Hold it in place for 10-15 seconds until the hair is completely dry. Do not manually wrap the hair around the barrel, as this counteracts the airflow technology.
Step 4: Cool and Release
Before releasing the curl, press the cool shot button for 5-10 seconds. This crucial step helps to set the curl shape, giving it much greater longevity. Turn the styler off and gently pull it downwards to release a perfectly formed curl. Avoid touching or brushing the curl while it's still warm. Repeat this process for all sections, alternating the barrel direction as you move around your head for a balanced look. Once all your hair is curled and completely cool, you can gently rake your fingers through it to loosen the curls into soft waves.
Common Mistakes to Avoid for Healthy, Beautiful Hair
To get the most out of your tool without compromising hair health, be mindful of these common errors:
- Styling on Soaking Wet Hair: This is the fastest way to cause damage. Always pre-dry your hair to a damp state before using any direct-contact styling attachment.
- Skipping Heat Protectant: This is a non-negotiable step. A good heat protectant creates a barrier between your hair and the heat, preventing moisture loss and cuticle damage.
- Using the Highest Heat Setting by Default: Start with a medium heat setting. The highest setting should be reserved for very thick, coarse hair and used sparingly. Fine or damaged hair is best styled on low to medium heat.
- Working with Sections that are Too Large: Trying to style too much hair at once leads to an uneven finish, frizz, and curls that won't hold. Smaller, manageable sections are key to a professional result.
- Neglecting to Clean Your Tool: Product build-up, dust, and hair can clog the filter and vents of your styler, reducing its efficiency and becoming a fire hazard. Check your user manual for instructions on how to clean the filter and wipe down the attachments regularly.


