


Enhancing the eyes with fuller, longer lashes is a simple way to elevate any look. While strip lashes offer a temporary solution and professional extensions provide a long-term one, cluster lashes sit perfectly in the middle. They offer a customisable, multi-day wear that can be achieved from the comfort of your own home. With a little patience and the right technique, you can master the art of applying cluster lashes for a seamless, voluminous effect that looks effortlessly natural.
Preparation: Setting the Stage for Flawless Lashes
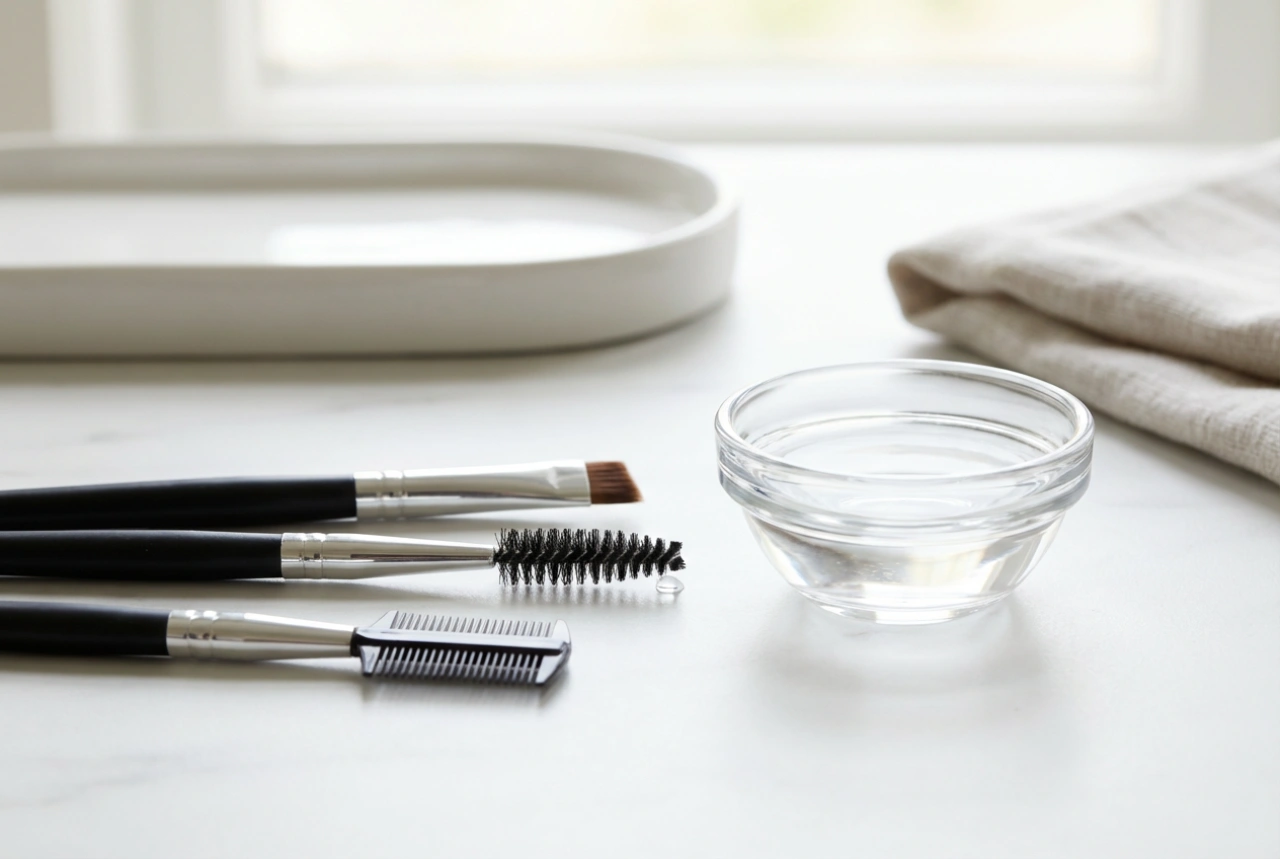
Before you begin, gathering your tools and preparing your eye area is crucial for a smooth and successful application. A clean, organised workspace will make the process much more enjoyable. Ensure you have good lighting and a magnifying mirror if needed.
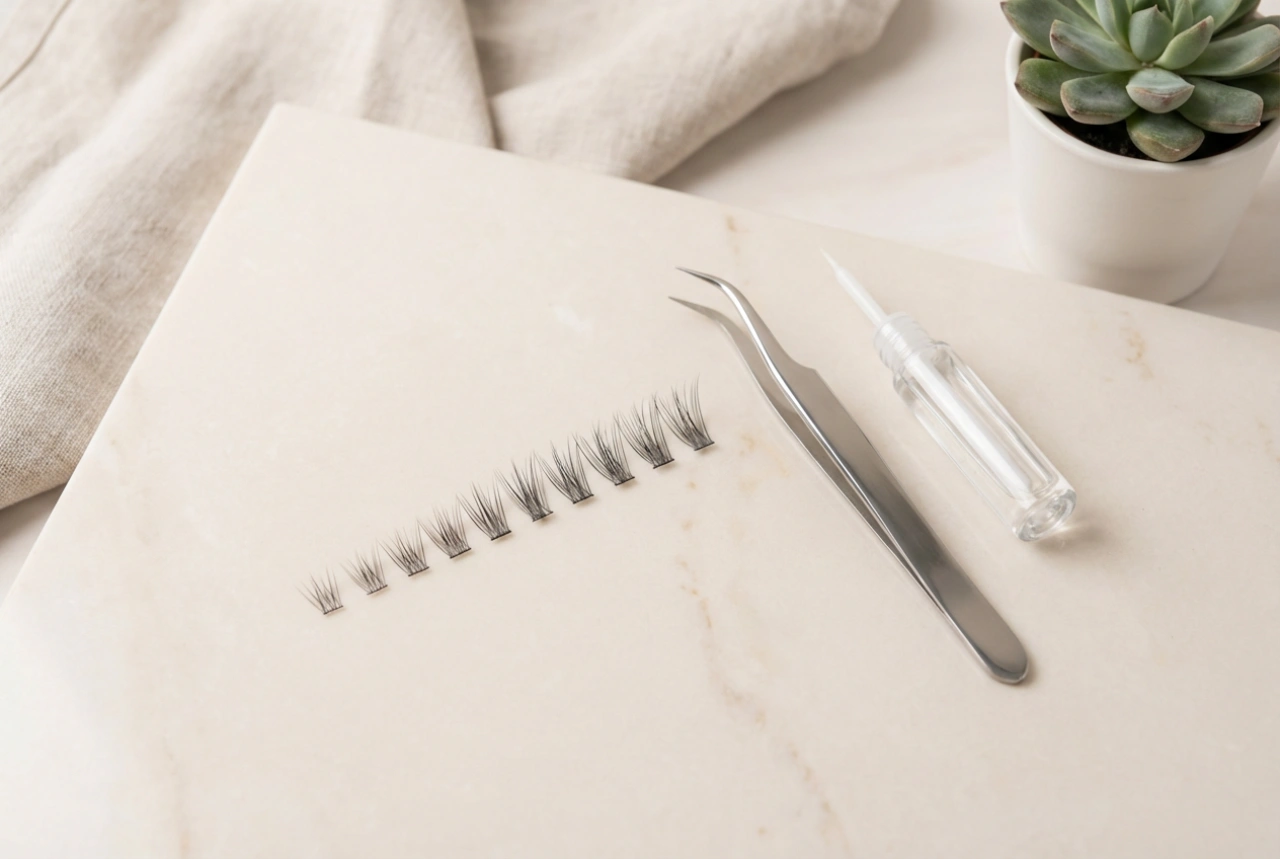
What You Will Need:
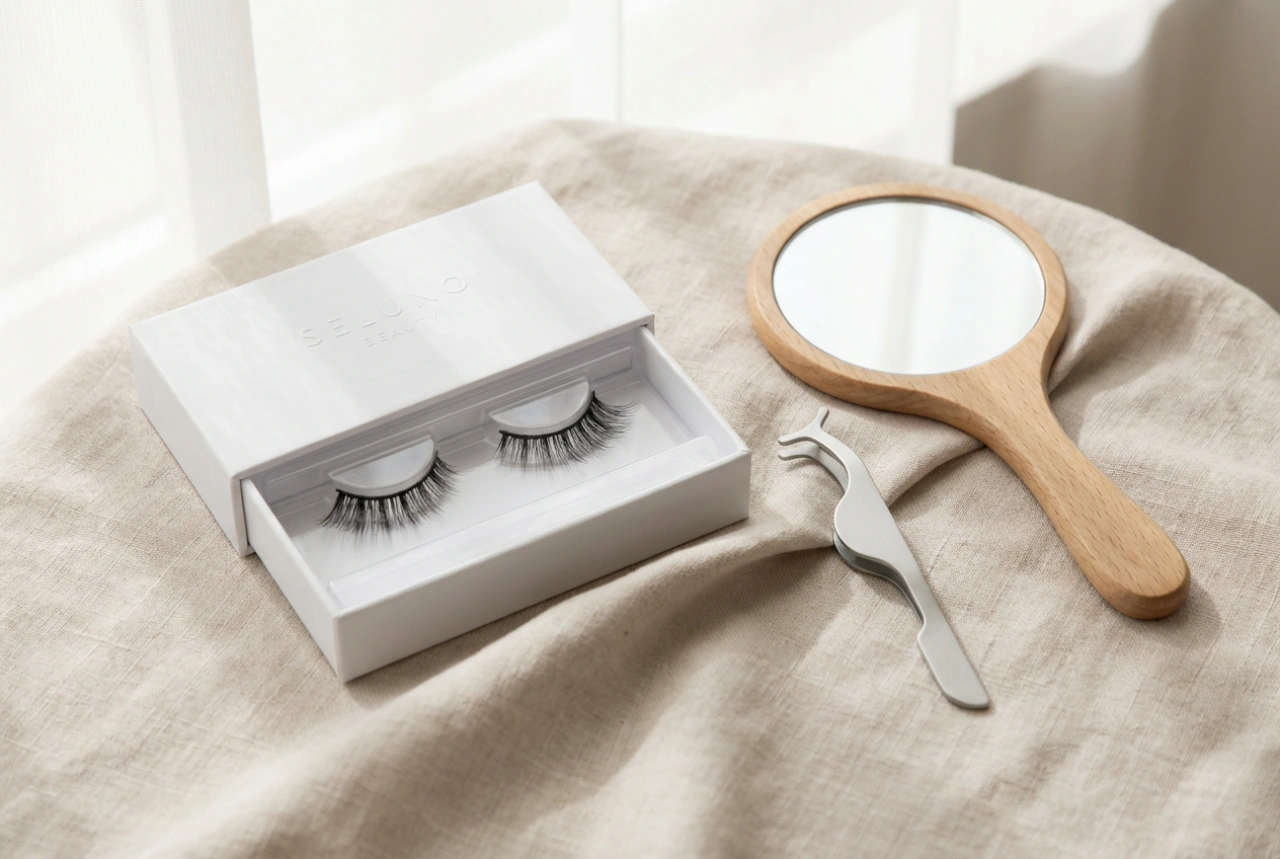
- A set of cluster lashes in your desired lengths and style.
- A gentle adhesive specifically formulated for cluster or individual lashes.
- A pair of precision tweezers, preferably with a fine tip.
- A clean, dry surface to work on.
Preparing Your Natural Lashes:
Start with a completely clean base. This is non-negotiable for ensuring the adhesive bonds correctly and the lashes last. Thoroughly cleanse your face, paying special attention to the eye area. Make sure there is no residual makeup, oil, or moisturiser on your skin or lashes. Your natural lashes should be completely dry before you start. Do not apply mascara, as this will prevent the clusters from adhering properly.
The Step-by-Step Application Process
Applying cluster lashes is a methodical process. Working one cluster at a time ensures precision and a beautifully blended result. It's best to start from the outer corner of the eye and work your way inwards.
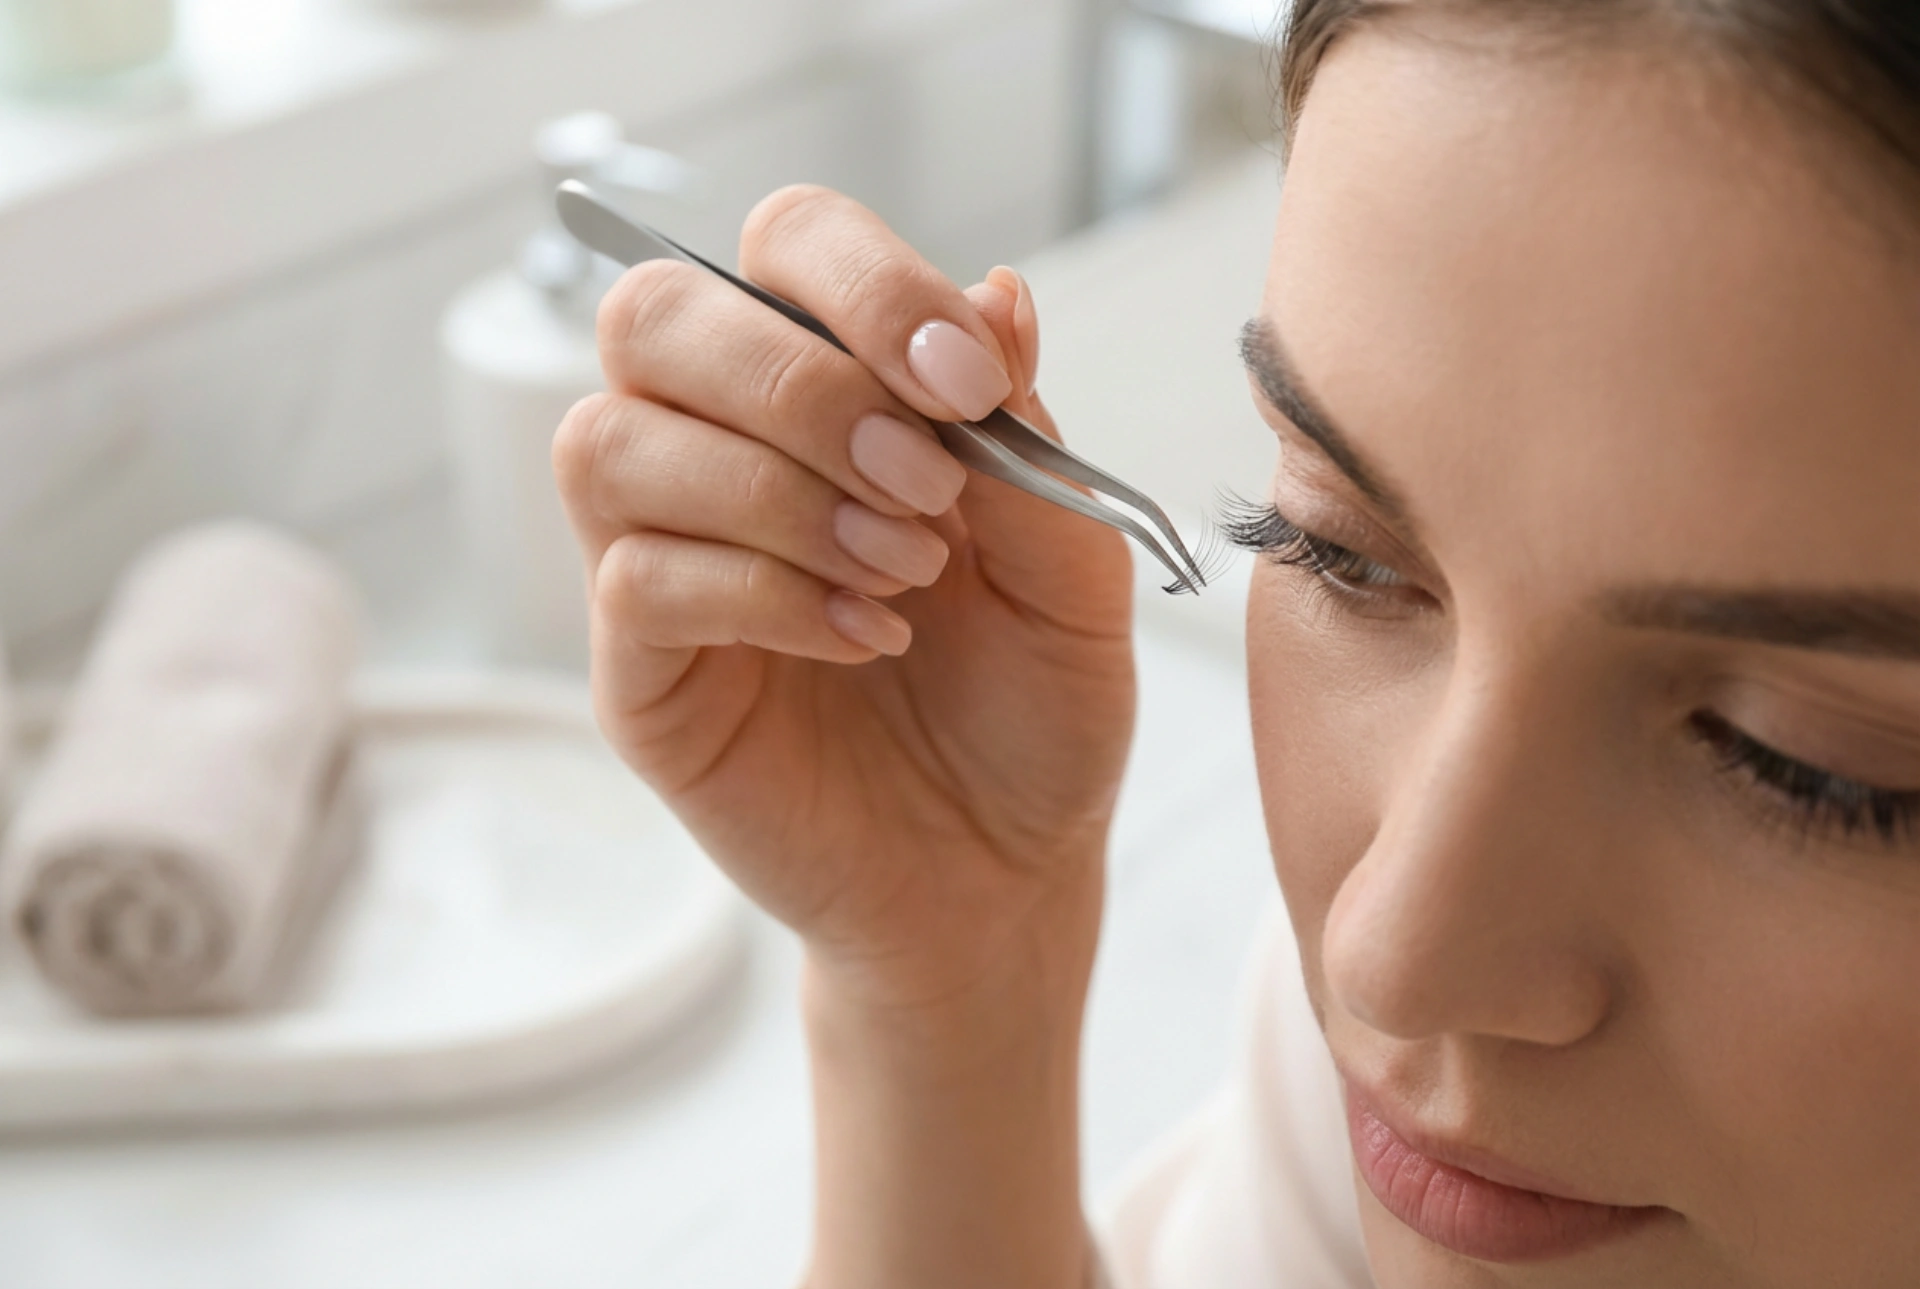
Step 1: Select and Remove a Cluster
Carefully decide on the lash map you want to create. Many people prefer to use longer clusters on the outer corners and gradually shorter ones towards the inner corner for a natural, winged effect. Using your tweezers, gently grip a single cluster at its base and lift it from the tray. Avoid pulling on the lash fibres themselves to prevent damage.
Step 2: Apply the Adhesive
Squeeze a tiny drop of your lash adhesive onto a clean, non-porous surface like a piece of foil or the plastic lash tray. Lightly dip the flat base of the lash cluster into the adhesive. A little goes a long way; you only need a small amount to cover the base. Wait for about 20-30 seconds for the adhesive to become tacky. This is a critical step, as applying it while too wet will cause it to slide, and waiting too long will cause it to dry.
Step 3: Placement and Attachment
Look downwards into a mirror to get a clear view of your upper lash line. Using the tweezers, carefully place the cluster underneath your natural lashes, about 1-2 millimetres away from your waterline. It is important not to attach it directly to the skin of your eyelid. The cluster should be bonded to your natural lashes, not your skin. Start at the outer corner and place the first cluster where you want your lash line to end.
Step 4: Build and Customise
Continue the process, placing clusters next to each other along your lash line. You can leave a tiny gap between each cluster for a more natural look or place them right next to each other for maximum volume. Alternate between different lengths as you move towards the inner corner to create a seamless blend with your natural lashes. Take your time to ensure each cluster is aligned and secure before moving to the next.
Step 5: Secure the Bond
Once all the clusters are in place and you are happy with the design, you can gently press them together. Using your tweezers, carefully clamp the cluster lashes and your natural lashes together. This fuses the bond and creates a more integrated, seamless look. Hold for a few seconds on each section.
Aftercare for Long-Lasting Results
Proper aftercare will help you enjoy your new lashes for as long as possible. The longevity of cluster lashes typically ranges from a few days to over a week, depending on the adhesive used and your care routine.
- For the first 24-48 hours, avoid getting your lashes wet. This includes avoiding steam from showers, saunas, or cooking, as it can weaken the adhesive bond before it fully cures.
- When cleansing your face, use oil-free products, especially around the eyes. Oils are the enemy of lash adhesive and will cause it to break down prematurely.
- Be gentle. Avoid rubbing, tugging, or pulling at your eyes or lashes. When you sleep, try to lie on your back to prevent crushing the lashes against your pillow.
- You can gently brush your lashes each morning with a clean, dry spoolie to keep them neat and separated.
Safe and Gentle Removal
Never pull off cluster lashes, as this can damage your natural lashes. Safe removal is just as important as the application itself. Use a remover specifically designed for lash adhesive. Apply the remover solution onto a cotton bud or micro-swab and gently dab it along the lash line where the clusters are bonded. Let it sit for a minute or two to dissolve the adhesive. The clusters should then slide off effortlessly. If they don't, apply a little more remover and wait longer. Once all clusters are removed, cleanse your eye area to remove any remaining adhesive residue and soothe the skin.