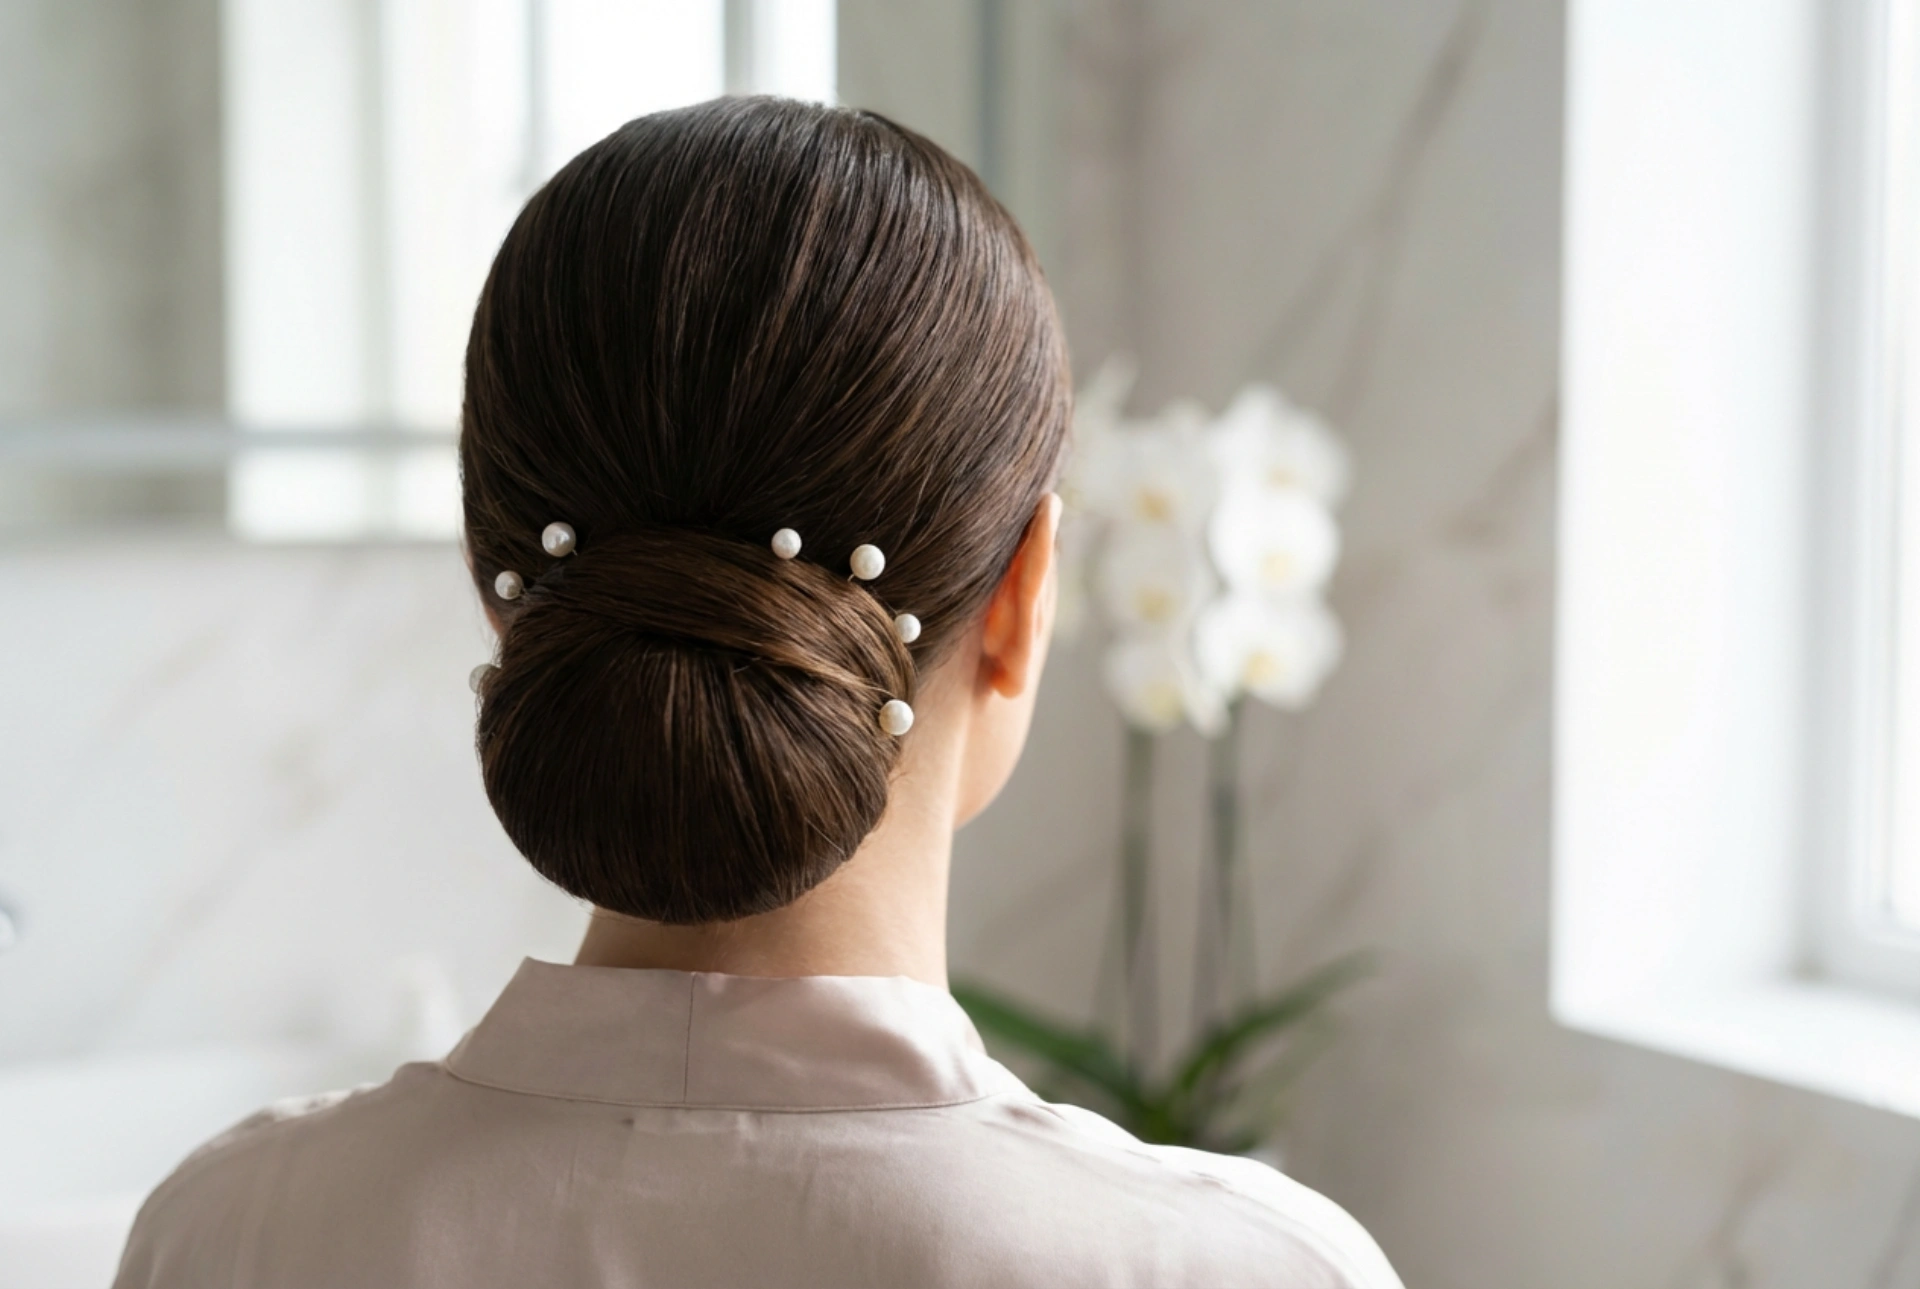


An elegant bun is a timeless choice for special occasions, especially weddings. It combines sophistication with practicality, keeping your hair neatly styled throughout the event. Achieving a look that is both perfectly polished and durable enough to last from the ceremony to the final dance can seem challenging, but with the right techniques, you can create a stunning updo at home. This guide will walk you through the steps to prepare your hair, style a flawless bun, and secure it for all-night hold.
Step 1: Hair Preparation is Key
The foundation of any long-lasting hairstyle is proper preparation. Starting with the right base will make styling easier and ensure your bun stays in place. Contrary to popular belief, freshly washed hair is often too soft and slippery to hold a style well. It's best to wash your hair the day before the event. This allows some natural oils to build up, providing better grip and texture.
- Texture and Volume: On the day of styling, work a texturising spray or a small amount of volumising mousse through your dry hair, focusing on the roots. This will add body and make the hair more pliable. If your hair is very fine or straight, you can also lightly tease the roots at the crown for extra lift before you begin gathering it.
- Brushing: Thoroughly brush your hair to remove any tangles. A smooth canvas is essential for achieving a polished finish. Use a paddle brush for thick hair or a boar bristle brush to distribute oils and create a sleek surface.
Step 2: Creating the Perfect Ponytail Base
The position and security of your initial ponytail will determine the final look and stability of your bun. Before you start, decide where you want the bun to sit: a low bun at the nape of the neck is classic and elegant, a high bun is bold and modern, while a side bun offers a touch of romance.
- Gathering the Hair: Use a brush to gather your hair smoothly into a ponytail at your desired location. For a super sleek look, use a fine-tooth comb and a little hairspray on the brush to tame any flyaways as you pull the hair back.
- Securing the Ponytail: Use a strong, snag-free hair elastic. For extra security, especially if you have thick or heavy hair, use two elastics. The ponytail should feel tight and secure against your head, as this is the anchor for your entire style.
Step 3: Shaping the Bun
With your ponytail base in place, you can now form the bun. There are several methods, each creating a slightly different effect. Choose the one that best suits your hair type and desired aesthetic.
The Classic Twist
This is the simplest and quickest method. Twist your ponytail tightly from base to ends. Then, coil the twisted hair around the base of the ponytail, forming a neat bun. As you wrap, tuck the ends underneath the bun. This technique works well for medium to long hair and creates a compact, elegant chignon.
The Sock Bun or Donut Method
For a perfectly shaped, voluminous bun, a hair donut (or bun shaper) is an excellent tool. Pull your ponytail through the hole in the donut and slide it to the base. Fan your hair out to cover the entire donut, ensuring no part of the shaper is visible. Secure the hair over the donut with another hair elastic. Gather the loose ends and wrap them around the base of the bun, pinning them in place.
The Braided Bun
For added texture and visual interest, start by braiding your ponytail. You can do a simple three-strand braid or a fishtail braid for a more intricate look. Gently pull on the sides of the braid to 'pancake' it, making it appear fuller. Then, wrap the braid around the base of the ponytail and secure it.
Step 4: Securing, Smoothing, and Final Touches
The final step is crucial for longevity and a flawless finish. Securing the bun properly will ensure it doesn't loosen or fall apart.
- Pinning Technique: Use bobby pins or U-shaped hairpins to secure the bun. The key is to slide the pin in, catch a section of the bun, and then anchor it into the base hair against your scalp. Use as many pins as you need for the bun to feel completely secure. For a hidden hold, make sure the pins are tucked deep inside the style.
- Taming Flyaways: For a perfectly smooth surface, spray a small amount of light-hold hairspray onto a clean toothbrush or a spoolie and gently brush down any stray hairs or flyaways around the hairline and on the bun itself. This gives you control without making the hair look stiff.
- Setting the Style: Once you are happy with the shape and smoothness, it's time to lock it in. Hold a can of strong-hold hairspray about 30 centimetres away from your head and give your entire hairstyle a generous misting. This will provide a firm but flexible hold.
- Adding Accessories: If you wish, this is the moment to add decorative elements like the subtle pearl pins in the image, a decorative comb, or fresh flowers. Slide them gently into the secured bun.





