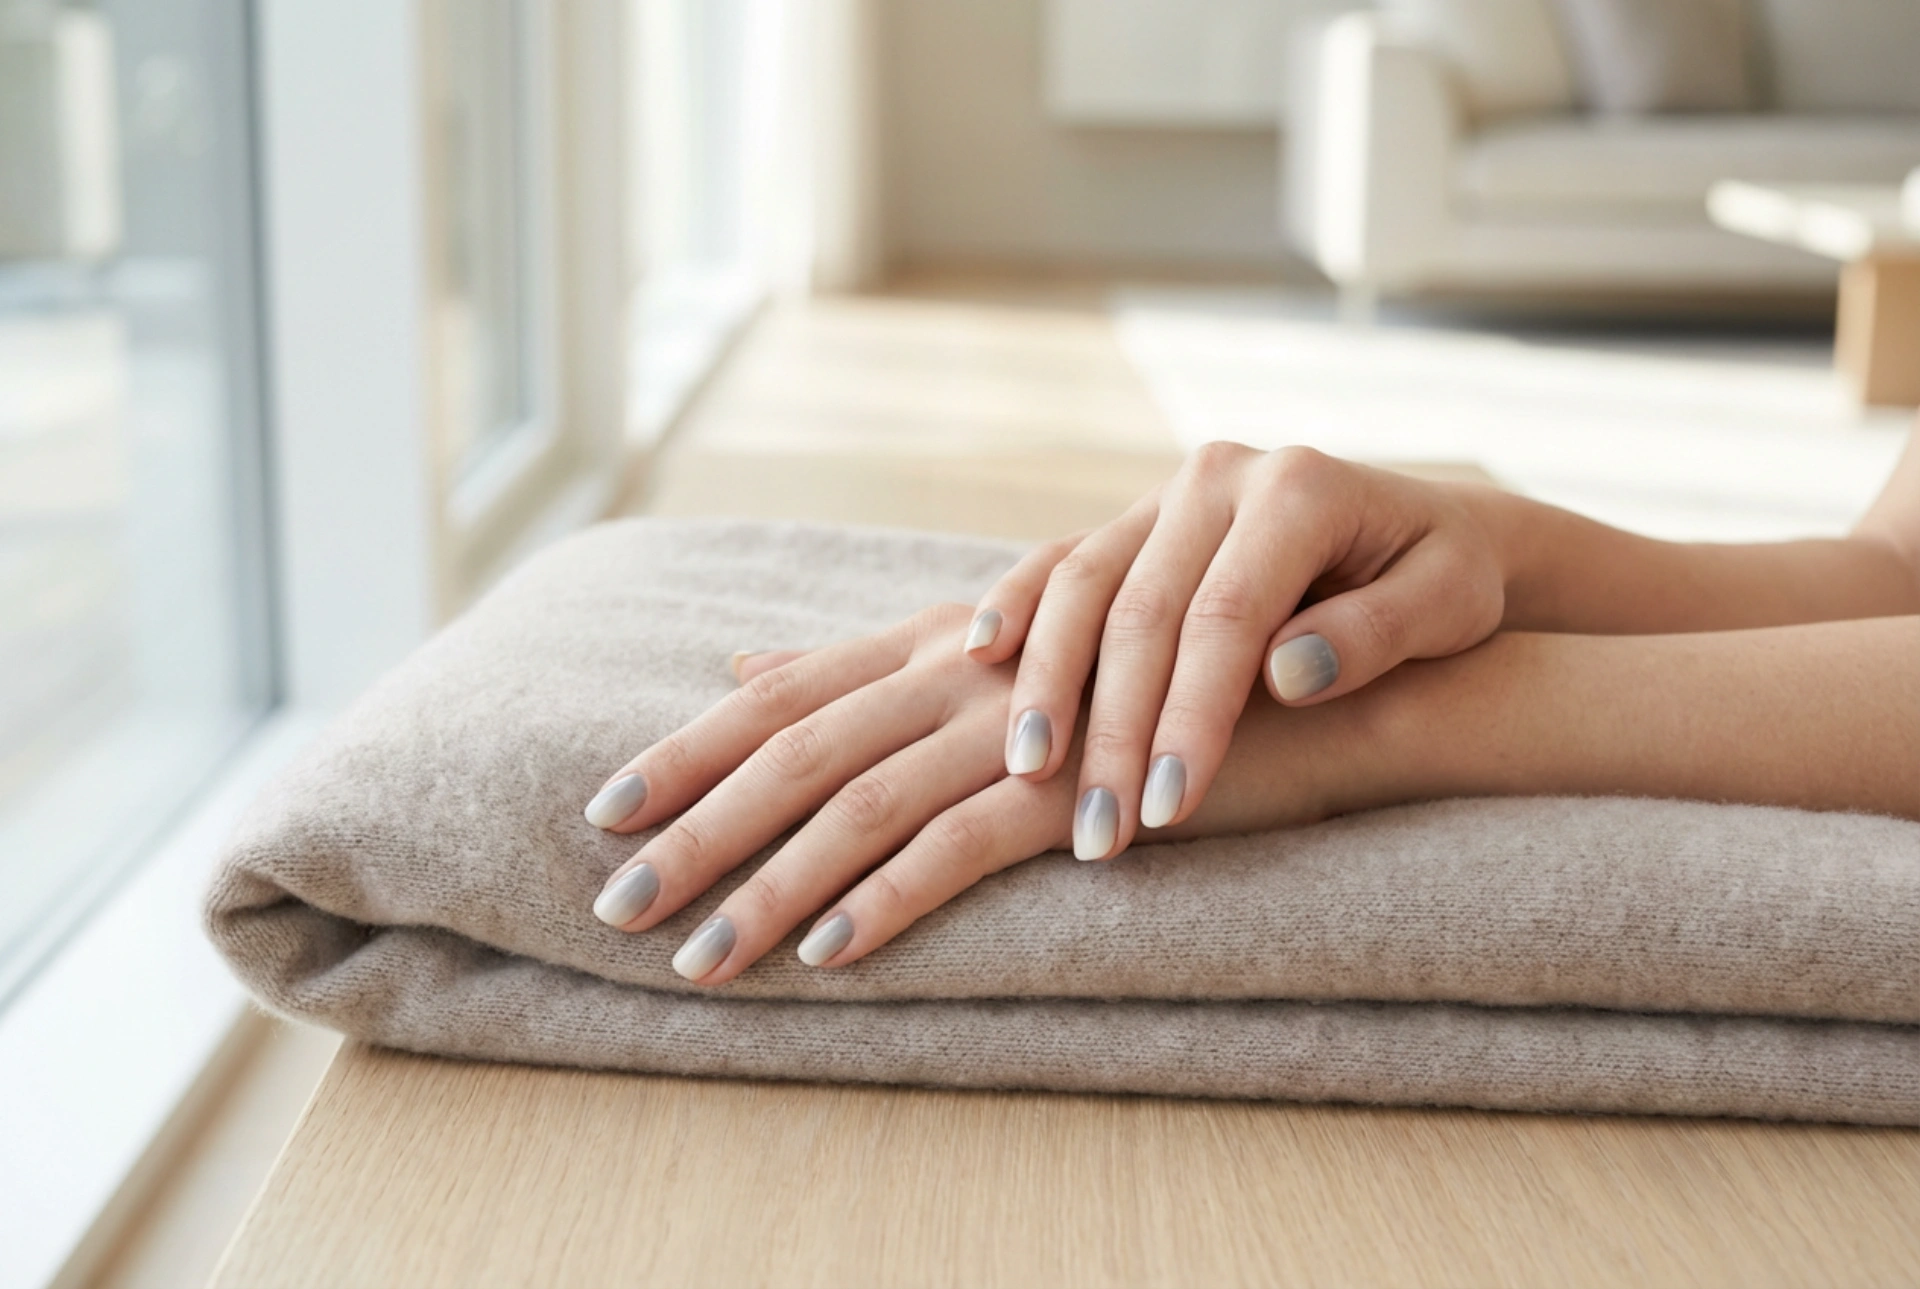


The ombre nail trend continues to captivate with its beautiful, seamless transition of colours. While often associated with bright, bold hues, the grey ombre manicure offers a uniquely sophisticated and modern alternative. It’s a style that speaks of quiet confidence and understated elegance, versatile enough for both a professional setting and a relaxed weekend. Achieving this chic gradient effect at home might seem daunting, but with the right technique and a little patience, you can create a flawless, salon-quality look that is both striking and refined.
Preparing for Your Grey Ombre Manicure
A successful manicure begins long before the first coat of colour is applied. Proper preparation is the foundation for a smooth, long-lasting finish. A flawless canvas allows the gradient to blend seamlessly and prevents chipping. Gather your tools and dedicate some time to prepping your nails correctly.
What You Will Need:
- Nail file and buffer
- Cuticle pusher or orange stick
- Base coat
- A light, neutral grey or off-white nail polish for the base
- At least two shades of grey polish (one medium, one dark) for the gradient
- A glossy top coat
- A disposable makeup sponge (a high-density one works best)
- Nail polish remover
- A small, flat brush or cotton bud for clean-up
- Optional: A liquid latex barrier for skin protection
Nail Preparation Steps:
Start by removing any old polish. File your nails to your desired shape, ensuring they are all a consistent length. Gently buff the surface of each nail to smooth out any ridges; this is crucial for an even gradient. Next, attend to your cuticles. Apply a cuticle remover if you have one, then gently push them back with a pusher or an orange stick. Avoid cutting your cuticles at home, as this can lead to irritation. Once your nails are shaped and your cuticles are tidy, wash your hands and wipe each nail with a lint-free cloth and some nail polish remover to eliminate any oils or residue. Finally, apply a thin layer of a quality base coat. This protects your natural nails from staining and provides a tacky surface for the polish to adhere to, significantly extending the life of your manicure.
Creating the Grey Ombre Gradient: A Step-by-Step Tutorial
This is where the magic happens. The key to the ombre effect is the sponge. It acts as a stamp to transfer and blend the colours onto your nail. This process can be a little messy, so it’s wise to protect your work surface. If you have a liquid latex barrier, now is the time to apply it around your nail onto the skin for easier clean-up later.
- Apply the Base Colour: Begin by painting all your nails with one or two thin coats of your lightest colour—the pale grey or off-white. This will be the lightest part of your gradient, typically at the base of your nail. Ensure this layer is completely dry before you proceed. Rushing this step will cause the base to lift when you apply the sponge.
- Prepare the Sponge: Take your makeup sponge and paint horizontal stripes of your chosen grey polishes directly onto it. The order should be from your lightest shade to your darkest. The lightest shade should overlap slightly with your medium shade, and the medium with the dark. Be generous with the polish, as the sponge will absorb some of it.
- Create the Gradient: Lightly press and dab the polish-coated sponge onto your nail. You can use a gentle rolling motion from one side to the other to help blend the colours. The first application will be quite sheer; this is normal. Let it dry for a minute or two.
- Build the Intensity: Reapply the polishes to the sponge and dab onto the nail a second or even a third time, slightly shifting the sponge's position with each layer to enhance the blend. Continue until you are happy with the opacity and the smoothness of the colour transition. Repeat this process for all of your nails, reapplying polish to the sponge as needed.
- Clean Up the Edges: Once the gradient is complete, it's time to tidy up. If you used a liquid latex barrier, you can now simply peel it off. If not, dip your small, flat brush or a cotton bud into nail polish remover and carefully trace around your cuticle line and the sides of your nail to remove any excess polish from your skin. A steady hand is key for a crisp, professional-looking result.
- Seal with a Top Coat: The sponging technique can leave a slightly textured surface. A generous layer of a glossy top coat will smooth this out, melt the colours together beautifully, and give your nails a high-shine finish. It also seals in the design, protecting it from chipping and extending its wear time. Allow it to dry completely.
Tips for a Flawless and Long-Lasting Finish
Perfecting the ombre technique takes a little practice. These extra tips will help you achieve a more professional result and ensure your elegant grey manicure lasts as long as possible.
- Choosing Your Greys: For a subtle, sophisticated look, choose shades that are relatively close in tone, like a dove grey and a slate grey. For a more dramatic effect, create a higher contrast by pairing a very light, almost-white grey with a deep charcoal or gunmetal shade.
- Dampen Your Sponge: Lightly misting your makeup sponge with water (and squeezing out any excess) before applying the polish can help the colours blend more seamlessly and prevent the sponge from absorbing too much product.
- Work One Nail at a Time: To prevent the polish on the sponge from drying out too quickly, it’s best to apply the gradient to one nail, then re-apply polish to the sponge before moving on to the next.
- The Top Coat Trick: For an extra-smooth, gel-like finish, apply a second layer of your top coat after the first one has fully dried. This can also help to revive the shine and extend the life of your manicure a few days later.
Common Mistakes to Avoid
Even with a guide, a few common pitfalls can trip you up. Being aware of them can help you achieve that perfect cool-toned elegance without frustration.
- Using a Dry, Porous Sponge: A cheap, open-pored craft sponge will absorb too much polish and create a bubbly, uneven texture. A dense, cosmetic-grade makeup sponge is essential for a smooth blend.
- Pressing the Sponge Too Hard: Applying too much pressure can lift the base coat or create harsh lines instead of a soft gradient. Use a light, dabbing or stippling motion.
- Skipping the Clean-up Step: The beauty of an ombre manicure is in its soft, blended appearance. Messy edges with polish on the skin detract from this and make the manicure look untidy. Take the time for meticulous clean-up.
- Not Waiting for Layers to Dry: Patience is paramount. Applying the sponge to a wet base coat or applying the top coat to a wet gradient will result in smudges, streaks, and a ruined design. Give each layer adequate time to dry.
- Using Old or Thick Polish: Thick, gloopy nail polish will not blend well on the sponge or transfer smoothly to the nail. Ensure your polishes have a good, fluid consistency for the best results.


