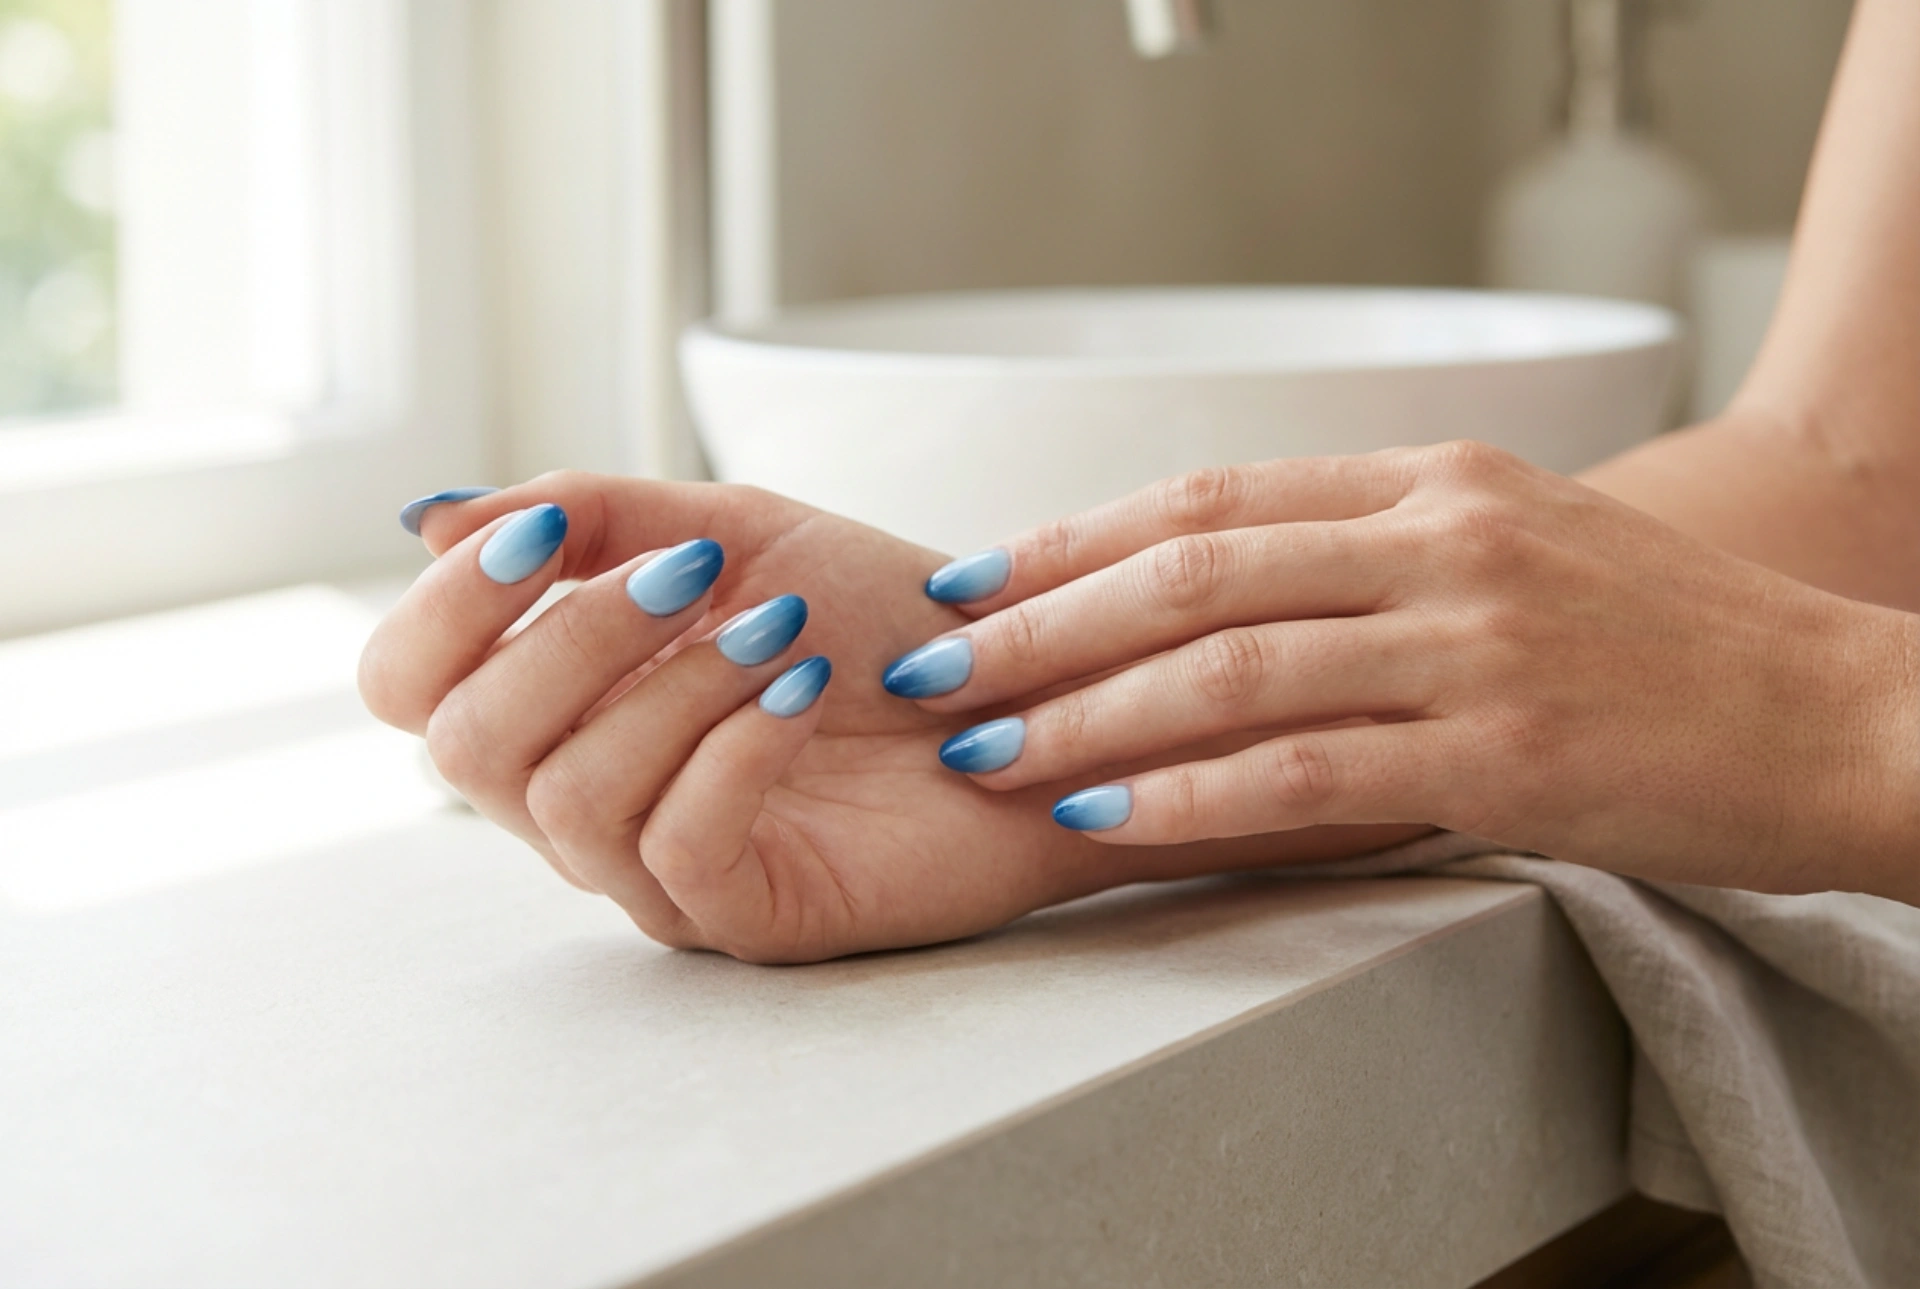


The elegance of a gradient manicure, particularly one that evokes the depths of the ocean, is undeniable. Blue ombre nails, with their fluid transition from a light, airy sky blue to a deep, mysterious marine hue, offer a sophisticated and versatile look. This style can be adapted for any season or occasion, bringing a touch of polished artistry to your fingertips. While it may look complex, achieving this beautiful effect at home is entirely possible with the right technique and a little patience. This guide will walk you through creating your own stunning blue ombre nails, ensuring a smooth, professional-looking finish.
Preparation: The Foundation for a Flawless Manicure
Before you even think about colours, proper nail preparation is essential. A clean and smooth canvas not only makes the application process easier but also significantly extends the life of your manicure. Rushing this stage is a common mistake that leads to a less-than-perfect outcome.
Start by removing any old polish thoroughly. Next, shape your nails with a fine-grit file, moving in one direction to prevent splitting. Whether you prefer a soft square, almond, or oval shape, ensure all nails are uniform in length and form. Once you're happy with the shape, gently push back your cuticles using a wooden or rubber-tipped cuticle pusher. Avoid cutting them, as this can lead to irritation and damage the delicate skin. Finally, lightly buff the surface of your nails to remove any natural oils and create a slightly textured base for the polish to adhere to. Wipe each nail with a lint-free pad soaked in nail polish remover to ensure they are completely clean and dry before applying a quality base coat. The base coat protects your natural nails from staining and provides an even surface for the colour application.
The Sponge Technique: A Step-by-Step Guide to Gradient Perfection
The secret to a seamless DIY ombre is a simple cosmetic sponge. A dense, disposable makeup wedge works best, as its fine pores create a smoother blend without visible bubbles. For this look, you will need at least two shades of blue nail polish—a light and a dark one—plus your base and top coats.
Creating the Gradient
- Step 1: Apply the Base Colour. After your base coat has dried completely, apply one or two coats of the lightest blue shade to all your nails. This will serve as the background for your gradient and ensure the transition looks bright and clean. Allow it to dry thoroughly; this is crucial for the next step.
- Step 2: Prepare Your Sponge. Take your cosmetic sponge and paint two horizontal stripes of your chosen blue polishes directly onto it. The lighter shade should be at the top and the darker one below it, with a slight overlap in the middle where they meet. Be generous with the polish, as the sponge will absorb some of it.
- Step 3: Transfer the Gradient. Before applying to your nail, you can dab the sponge once on a piece of paper to blend the colours slightly and remove excess polish. Then, gently press and roll the sponge onto your nail. You can dab it a few times to build up the colour intensity and perfect the blend. The initial result may look a little sheer, which is normal.
- Step 4: Repeat and Intensify. Re-apply the polish to the sponge for each nail to ensure a fresh, saturated gradient every time. For a more opaque and vibrant look, wait a few minutes for the first layer to become tacky, then repeat Step 3. Two to three layers are usually enough to achieve a rich, seamless ombre effect.
- Step 5: Clean Up the Edges. This technique is inevitably messy. Protect the skin around your nails beforehand with a liquid latex barrier or simply clean up afterwards. Dip a small, flat brush or a cotton bud into nail polish remover and carefully trace around your cuticle line to remove any excess polish from your skin. A clean edge is what makes a home manicure look professional.
Achieving a High-Shine Finish and Longevity
Once you are satisfied with the gradient and the edges are clean, the final step is to seal your design. Applying a generous layer of a high-quality, quick-drying top coat is non-negotiable. The top coat serves multiple purposes: it smooths out the slightly bumpy texture left by the sponge, melts the colours together for an even more seamless blend, and provides a brilliant, long-lasting shine. For an extra durable finish, you can apply a second layer of top coat after the first one has dried. To maintain your beautiful blue ombre manicure, apply a fresh layer of top coat every two to three days. Also, remember to keep your cuticles hydrated by applying cuticle oil daily. This not only keeps your hands looking neat but also helps promote healthy nail growth.
Common Ombre Mistakes to Avoid
Even with a clear guide, a few common pitfalls can trip you up. Being aware of them will help you achieve the best possible result.
- Using the Wrong Sponge: A kitchen sponge or one with large, open pores will create a bubbly, uneven texture. Always opt for a dense, fine-pored makeup sponge.
- Not Letting the Base Colour Dry: Dabbing a wet sponge onto semi-dry polish will lift the base colour, creating smudges and bald patches. Patience is key.
- Pressing the Sponge Too Hard: A gentle dabbing or rolling motion is all that's needed. Pressing too firmly can remove the polish instead of depositing it.
- Forgetting to Reapply Polish to the Sponge: Using the same polish application on the sponge for multiple nails will result in a faint, patchy gradient. Refresh the polish for each nail.
- Skipping the Top Coat: An ombre manicure without a top coat will look dull and feel rough to the touch. The top coat is what brings the design to life and gives it that smooth, glossy appearance.


