


Pink eyeshadow has long been associated with soft, romantic aesthetics, but its true potential is far more diverse. A well-curated pink palette is a surprisingly versatile tool in any makeup collection, capable of creating looks that range from a fresh, subtle daytime glow to a deep and enchanting smoky eye. It’s all about understanding the shades, textures, and techniques. Moving beyond a simple wash of colour opens up a world of creative possibilities, allowing you to tailor your look for any occasion while enhancing your features in a beautifully understated way.
Why a Pink Palette is a Makeup Staple
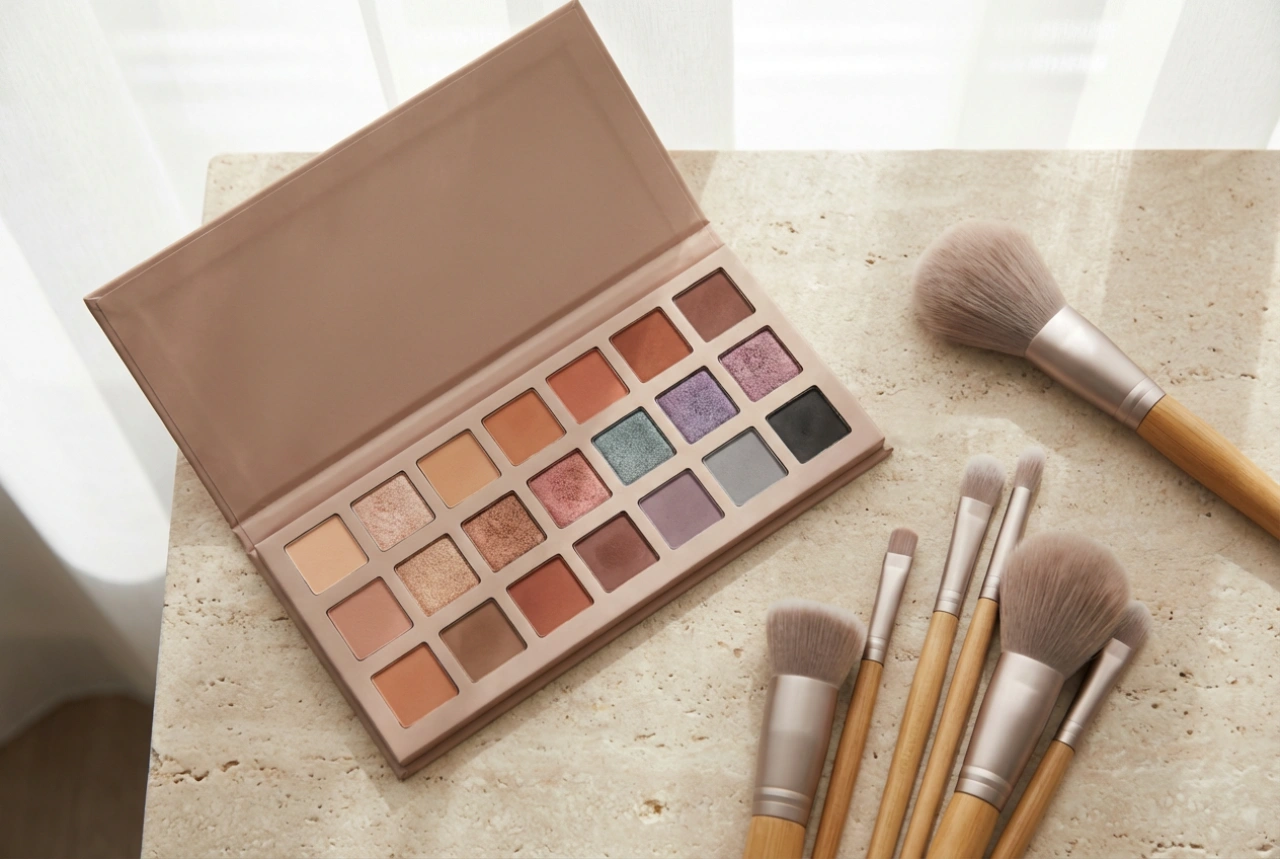
The beauty of a pink eyeshadow palette lies in its universal appeal. With a spectrum of shades from pale rose and dusty mauve to vibrant fuchsia and deep berry, there is a pink to complement every skin tone. Warmer skin tones are beautifully enhanced by peachy-pinks and corals, while cooler skin tones shine with lavender-pinks and raspberry hues. A good palette will feature a mix of finishes. Mattes are perfect for creating structure and depth in the crease, shimmers add a luminous pop of light to the lid, and metallics provide a high-impact, reflective finish for more dramatic looks. This combination allows for seamless transitions and multi-dimensional effects, making the pink palette an incredibly practical choice for both beginners and experienced makeup enthusiasts.
Look 1: The Everyday Subtle Shimmer
This look is perfect for the office, a casual day out, or any time you want a touch of polished colour without looking overly made-up. The goal is to create a bright, wide-awake effect with minimal effort.
- Step 1: Prime the Lids. Start by applying a thin layer of eyeshadow primer. This crucial step creates a smooth canvas, prevents the shadow from creasing throughout the day, and makes the colours appear more vibrant.
- Step 2: Apply a Base Colour. Using a fluffy blending brush, sweep a light, matte pink or a soft peach shade all over your eyelid, from the lash line up to the crease. This will act as a base and help subsequent colours blend more easily.
- Step 3: Add a Pop of Shimmer. With your fingertip or a flat shader brush, gently press a light shimmery pink or champagne shade onto the centre of your eyelid. This technique catches the light and makes your eyes appear larger and more luminous.
- Step 4: Define the Lash Line. For subtle definition, take a small, angled brush and use a slightly deeper matte shade, like a dusty rose or soft mauve, to line your upper lash line. This creates the illusion of thicker lashes without the harshness of a liquid liner. Blend it slightly for a softer finish.
Look 2: The Enchanting Romantic Smoky Eye
For an evening event or a special occasion, a romantic pink smoky eye offers a softer, more modern alternative to the traditional black or grey version. The key is to build depth gradually through layering and blending.
- Step 1: Build the Transition. After priming your lids, take a fluffy brush and apply a mid-tone matte pink into your crease, using windshield-wiper motions. This transition shade will ensure there are no harsh lines between your different colours.
- Step 2: Create Depth. Switch to a smaller, denser blending brush and pick up a deeper matte shade, such as a berry, plum, or rich raspberry. Focus this colour on the outer third of your eyelid and blend it into the crease to create a "V" shape. This adds dimension and a sultry feel.
- Step 3: Apply the Lid Shade. Apply a vibrant shimmer or metallic pink shade all over the main part of your eyelid, from the inner corner to where the deeper shade begins. Using your fingertip can provide a more intense colour payoff. Gently blend the edge where it meets the darker outer corner shade.
- Step 4: Smoke it Out. Using a small pencil brush, apply the same deep matte shade from the outer corner along your lower lash line, concentrating it on the outer two-thirds. To complete the smoky effect, you can use an even darker shade (like a deep plum or chocolate brown from the palette, if available) very close to your upper lash line.
- Step 5: Highlight. To add a final touch of brightness and lift, apply the lightest shimmery shade from your palette to the inner corner of your eye and just beneath the arch of your eyebrow. This contrast makes the smoky effect pop.
Tips for a Flawless Finish
To ensure your pink eyeshadow look is always flattering, keep a few key principles in mind. Firstly, always prioritise blending. Use clean, fluffy brushes to soften the edges between each colour for a seamless gradient. Secondly, don't be afraid to mix textures; combining mattes and shimmers creates a more professional, multi-dimensional look. Finally, pay attention to your application technique. It's better to build up colour slowly in thin layers than to apply too much at once, as this gives you more control and prevents a heavy, chalky appearance. With these tips, you can confidently explore the full romantic and versatile potential of pink eyeshadow.