


Brown nail varnish has firmly established itself as a symbol of understated elegance and versatility. Far from being a fleeting trend, its rich and earthy tones offer a sophisticated alternative to classic reds and nudes. Achieving that flawless, salon-quality finish, as seen in a perfectly executed manicure, requires more than just a steady hand. It involves choosing the right shade for your complexion and mastering an application technique that keeps your cuticles clean. This guide will walk you through the steps to select your ideal brown and apply it like a professional.
Choosing the Perfect Shade of Brown
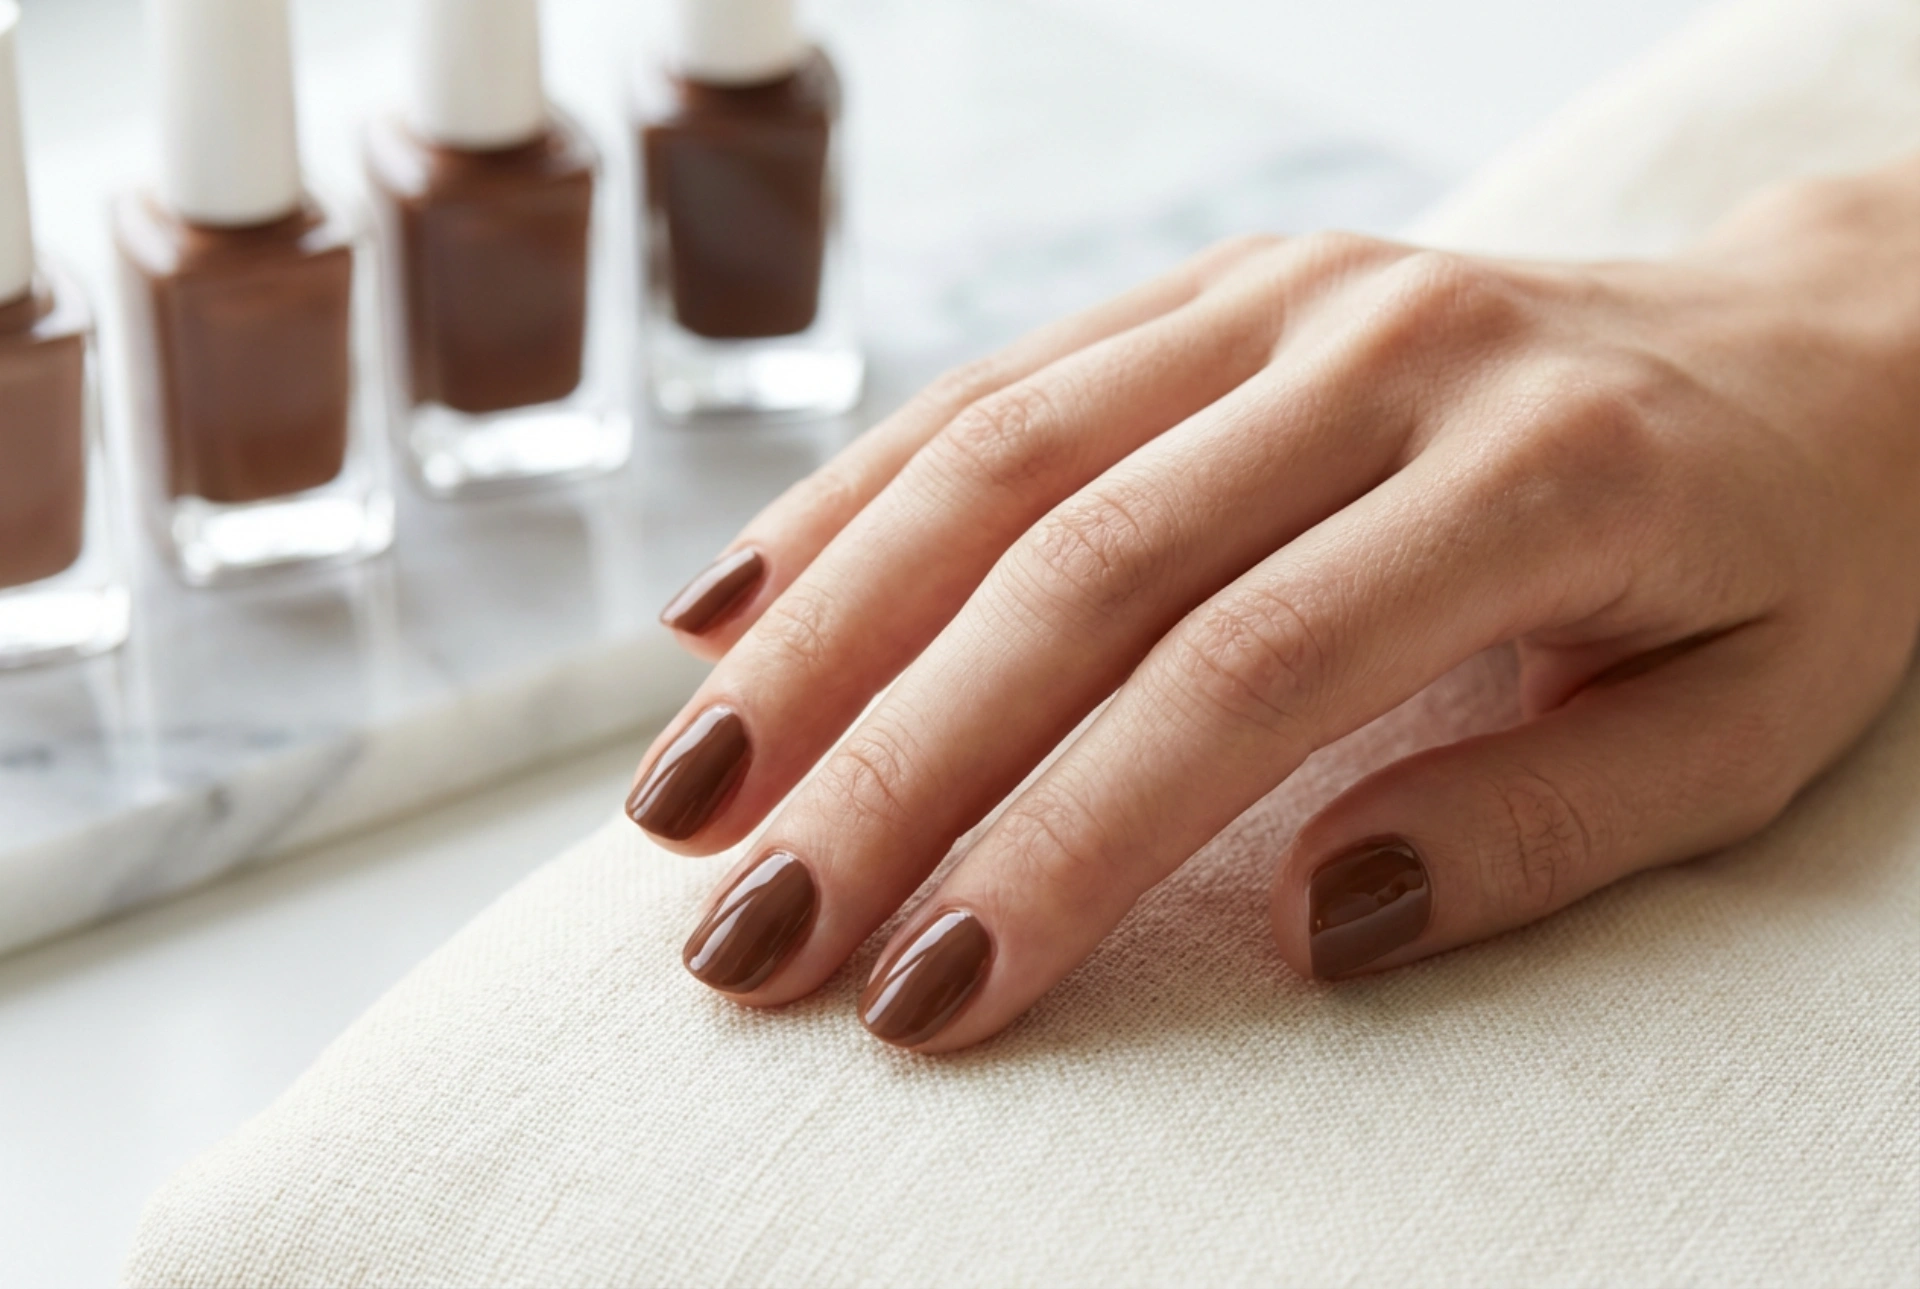
The spectrum of brown is vast, ranging from soft, sandy beiges to deep, dark espressos. The key to finding the most flattering shade lies in understanding your skin's tone and undertone. A well-chosen colour can brighten your complexion and make your hands look more elegant.
Consider Your Skin Tone
Matching the varnish to your overall skin tone is the first step. While there are no strict rules, certain pairings tend to be particularly harmonious.
- Fair Skin: Lighter, softer browns work beautifully. Think of shades like taupe, caramel, or milky chocolate. These colours provide a gentle contrast without overpowering your complexion. Avoid very dark, stark browns which can look too harsh.
- Medium Skin: You have a wide range of options. Rich chocolate browns, terracotta, and shades with a hint of red or copper will look stunning. These warmer tones complement the natural warmth in medium skin.
- Dark Skin: Deep, intense browns create a chic and dramatic look. Shades like dark espresso, mahogany, and blackened plum-browns are exceptionally flattering. The deep colours create a luxurious contrast and highlight the richness of your skin tone.
The Importance of Undertones
For an even more precise match, consider your skin's undertone – the subtle hue beneath the surface. To find yours, look at the veins on your wrist. If they appear blue, you likely have cool undertones. If they look green, you have warm undertones. If you can't decide, you may be neutral.
- Warm Undertones: Opt for browns that have a warm base, such as those with hints of red, orange, or yellow. Caramel, terracotta, and copper-browns are excellent choices.
- Cool Undertones: Look for browns with a cool base, like those with grey, purple, or blue hints. Ashy browns, taupes, and deep mochas will complement your skin beautifully.
- Neutral Undertones: You have the flexibility to wear almost any shade of brown, from warm to cool.
Preparing Your Nails for a Flawless Manicure
A perfect paint job starts with meticulous preparation. Creating a smooth, clean canvas not only makes the application easier but also significantly extends the life of your manicure.
- Clean and Shape: Start by removing any old polish. Wash your hands, then file your nails into your desired shape. Filing in one direction helps prevent splitting.
- Cuticle Care: Gently push back your cuticles using an orange wood stick or a soft cuticle pusher. Proper cuticle care creates a neat frame for your nail and provides more surface area for the varnish. Avoid cutting them at home, as this can lead to issues.
- Buff the Surface: Lightly buff the surface of your nails with a fine-grit buffer. This smooths out any ridges and creates a slightly textured surface for the base coat to adhere to.
- Dehydrate the Nail Plate: Wipe each nail with a lint-free pad soaked in nail polish remover or an alcohol solution. This removes any natural oils or lotions, ensuring maximum adhesion.
- Apply a Base Coat: Never skip the base coat. It protects your natural nails from staining (especially important with pigmented colours like brown) and provides a sticky foundation for the colour to grip onto.
The Art of Application: Painting Without Flooding Cuticles
Flooding the cuticles is a common frustration that can make an otherwise lovely manicure look messy. The secret to avoiding it is control and technique.
The Three-Stripe Method
This professional technique ensures even coverage without overloading the nail with product.
- Load your brush with a modest amount of varnish. Wipe one side of the brush clean against the inside of the bottle's neck.
- Place the brush in the centre of your nail, slightly away from the cuticle line.
- Gently push the brush back towards the cuticle, leaving a tiny, hair's-width gap.
- Pull the brush forward in a straight line to the tip of the nail. This is your first stripe.
- Return the brush to the base of the nail and sweep it down the left side, following the curve of your nail.
- Repeat on the right side to complete the coverage. Two thin coats are always better than one thick, gloopy one.
Tips for Precision and Quick Fixes
To further refine your technique, keep a few extra tips in mind. If you do make a mistake, it's easy to correct. Use a small, stiff brush (an old lip or eyeliner brush works well) dipped in nail polish remover to carefully wipe away any varnish from the skin. This creates a crisp, clean line around the nail. Working with a steady hand, perhaps resting your wrist on a table, can also greatly improve your control.
Finishing Touches for a Long-Lasting Manicure
Once your two coats of colour are applied and have had a minute to set, it's time for the final step. A high-quality top coat is non-negotiable. It seals in the colour, adds a brilliant shine, and provides a durable barrier against chips and scratches. When applying the top coat, be sure to 'cap' the free edge by swiping the brush along the very tip of your nail. This helps to prevent chipping and seals the layers of your manicure. Finally, once your nails are dry to the touch, apply a nourishing cuticle oil to rehydrate the skin around your nails, giving your manicure a truly polished, professional appearance.


