


The festive season is a wonderful time to experiment with your look, and a decorative manicure is a perfect way to add a touch of holiday cheer. If you're looking for a quick, easy, and effective way to adorn your nails without needing steady hands or artistic talent, Christmas-themed nail stickers are an excellent solution. They offer intricate designs that can transform your nails in minutes, creating a polished and festive appearance.
Why Opt for Nail Stickers This Christmas?
Nail stickers have become a go-to for many beauty enthusiasts, and for good reason. They present a simple alternative to complex, hand-painted nail art, offering a range of benefits for anyone wanting a seasonal manicure.
- Speed and Convenience: Applying stickers is significantly faster than painting intricate designs. You can achieve a full, detailed manicure in a fraction of the time.
- Variety of Designs: From delicate snowflakes and shimmering stars to cheerful reindeer and classic holly, the range of festive designs is vast. You can easily find patterns that match your style or a specific outfit.
- Accessibility for All Skill Levels: You don't need to be a professional nail artist to use stickers. Their application is straightforward, making them perfect for beginners who want beautiful results.
- No Drying Time for the Design: Unlike nail polish art, the sticker's design is already set. The only drying time required is for your base and top coats, which simplifies the process.
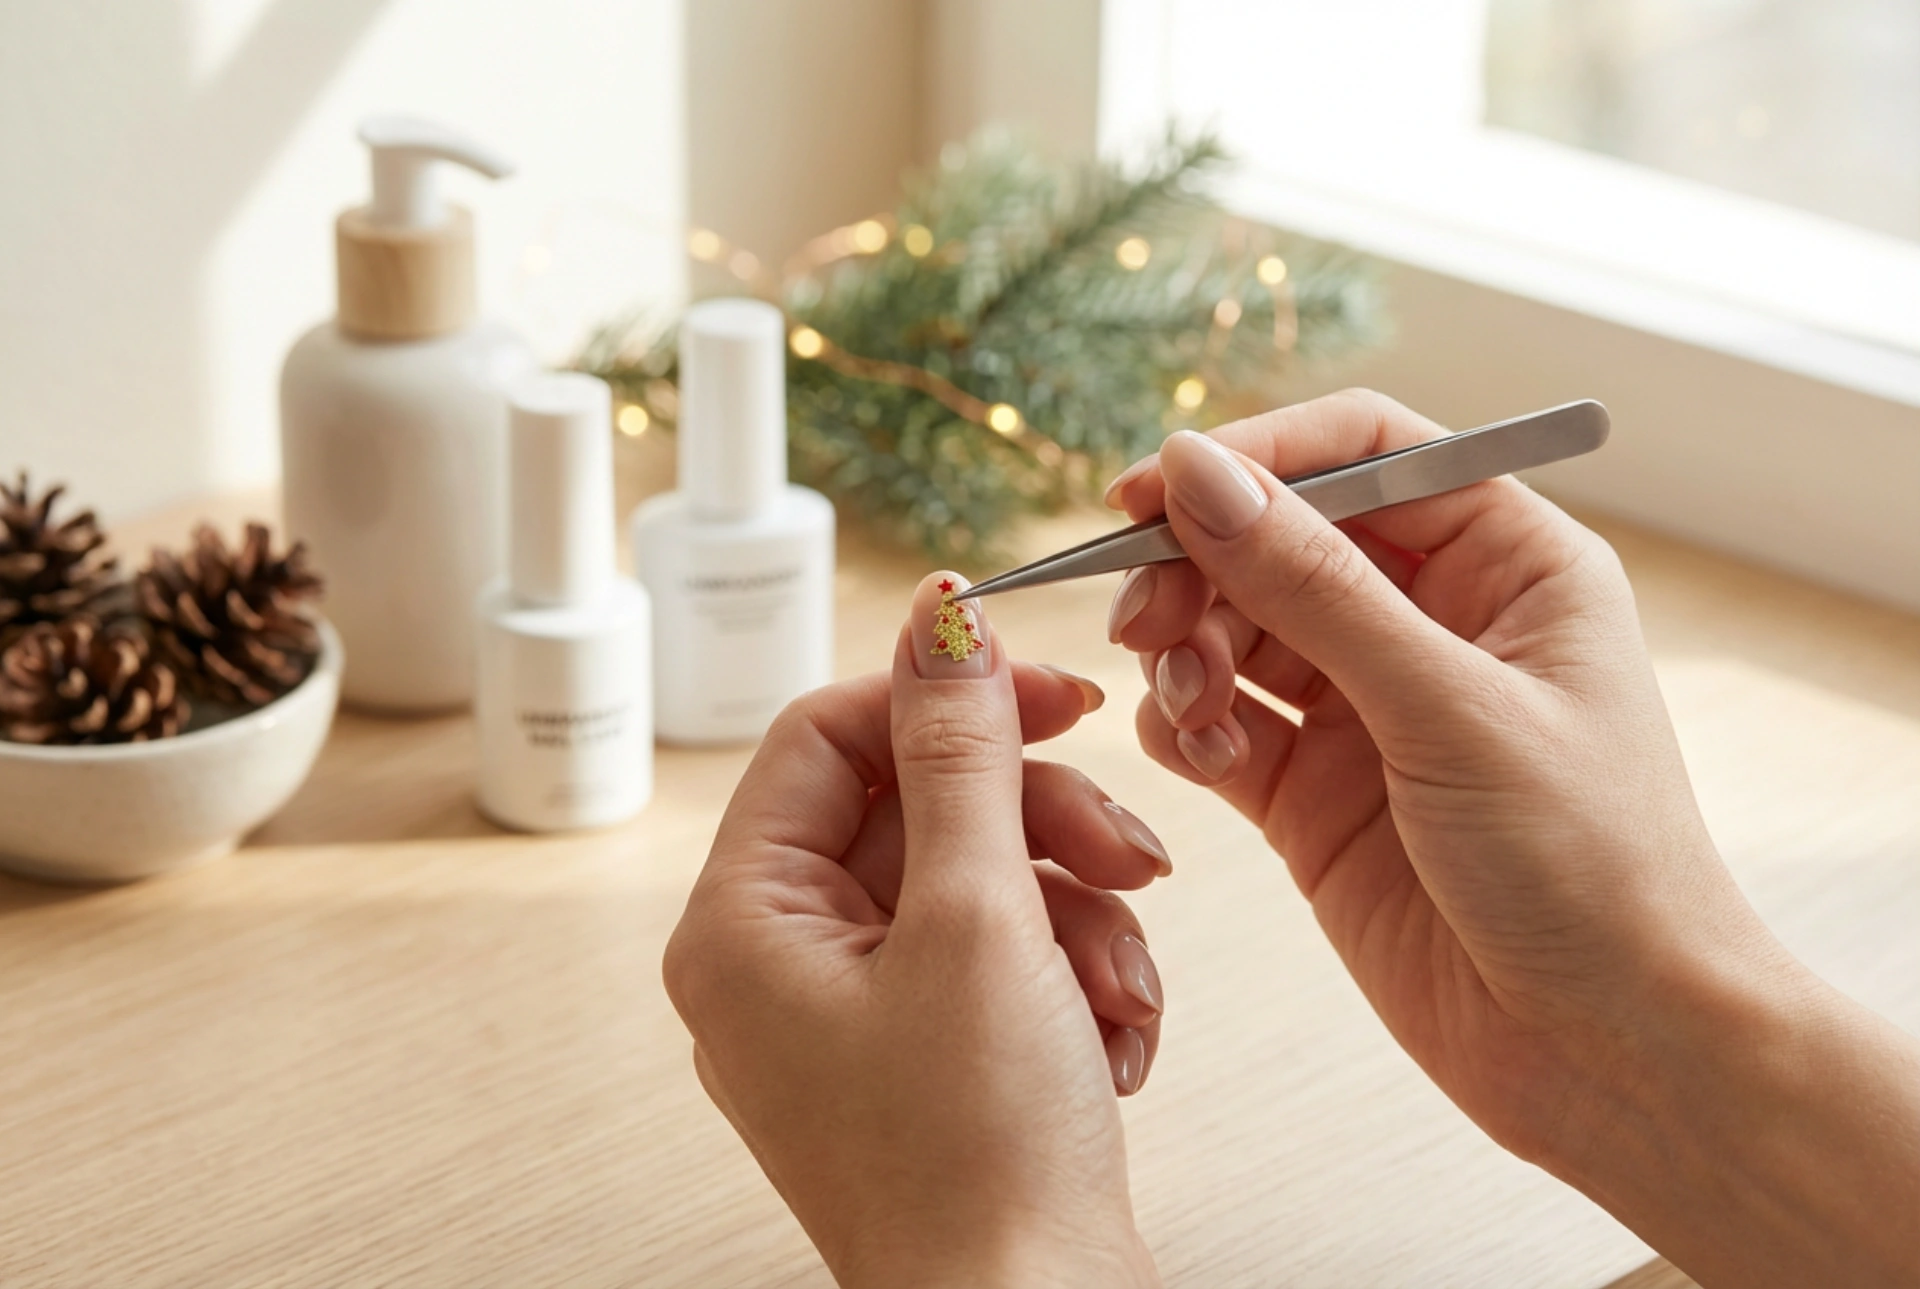
How to Apply Christmas Nail Stickers Like a Pro
To ensure your sticker manicure looks neat and lasts as long as possible, proper application is crucial. Follow these simple steps for a professional-looking finish at home.
1. Prepare Your Nails
A clean canvas is essential. Start by thoroughly cleaning your nails to remove any oils or residue. Gently push back your cuticles and shape your nails with a file. For the best adhesion and to protect your natural nail, always apply a thin layer of a quality base coat and let it dry completely before moving on to the sticker application.
2. Choose and Apply the Sticker
Select a sticker that best fits the size and shape of your nail. It is often better to choose one that is slightly smaller than your nail to avoid it touching the skin or cuticles. Carefully peel the sticker from its backing, using tweezers if necessary to avoid touching the adhesive side. Position it on your nail, starting from the cuticle and smoothing it outwards towards the tip. Press down firmly, ensuring there are no air bubbles or creases. A silicone tool or a wooden cuticle stick can help smooth the surface for perfect adherence.
3. Secure the Design
Once the sticker is perfectly smooth, you may have some excess material at the tip of your nail. Gently fold it over the edge and file it away using a downward motion only. This creates a clean, flush edge. To protect the sticker and give your manicure a glossy, finished look, apply one or two thin layers of a clear top coat. Make sure to "cap" the free edge of your nail with the top coat to seal everything in and prevent peeling.
Tips for a Long-Lasting Festive Manicure
With proper care, your nail sticker manicure can last throughout the festive celebrations. Here are a few tips to maximise its longevity:
- Seal the Edges: Pay special attention to sealing the edges of the sticker with your top coat. This is the most common area for lifting to begin. A second coat focused on the tip can be beneficial.
- Reapply Top Coat: If you plan to wear the manicure for more than a few days, applying another thin layer of top coat every two to three days can help maintain the shine and add extra protection.
- Be Gentle with Your Hands: Avoid using your nails as tools to open cans or scrape things. When doing household chores, especially those involving water or cleaning agents, wear gloves to protect your manicure.
- Avoid Soaking: Prolonged exposure to hot water, such as in long baths or hot tubs, can weaken the adhesive and cause the stickers to lift prematurely.
Safe and Easy Removal
When the festivities are over and it's time for a new look, removing the stickers correctly is important to keep your natural nails healthy. Most nail stickers can be removed easily. You can often gently peel them off, starting from one edge. If you encounter any resistance, do not force it. Instead, soak a cotton pad in a standard nail polish remover, place it on the nail for a few moments, and then gently wipe the sticker and any remaining adhesive away. Finish by washing your hands and applying a nourishing cuticle oil to rehydrate the nail area.


