


The appeal of a flawless, long-lasting manicure is undeniable, and achieving it at home is more accessible than ever. A home gel nail kit provides all the essential tools and products to create a durable, high-shine finish that rivals a salon visit. It empowers you to get creative with your nail look from the comfort of your own space. Understanding the components of your kit and the correct application technique is the key to mastering the art of the DIY gel manicure.
What's Inside a Home Gel Nail Kit?
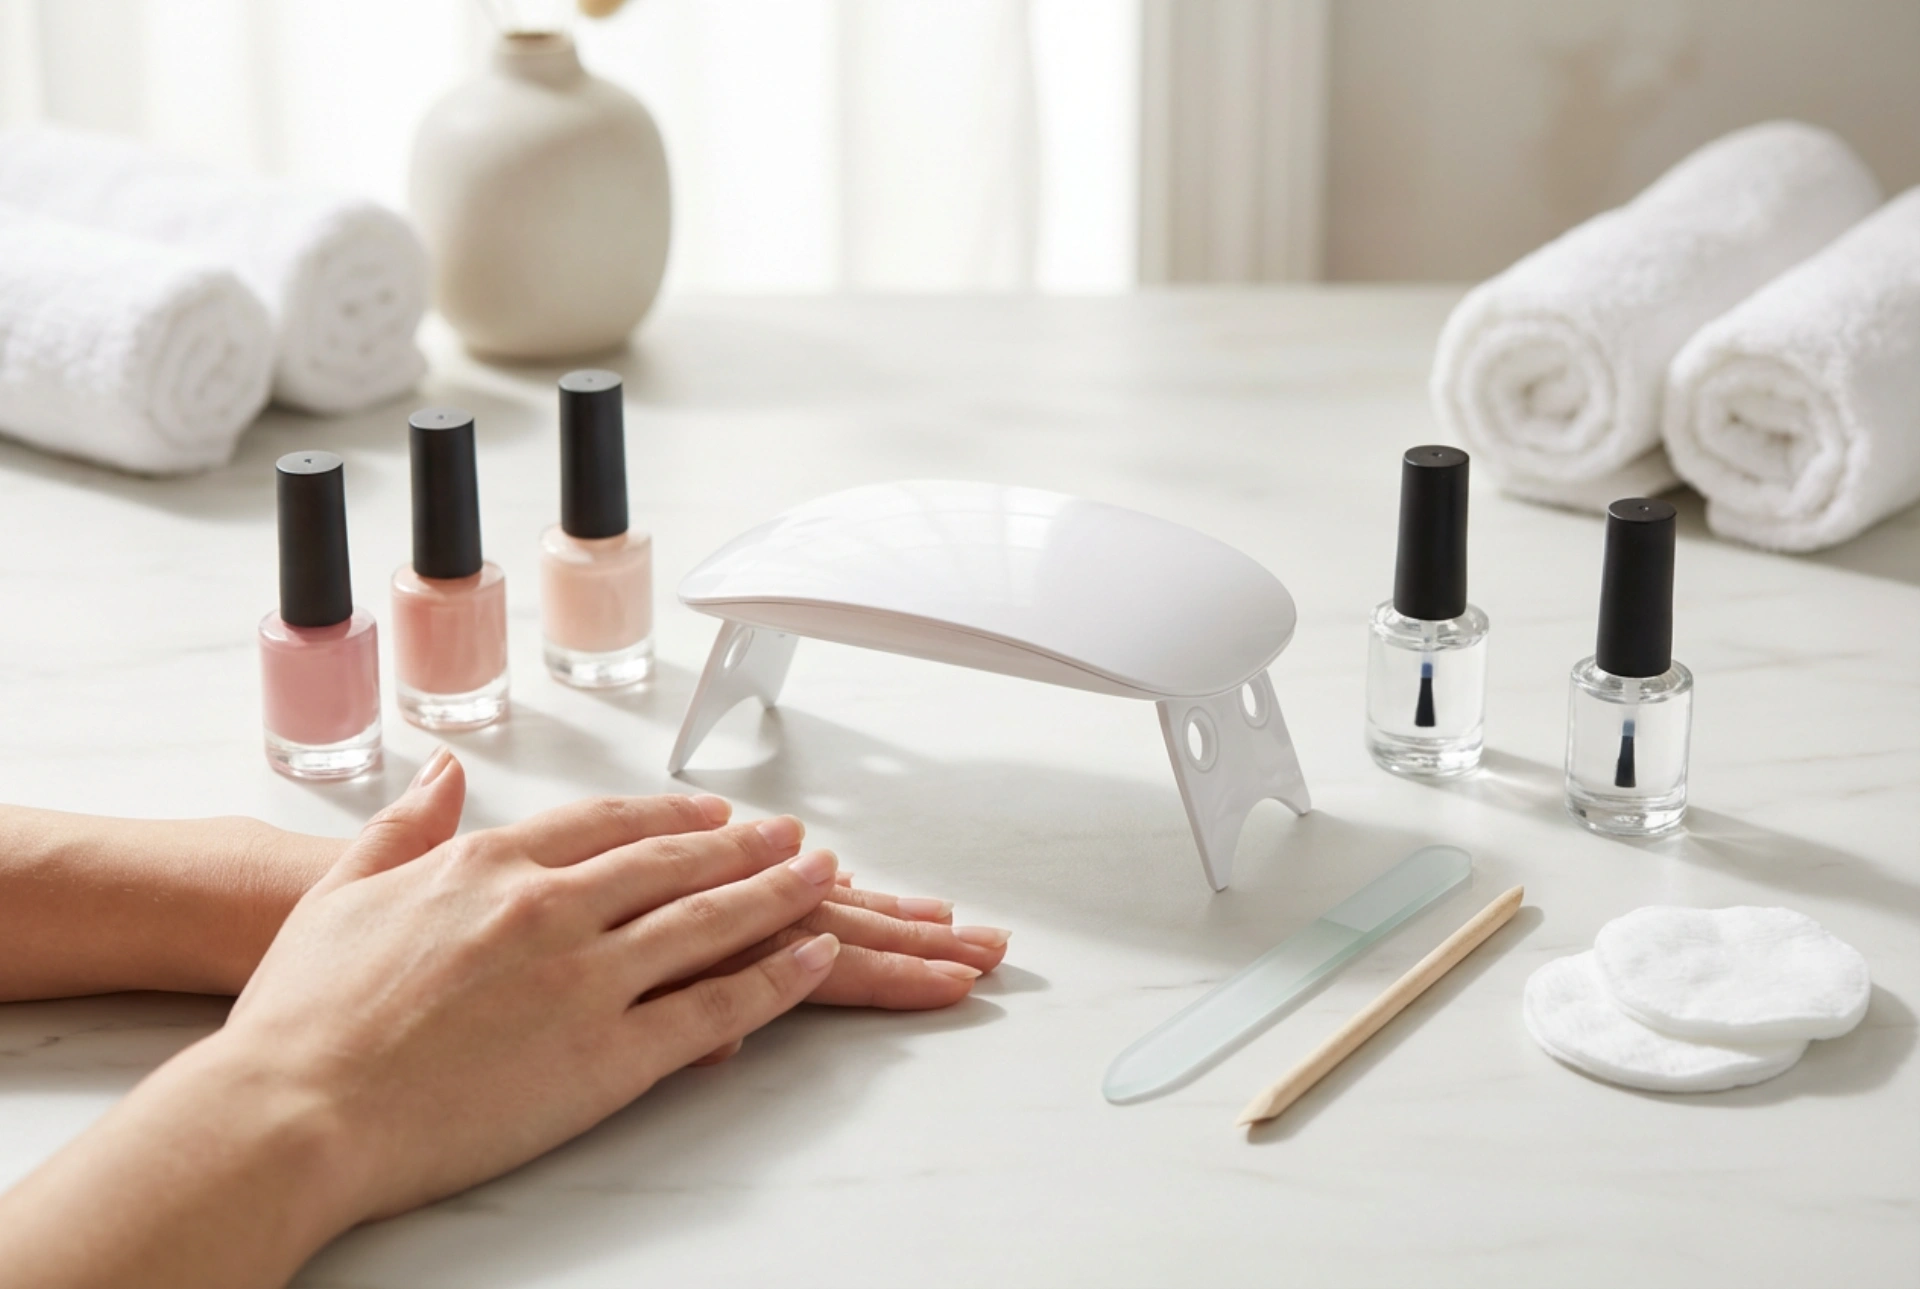
A starter kit for gel nails is a curated collection of items needed to perform a complete gel manicure from start to finish. While the contents can vary slightly, most kits include a core set of essentials designed to work together. The central piece of any kit is the curing lamp, which is what hardens the gel polish and gives it its signature durability. The rest of the items focus on preparing the nail, applying the colour, and ensuring a glossy, protective finish.
The Essential Components
To get started, your kit should contain several key items. Let's break down what they are and why they're important.
- UV/LED Lamp: This is the most crucial tool. The lamp emits specific wavelengths of light that cure, or harden, the gel polish in a matter of seconds. LED lamps are generally faster than traditional UV lamps.
- Base Coat: This is the foundation of your manicure. A gel base coat is applied first to help the colour adhere to your natural nail and to create a protective barrier.
- Top Coat: Applied as the final layer, the top coat seals in the colour, provides a high-gloss or matte finish, and protects the manicure from chipping and scratching. Some are 'no-wipe', meaning they don't leave a sticky residue after curing.
- Gel Polish Colours: Most starter kits come with a few popular shades of gel polish. These special polishes are formulated to cure under a UV or LED light.
- Nail Prep Tools: Proper preparation is vital for a long-lasting manicure. Your kit will likely include a nail file for shaping, a buffer to gently rough up the nail surface for better adhesion, and a cuticle pusher to neaten the nail bed.
- Cleanser/Wipes: These are typically alcohol-based solutions used to cleanse the nail plate of any oils and residue before application. They are also used at the end to wipe away the sticky inhibition layer that some top coats leave behind after curing.
How to Use Your Home Gel Nail Kit: A Step-by-Step Guide
Using a gel nail kit is a systematic process. Following these steps carefully will ensure a smooth, professional-looking result that lasts for two weeks or more.
Step 1: Prepare Your Nails
Start with clean, dry hands. Gently push back your cuticles using a cuticle pusher. Shape your nails to your desired length and form using a nail file. Next, take a buffer block and very lightly buff the entire surface of each nail. This removes the shine and creates a slightly textured surface for the base coat to grip onto. Finally, wipe each nail with a cleanser wipe to remove any dust and natural oils.
Step 2: Apply the Base Coat
Apply a very thin, even layer of the gel base coat to one hand. Be careful not to get any product on your skin or cuticles, as this can cause lifting later on. 'Cap' the free edge of the nail by running the brush along the tip. Cure the base coat under your UV/LED lamp for the time specified in the product's instructions (usually 30-60 seconds).
Step 3: Apply the Gel Colour
Now for the fun part. Apply a thin layer of your chosen gel polish colour. Just like the base coat, thinness is key to proper curing. Avoid the skin and cap the free edge. Cure this layer under the lamp. If the colour looks streaky, don't worry. Apply a second thin coat, repeating the same process and curing it again. Most colours require two coats for full opacity.
Step 4: Apply the Top Coat
To seal everything in and add shine, apply a thin layer of the gel top coat. Make sure to cover the entire nail and cap the free edge once more. This final layer protects your manicure from daily wear and tear. Cure it under the lamp for the recommended time. This final cure is often slightly longer to ensure the polish is completely hard.
Step 5: The Final Wipe
If your top coat is not a 'no-wipe' formula, it will have a slightly sticky film on it after curing. Take a fresh cleanser wipe and firmly wipe the surface of each nail to reveal the smooth, glossy finish underneath. To finish, apply a drop of cuticle oil to nourish the skin around your nails.
Tips for a Perfect, Long-Lasting Manicure
To get the most out of your at-home gel manicure, keep a few pro tips in mind. Proper removal is just as important as application for maintaining nail health, so always use a dedicated gel remover and avoid peeling or picking off the polish. Always apply products in thin coats, as thick layers won't cure properly and can lead to wrinkling or bubbling. Keeping the polish off your cuticles and skin prevents lifting and helps the manicure last longer. With a little practice, your home gel kit will become your go-to for beautiful, durable nails.


