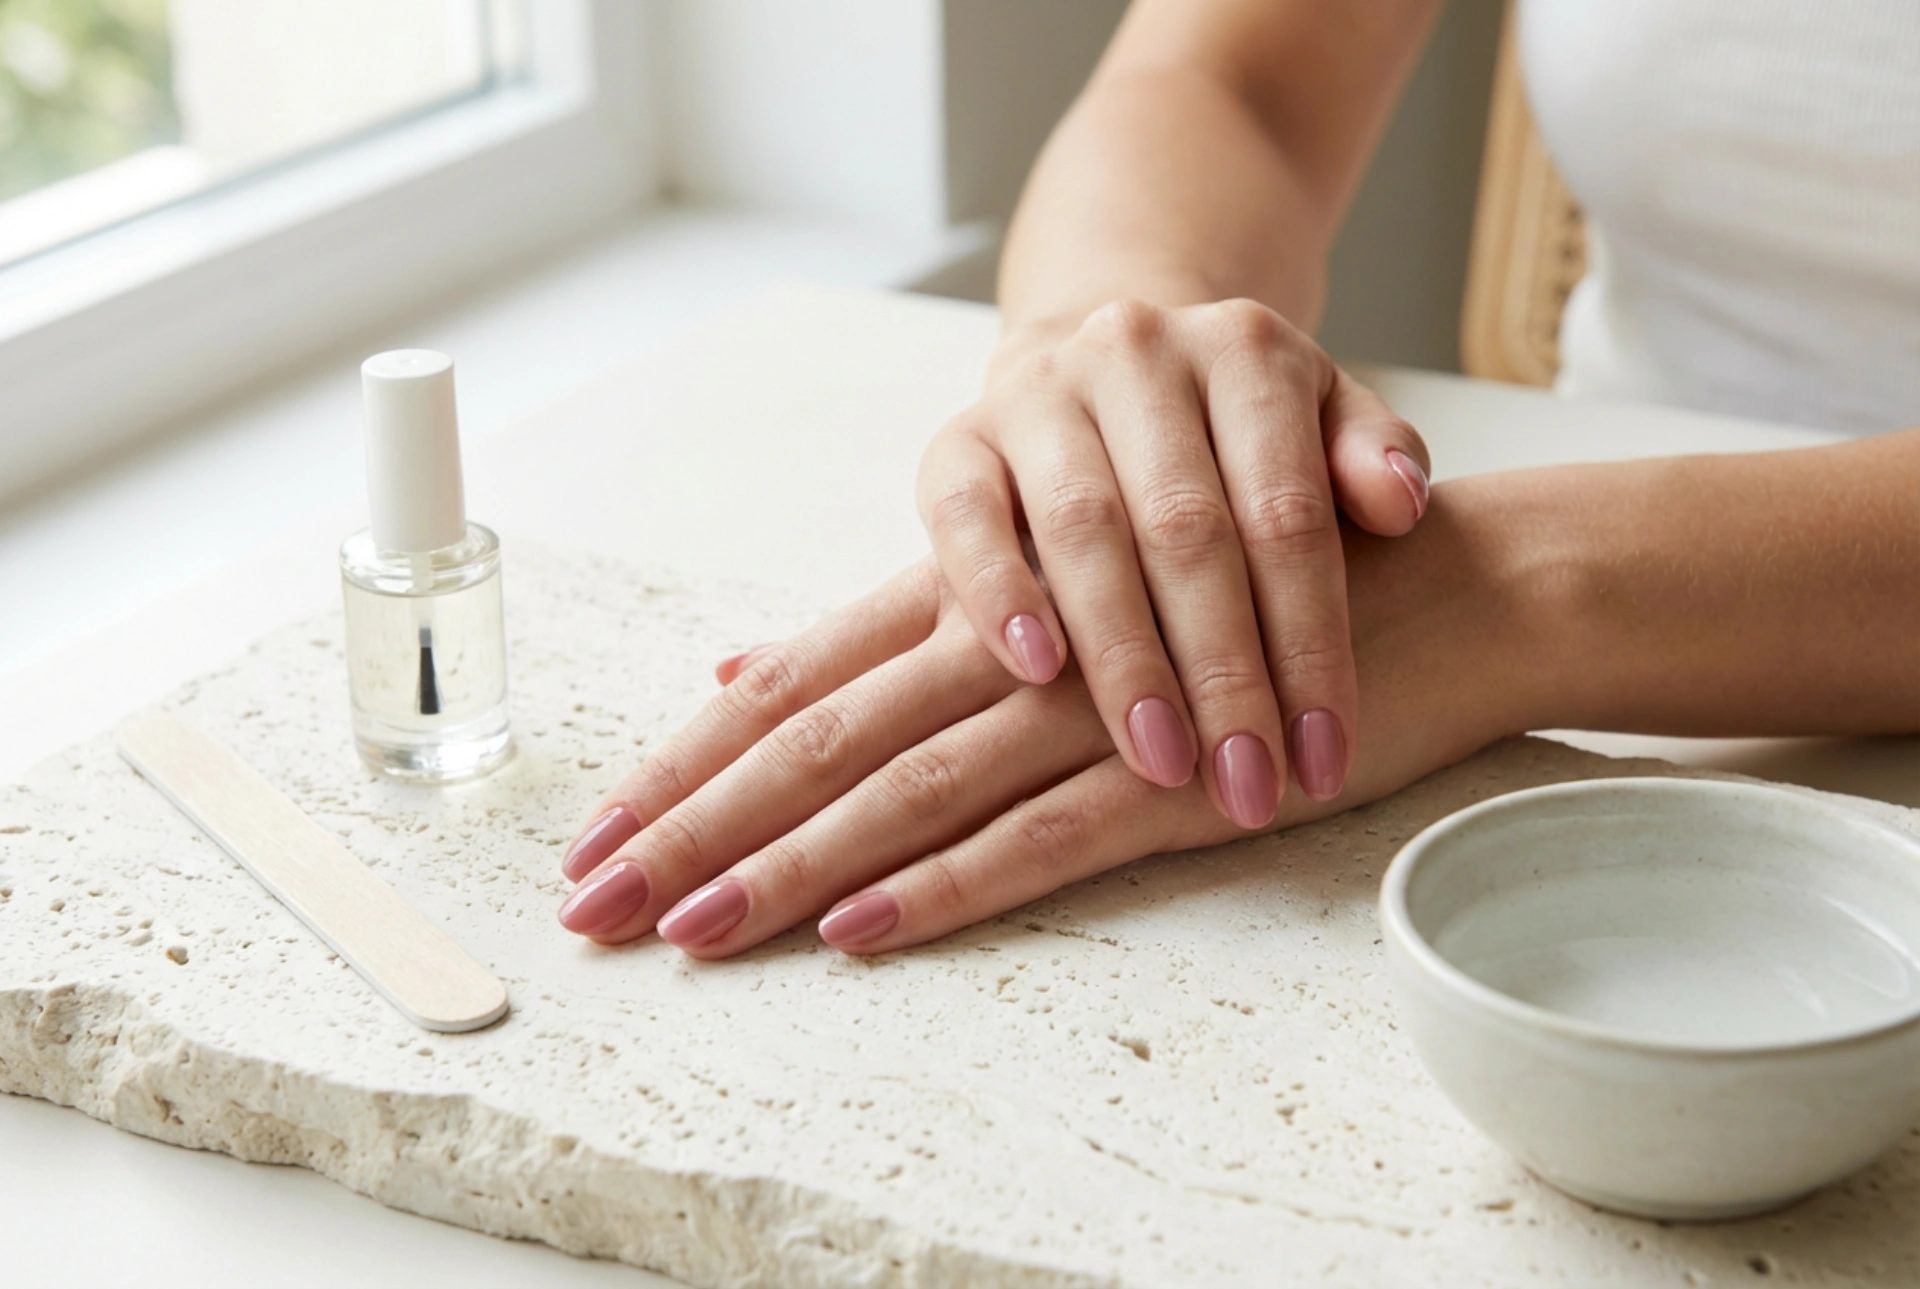


A beautiful, long-lasting manicure is a hallmark of well-groomed hands. For many, the challenge lies in finding a solution that withstands daily chores without chipping or losing its shine. A hybrid manicure offers the perfect balance of durability and aesthetic appeal, providing a glossy finish that can last for weeks. While often associated with salon visits, achieving a professional-looking hybrid manicure at home is entirely possible with the right technique and tools. This guide will walk you through the entire process, from preparing your nails to the final, glossy top coat.
Preparing the Nail Plate for a Hybrid Manicure
Proper preparation is the most critical step for ensuring your hybrid manicure lasts as long as possible. A well-prepared nail plate provides the ideal surface for the polish to adhere to, preventing lifting and chipping. Skipping this stage can compromise the entire manicure.
The Essential Preparation Steps
- Clean and Shape: Begin by washing your hands thoroughly. Gently push back your cuticles using a wooden stick or a cuticle pusher. Avoid cutting them if you are not experienced, as this can lead to issues. Next, shape your nails to your desired length and form using a fine-grit nail file. Always file in one direction to prevent splitting.
- Buff the Surface: Using a gentle buffer block, lightly buff the entire surface of each nail. The goal is not to thin the nail, but simply to remove the natural shine. This creates a slightly rougher texture that the base coat can grip onto more effectively.
- Degrease the Nail: After buffing, there will be fine dust on the nails. Wipe each nail thoroughly with a lint-free wipe soaked in a special nail cleaner or degreaser. This step removes all oils, moisture, and dust, leaving a perfectly clean and dehydrated surface ready for application. Do not touch the nail surface with your fingers after this step.
The Hybrid Application Process: A Step-by-Step Guide
A hybrid manicure is built in layers, with each layer being cured (hardened) under an LED or UV lamp. Patience and precision are key to achieving a smooth, even finish. Always apply thin coats, as thick layers may not cure properly and can lead to a wrinkled appearance.
Step 1: The Base Coat
The base coat acts as a protective barrier for your natural nail and provides a sticky foundation for the colour polish. Apply a very thin, even layer of the hybrid base coat to the entire nail, being careful not to touch the cuticles or surrounding skin. 'Cap' the free edge of the nail by running the brush along its tip. This helps to seal the manicure and prevent chipping. Cure the base coat under your lamp according to the product's instructions, typically for 30-60 seconds in an LED lamp.
Step 2: The Colour Coats
Now for the fun part – the colour. Apply a thin, even layer of your chosen hybrid colour polish. Again, avoid flooding the cuticles. If you do get any polish on your skin, clean it off with a small brush or wooden stick dipped in cleaner before curing. Capping the free edge is also important with each colour coat. Cure the layer under the lamp. Most colours require two coats for full opacity. Apply the second thin coat in the same manner and cure it again for the recommended time.
Step 3: The Top Coat
The top coat is what gives your manicure its signature high-gloss shine and robust protection. Apply a thin layer of the hybrid top coat over the cured colour, making sure to cover the entire nail and cap the free edge one last time. This final layer seals in the colour and protects it from scratches and dulling. Cure it under the lamp, sometimes for a slightly longer duration than the previous coats, as specified by the manufacturer.
Essential Tools for a Home Hybrid Manicure
To get started with hybrid manicures at home, you'll need a few key items. Investing in a good quality starter kit can be a convenient option. Your basic checklist should include:
- An LED or UV lamp for curing the polish.
- A nail file (around 180 grit) and a buffer block.
- Wooden sticks or a cuticle pusher.
- Lint-free cotton wipes.
- A nail cleaner/degreaser solution.
- A hybrid base coat.
- Your chosen hybrid colour polishes.
- A hybrid top coat (look for 'no-wipe' versions for simplicity).
- Cuticle oil for post-manicure care.
Tips for a Flawless, Long-Lasting Finish
With practice, your technique will improve. Keep these professional tips in mind to avoid common pitfalls and extend the life of your manicure. Firstly, thin layers are non-negotiable for proper curing and a sleek look. Secondly, always remember to cap the free edge of the nail to prevent chipping. Thirdly, maintaining a tiny gap between the polish and the cuticle prevents the product from lifting as your nail grows. Finally, once your manicure is complete and the final sticky layer (if any) is wiped away, nourish your skin. Apply a hydrating cuticle oil and a good hand cream to restore moisture and keep your hands looking elegant.


