


The mesmerising, shimmering line that moves with the light is the hallmark of the cat eye manicure, a trend that brings a touch of magic to your fingertips. This captivating effect, reminiscent of a cat's eye, is surprisingly achievable at home with the right tools and techniques. It all comes down to a special type of polish and a small magnet. If you've ever wondered how to create that deep, three-dimensional look on your nails, this guide will walk you through the entire process, from preparation to the final, glossy finish.
What Is Magnetic Hybrid Polish?
Magnetic hybrid polish is a unique nail product infused with fine metallic particles. When a magnet is held over the wet polish, these particles react and move, arranging themselves into specific patterns. The most common pattern is a sharp, bright line, which creates the signature cat eye effect. By changing the position and angle of the magnet, you can manipulate the particles to form different designs, such as waves, crosses, or diagonal stripes. This makes it a versatile tool for creating custom nail art with a professional-looking finish that has incredible depth and dimension.
Preparing Your Nails for the Manicure
Proper preparation is the foundation of any long-lasting hybrid manicure. Before you even open the magnetic polish, ensure your nails are clean, shaped, and ready for application.
Nail and Cuticle Preparation
Start by removing any old polish. Gently push back your cuticles and trim any excess if necessary. Shape your nails to your desired length and form using a nail file. Afterwards, gently buff the surface of your nail plate with a soft buffer block. This removes any natural oils and creates a slightly rough surface for the polish to adhere to, which helps prevent chipping and lifting.
Applying the Base Coat
Once your nails are shaped and buffed, wipe them with a lint-free pad soaked in a nail cleaner or isopropyl alcohol to remove any dust and oils. Apply a thin layer of a hybrid base coat to each nail, making sure to cap the free edge. Cure the base coat under an LED or UV lamp according to the product's instructions. This base layer protects your natural nail and provides a strong foundation for the colours to come.
Creating the Cat Eye Effect: Step-by-Step
With your nails prepped, you're ready for the main event. For the best results, it's recommended to work on one nail at a time during the magnetic stage to ensure the polish doesn't start to set before you use the magnet.
- Step 1: Apply a Base Colour (Optional): For a deeper, more intense effect, you can apply a coat of a dark, standard hybrid colour (like black or dark blue) and cure it. This will make the magnetic line pop. Alternatively, you can proceed directly to the magnetic polish.
- Step 2: Apply the First Coat of Magnetic Polish: Apply a thin, even layer of your chosen magnetic hybrid polish. Cure it under the lamp. At this stage, you don't need to use the magnet.
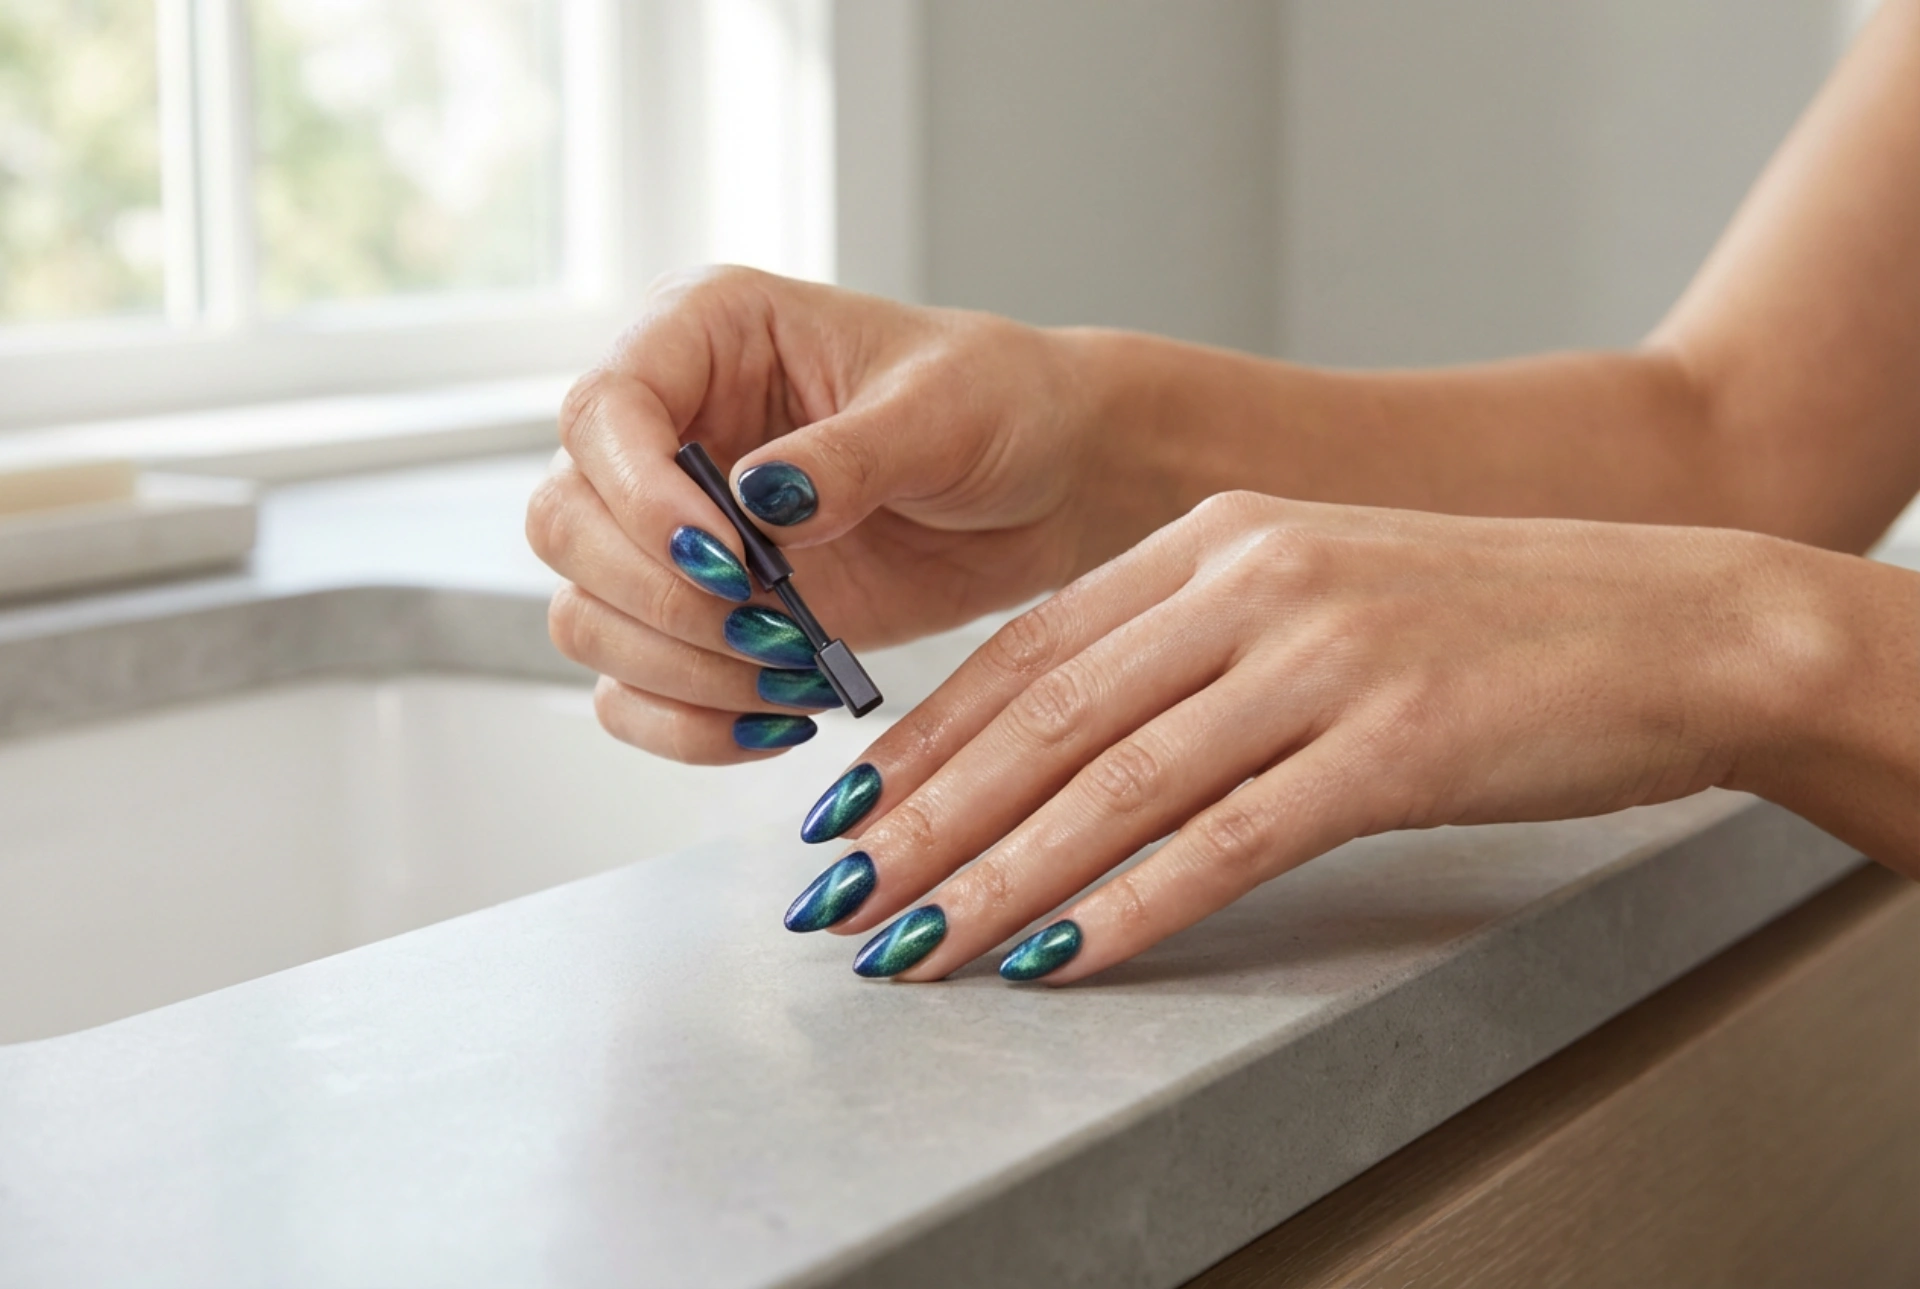
- Step 3: Apply the Second Coat and Use the Magnet: Apply a second, slightly thicker coat of the magnetic polish. Do NOT cure it yet. Immediately take your magnet and hold it close to the nail for 5-10 seconds. You can place it diagonally, horizontally, or vertically to create different lines. Do not touch the wet polish with the magnet. You will see the metallic particles shift and form a crisp line.
- Step 4: Cure the Design: Once you are happy with the placement of the cat eye line, immediately cure the nail under the lamp. Curing locks the metallic particles in place.
- Step 5: Apply the Top Coat: To finish, apply a thin layer of a no-wipe hybrid top coat. This will protect your design, add a high-gloss shine, and ensure your manicure lasts. Cure the top coat under the lamp for the final time.
Tips for a Perfect Cat Eye Finish
Achieving a sharp and defined cat eye effect can take a little practice. Here are a few tips to help you master the technique:
- Work One Nail at a Time: Apply the second coat of magnetic polish and use the magnet on one nail before moving to the next. This prevents the polish from self-levelling and blurring the magnetic effect.
- Magnet Proximity is Key: Hold the magnet as close as possible to the nail without actually touching it. The closer the magnet, the sharper and more defined the line will be.
- Experiment with Magnets: Many different magnets are available, including rectangular ones for straight lines and round ones for creating curved effects. Experiment with different types and angles to discover new patterns.
- Shake the Bottle Well: The metallic particles in the polish can settle at the bottom. Always shake the bottle thoroughly before use to ensure the particles are evenly distributed.


