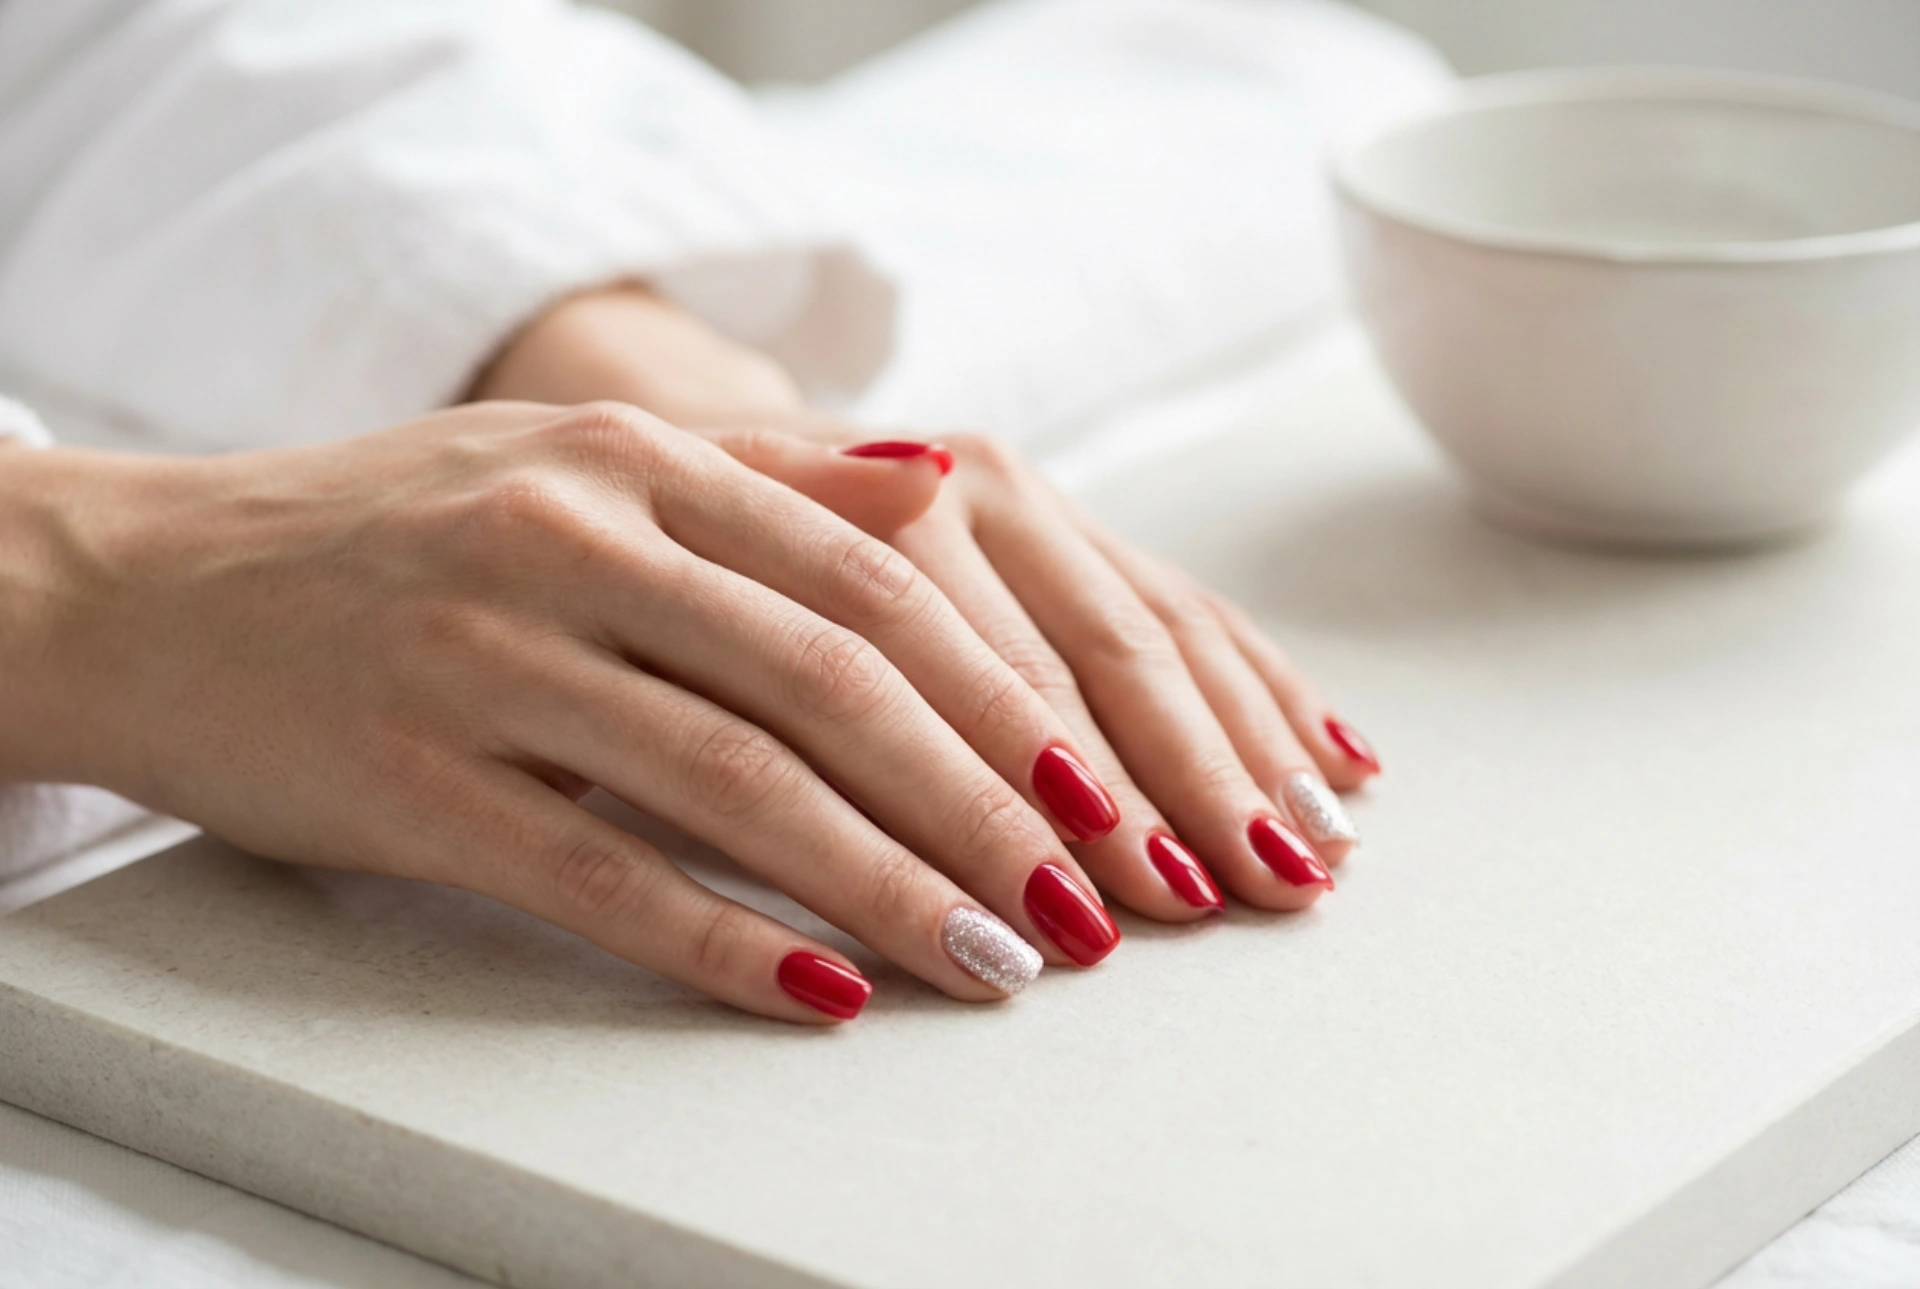


A classic red manicure is the epitome of elegance and confidence. It's a timeless choice that suits any occasion. When you introduce a subtle hint of silver glitter, this iconic look is transformed into something modern and captivating. Creating this sophisticated style at home is easier than you might think. With the right techniques and a little patience, you can achieve a flawless, sparkling finish that rivals a professional salon manicure, perfectly accentuating the beauty of your hands.
Preparing Your Nails for a Flawless Finish
Proper preparation is the foundation of any long-lasting manicure. Neglecting this step can lead to chipping and an uneven finish. Start by ensuring your nails are completely clean and free of any old polish. Use a gentle nail polish remover, even if you weren't wearing any colour, to eliminate oils and residue.
- Shape and File: Gently file your nails into your desired shape. Whether you prefer square, oval, or almond, aim for smooth, uniform edges. Always file in one direction to prevent splitting.
- Buff the Surface: Lightly buff the surface of your nails. This creates a slightly rougher texture that helps the polish adhere better, but be careful not to overdo it, as this can weaken the nail.
- Cuticle Care: Soften your cuticles by soaking your fingertips in warm, soapy water for a few minutes or by using a cuticle remover solution. Gently push them back with a cuticle pusher or an orange stick. Avoid cutting your cuticles, as they serve as a protective barrier against bacteria.
- Cleanse Again: Finally, wipe each nail with a lint-free pad soaked in rubbing alcohol to remove any remaining dust or oils from the preparation process.
Choosing Your Shades and Glitter
The combination of red and silver offers a wide range of possibilities. The key is to select shades that complement each other and your skin tone. A classic, true red is universally flattering, while a deeper, wine-red offers a more dramatic and sophisticated feel. For a brighter, more playful look, consider a cherry or scarlet red.
When it comes to glitter, you also have choices. Fine silver glitter provides a delicate, shimmering effect, perfect for a subtle accent. Chunky or holographic glitters create a bolder, more eye-catching statement. You can use a pre-mixed glitter polish, which combines the glitter particles in a clear or coloured base, or opt for loose cosmetic-grade glitter for more control over the placement and density.
Mastering the Application Technique
With your nails prepped and your colours chosen, it's time for the application. Work in thin, even layers to ensure a smooth finish and quicker drying time.
Step 1: The Essential Base Coat
Never skip the base coat. It serves multiple purposes: it protects your natural nails from staining (especially important with pigmented reds), fills in any minor ridges for a smoother canvas, and gives the coloured polish something to grip onto, extending the life of your manicure.
Step 2: Applying the Red Polish
Apply your chosen red polish in two thin coats. Start with a single stripe down the centre of the nail, then fill in each side. Allow the first coat to dry for a couple of minutes before applying the second. This technique ensures full, opaque coverage without any streaks.
Step 3: Adding the Silver Glitter
This is where your creativity comes into play. You can apply glitter to all your nails, but an accent nail—typically on the ring finger—is a popular and chic choice. Here are a few methods:
- Using Glitter Polish: The simplest method is to apply one or two coats of silver glitter polish over your dry red base on the desired nail(s).
- The Dipping Method: While the second coat of red polish is still wet, gently dip the nail into a small pot of loose glitter. Lightly press the glitter down to secure it before brushing away any excess.
- The Sponge Technique: For a concentrated glitter effect, apply some glitter polish to a corner of a makeup sponge and dab it onto the nail. The sponge absorbs the excess clear polish, leaving behind a dense layer of glitter. This is great for creating a glitter gradient or ombre effect.
Sealing and Maintaining Your Manicure
The final step is crucial for longevity and a high-gloss shine. Apply a generous layer of a good quality top coat over all your nails. For glitter nails, you may need two layers to create a perfectly smooth surface, as the glitter can have a rough texture. The top coat will seal in your design, protect it from chipping, and enhance the sparkle.
To make your beautiful manicure last, be mindful of your hands. Wear gloves when doing dishes or cleaning with harsh chemicals. Apply cuticle oil daily to keep your cuticles and the skin around your nails hydrated, which can also help prevent the polish from lifting. With proper care, your red and silver glitter nails will remain stunning for days.


