


Beautiful, long, and perfectly shaped nails are a goal for many beauty enthusiasts. Achieving this look at home can seem challenging, but modern techniques have made it more accessible than ever. One of the most popular and efficient methods is using dual forms with gel. This technique allows you to create strong and elegant nail extensions with a smooth, professional finish. If you're ready to master this skill, our comprehensive guide will walk you through every step, from preparation to the final glossy top coat.
What Are Dual Forms and Why Use Them?
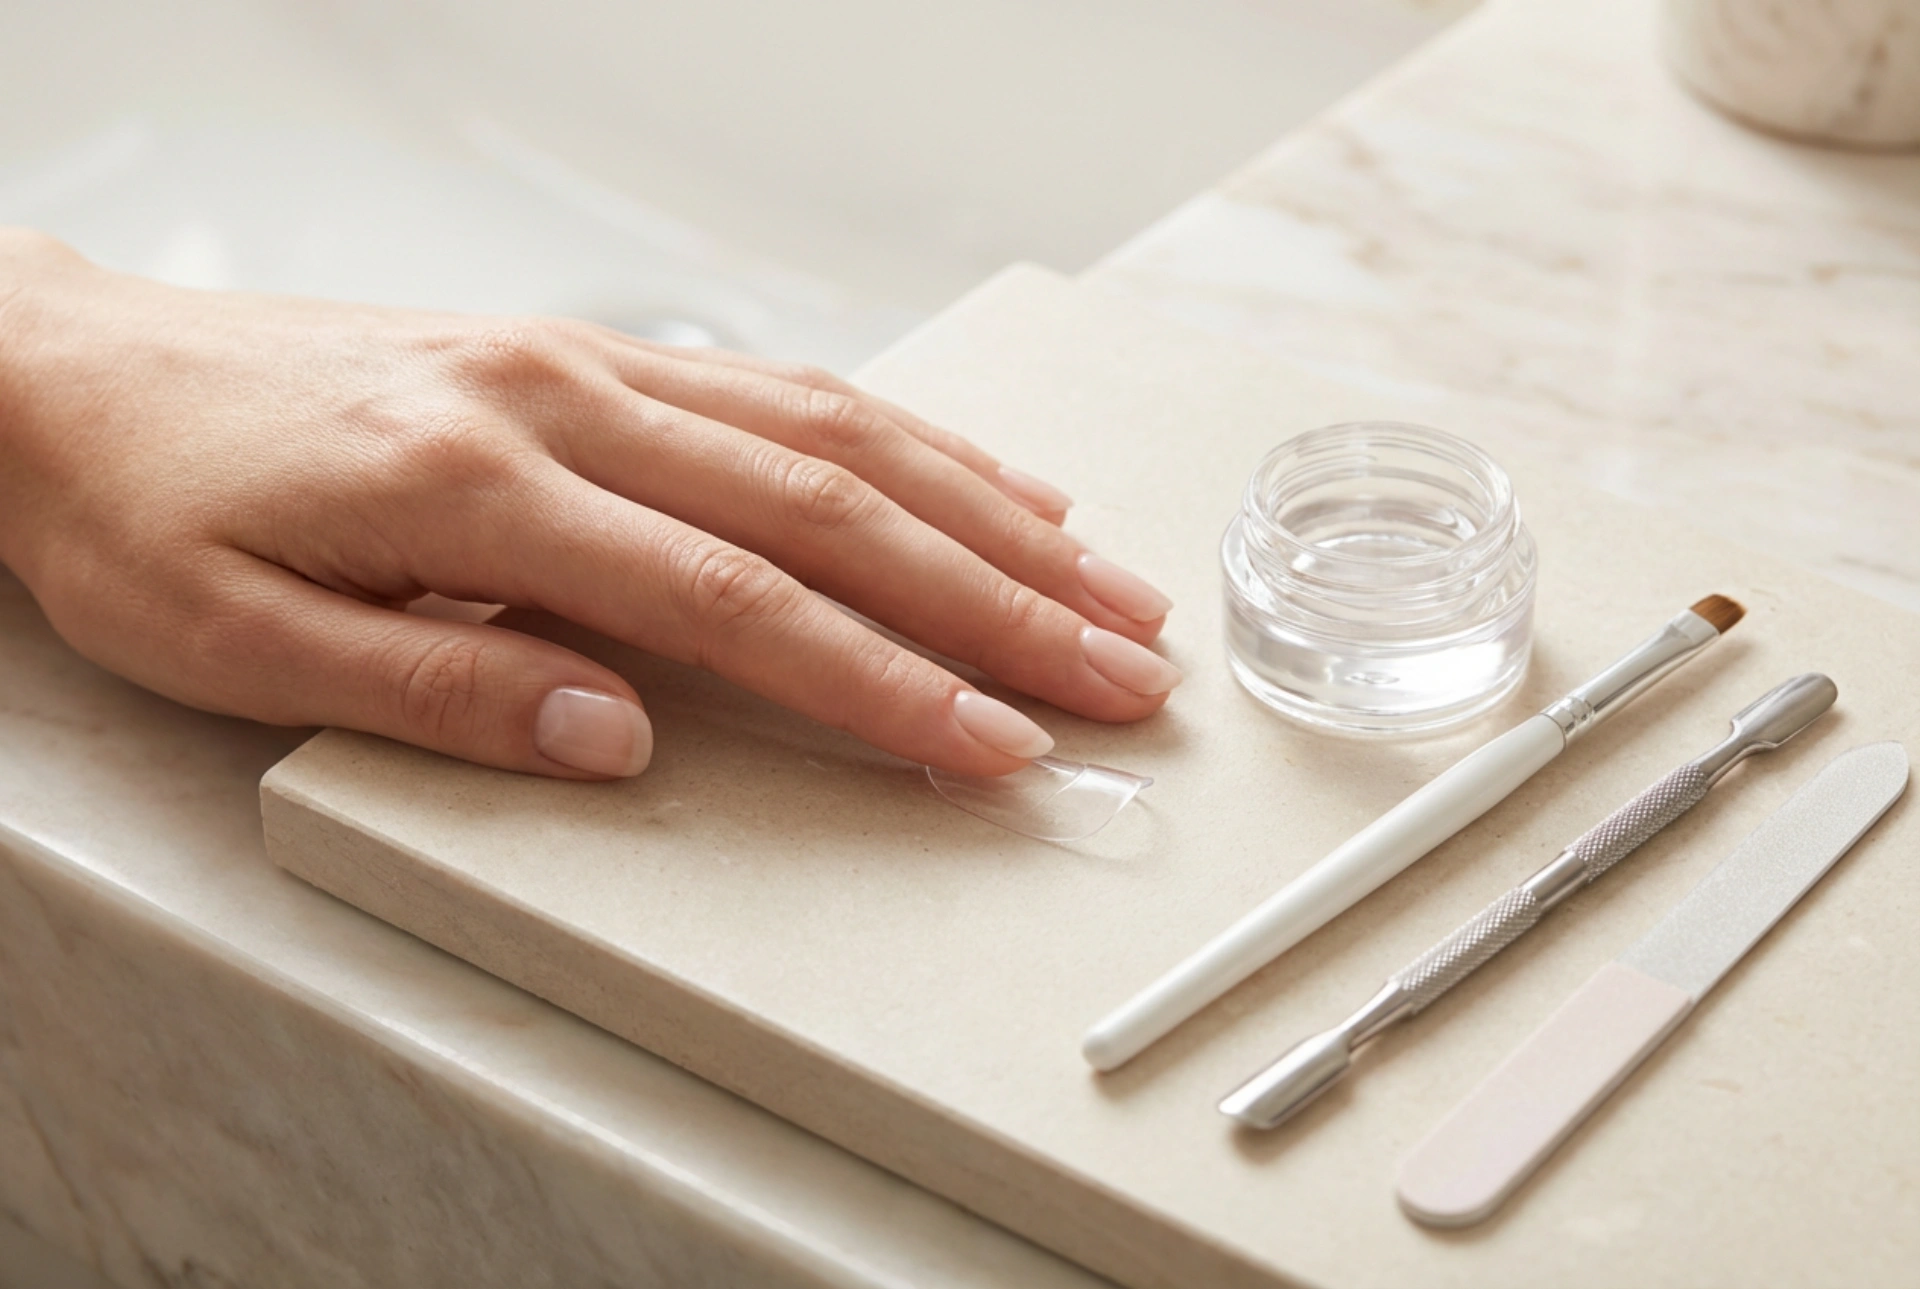
Dual forms are reusable, transparent plastic moulds shaped like a nail. Unlike traditional paper forms that are placed under the natural nail to build an extension, dual forms work as a template from the top. You apply the building gel inside the form and then press it onto the natural nail to create the extension. This method offers several key advantages:
- Speed: It significantly reduces the time needed for application and shaping, as the form itself creates the basic structure and a smooth surface.
- Consistency: It’s easier to create nails of a uniform shape and length across all ten fingers.
- Perfect C-Curve: The forms are designed to create a beautiful and strong C-curve, which is essential for the durability of the extension.
- Less Filing: Because the top surface of the nail is moulded smooth by the form, it requires minimal filing and buffing, saving time and reducing dust.
Preparing for Your At-Home Manicure
Proper preparation is the key to long-lasting and safe nail extensions. Skipping these steps can lead to lifting and may damage your natural nails. Before you begin, gather your tools and prepare your nail plate carefully.
Essential Tools and Supplies
To perform the extension, you will need a few key items. Ensure you have them all ready before you start:
- Nail file (180/240 grit) and a buffer block
- Cuticle pusher or wooden stick
- Nail cleanser/dehydrator
- Acid-free primer
- Gel base coat
- Building gel (in a pot or tube)
- Dual forms in various sizes
- A gel brush and a small dish with cleanser for cleaning the brush
- An LED or UV lamp suitable for curing gel products
- Gel top coat
- Cuticle oil
Preparing the Natural Nail Plate
Follow these steps to ensure your nails are perfectly prepped:
- Clean and Sanitise: Start by washing your hands. Gently push back your cuticles using a cuticle pusher or an orangewood stick. If necessary, carefully trim any excess non-living tissue.
- Shape the Nail: Lightly file the free edge of your natural nail to give it a neat shape.
- Buff the Surface: Using a gentle buffer, carefully remove the shine from the entire surface of the nail plate. This creates a slightly rough texture that helps the product adhere better. Be gentle to avoid thinning the natural nail.
- Dehydrate: Remove all dust with a soft brush and wipe the nail with a lint-free pad soaked in a nail cleanser or dehydrator. This step removes any oils and moisture.
- Apply Primer: Apply a thin layer of acid-free primer to the natural nail plate. This acts as a double-sided tape, creating a strong bond between your nail and the gel product. Allow it to air dry completely.
Applying Gel Extensions with Dual Forms: A Step-by-Step Guide
Once your nails are prepped, you are ready for the main event. Work on one nail at a time for the best results.
- Step 1: Select the Form Size. Choose a dual form for each nail. The form should be slightly wider than your natural nail plate to accommodate the gel, fitting comfortably from one side wall to the other without pressing too hard.
- Step 2: Apply a Base Coat. Apply a thin layer of gel base coat to your natural nail and cure it under your lamp according to the product's instructions (typically 30-60 seconds).
- Step 3: Apply Gel to the Form. Squeeze or scoop a bead of building gel and place it inside the dual form. Using your gel brush lightly dampened with cleanser, spread the gel evenly inside the form to your desired length and thickness. Make it slightly thinner near the cuticle area and thicker at the stress point (where the extension meets the natural nail tip).
- Step 4: Place the Form on the Nail. Carefully press the gel-filled form onto your nail, starting at the cuticle area at a 45-degree angle and slowly lowering it towards the free edge. Apply gentle, even pressure. You should see the gel spread evenly underneath. If any gel oozes out around the cuticles or sidewalls, clean it up immediately with your brush and cleanser before curing.
- Step 5: Cure the Nail. While holding the form in place, cure the nail under the lamp for the recommended time. It can be helpful to do a short 'flash cure' for 10-15 seconds to hold it in place before completing the full cure. For transparency and full curing, it's a good idea to flip your hand over and cure the underside of the nail as well.
- Step 6: Remove the Dual Form. Once fully cured, gently pinch the sides of the dual form at the tip and wiggle it from side to side to release it from the gel. It should pop off easily, revealing a smooth, perfectly shaped nail.
- Step 7: Final Shaping and Finishing. The nail will have a slight sticky inhibition layer; wipe this off with cleanser. Use a nail file to refine the shape of the free edge. If needed, you can lightly buff the entire nail, but this is often unnecessary with dual forms.
- Step 8: Apply Top Coat. Apply a layer of gel top coat to seal the nail, add shine, and provide protection. Cure one final time under the lamp.
Caring for Your New Gel Extensions
To keep your extensions looking their best for as long as possible, a little aftercare goes a long way. Apply cuticle oil daily to nourish the skin around your nails. Avoid using your nails as tools to open cans or scrape things, as this can cause lifting or breakage. When it's time for removal, never peel or pull the extensions off. They should be carefully filed down to avoid damaging the natural nail plate underneath.


