


The combination of black and gold is a timeless classic, exuding sophistication and elegance. When translated to nail art, a simple golden stripe on a deep black background can elevate your manicure from ordinary to extraordinary. This chic design is surprisingly versatile, fitting for both formal events and adding a touch of glamour to your everyday look. Best of all, with a few basic tools and a little patience, you can achieve this polished, salon-quality design at home. This guide will walk you through the steps to create the perfect golden stripe on your black nails.
Preparing Your Nails for a Flawless Manicure
Before you even think about polish, proper preparation is key to a long-lasting and smooth finish. A beautiful design deserves a perfect canvas. Start by ensuring your nails are clean and free of any old polish. Gently push back your cuticles and file your nails into your desired shape, whether it be square, oval, or almond. Buff the surface of your nails lightly to create a smooth base for the polish to adhere to. Finally, wipe your nails with a lint-free cloth and a bit of nail polish remover or alcohol to get rid of any oils or dust. The last step in preparation is applying a quality base coat. This not only protects your natural nails from staining but also helps your manicure last longer.
Achieving the Perfect Black Base
The deep, opaque black base is the foundation of this look. Choose a good quality black nail polish for a rich and even colour. After your base coat has completely dried, apply your first thin coat of black polish. The key to a professional finish is to apply thin, even layers rather than one thick one. Allow the first coat to dry for a few minutes before applying a second one. Two coats are usually sufficient to achieve full, streak-free coverage. Patience is crucial here; ensure the black polish is completely dry to the touch before moving on to the golden stripe. Rushing this step can lead to smudges and ruin the entire look.
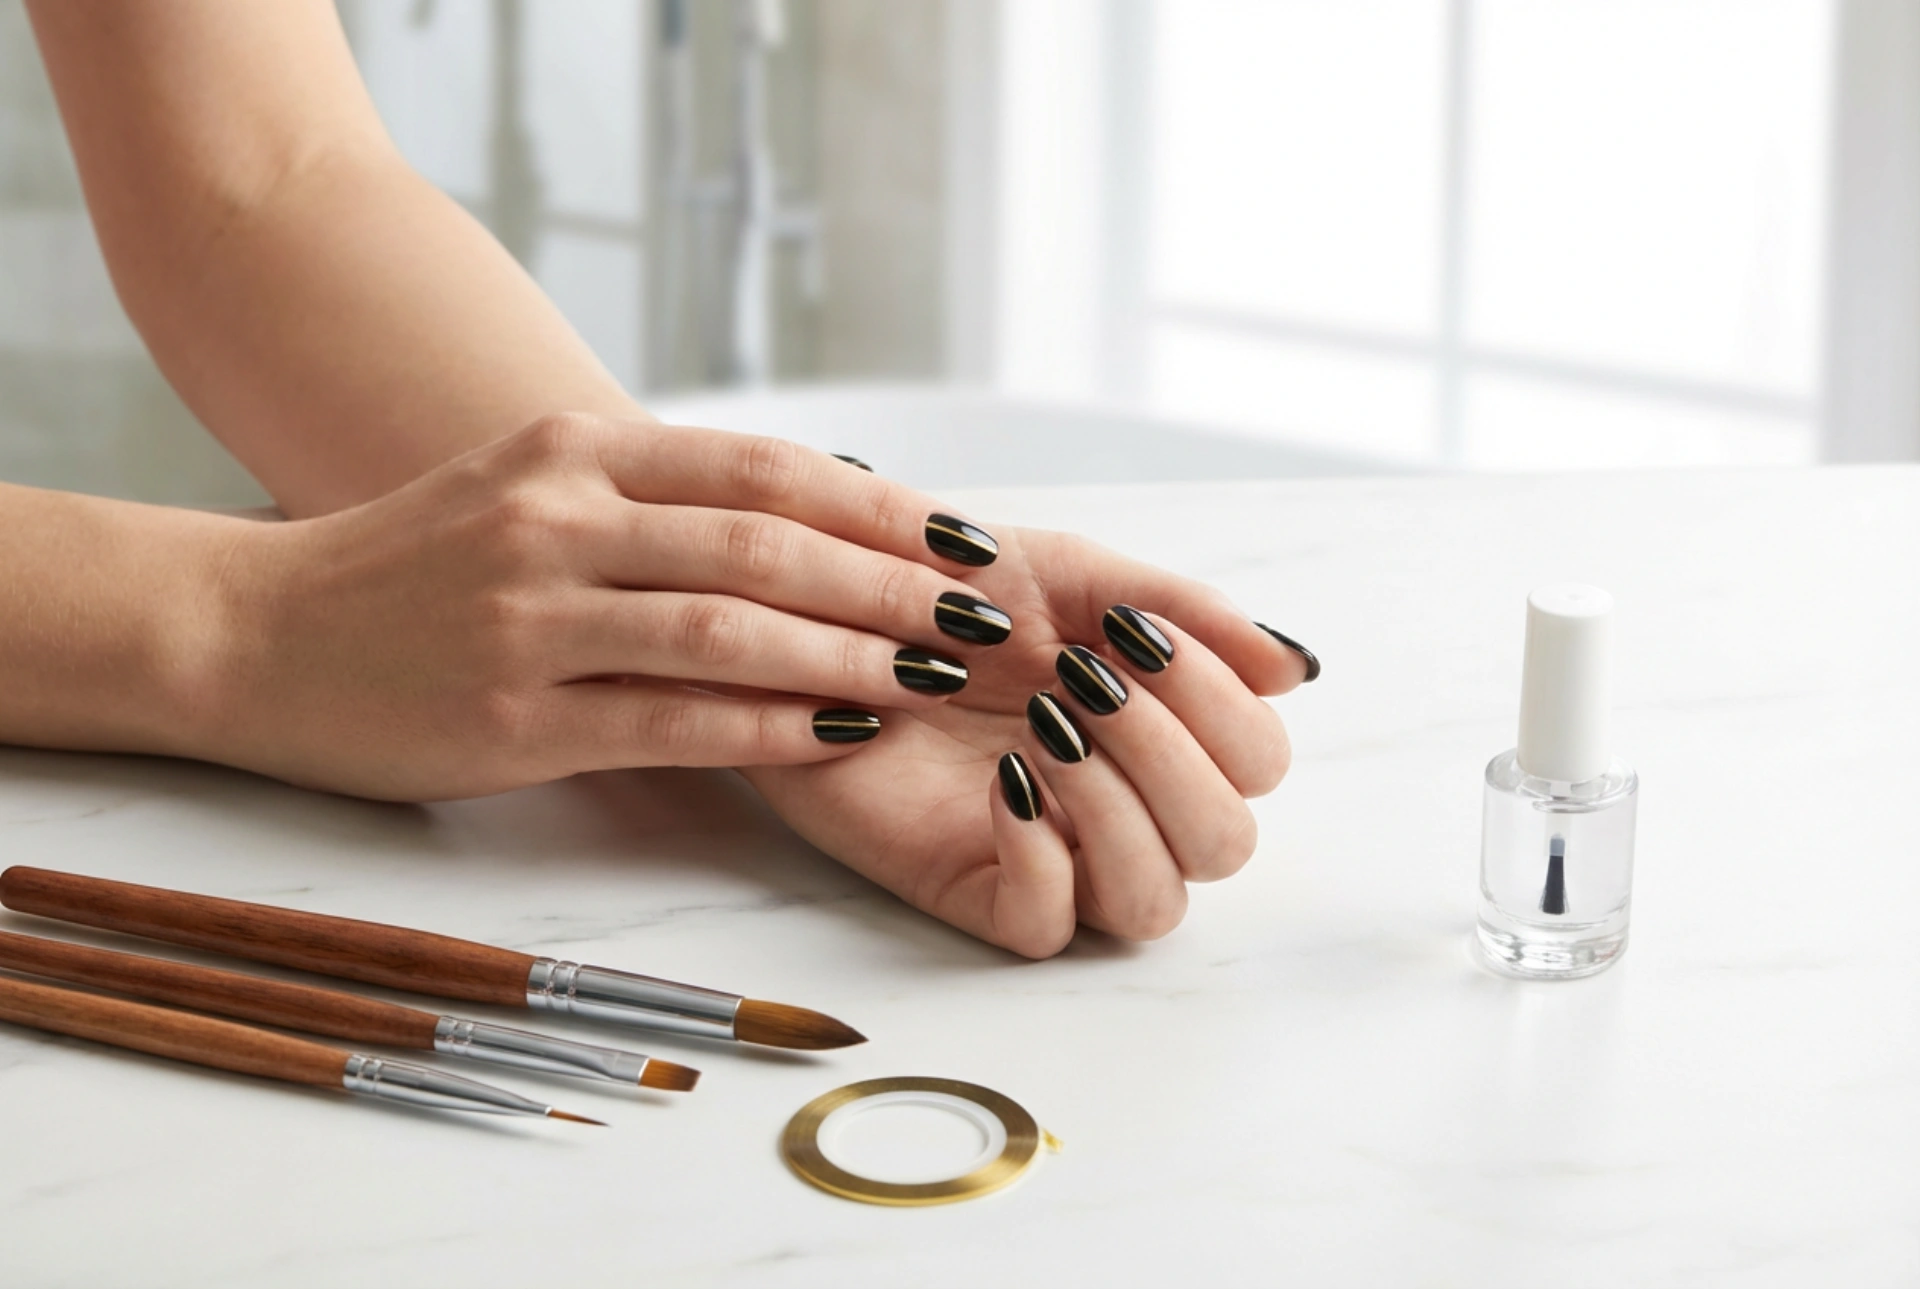
Creating the Golden Stripe: Techniques and Tips
Now for the artistic part: adding the golden accent. There are two primary methods for creating a clean, crisp stripe, depending on your comfort level and the tools you have available. Both can yield beautiful results.
The Striping Tape Method
This method is ideal for beginners or anyone who wants a guaranteed sharp, straight line. Nail striping tape is a very thin, self-adhesive tape designed specifically for nail art.
- Placement: Once your black polish is completely dry, decide where you want your golden stripe to be. Common placements include vertically down the centre, horizontally across the tip, or diagonally for a modern twist.
- Application: Cut a piece of striping tape and press it firmly onto the nail to create the edge of your future stripe. For a single stripe, you will need two pieces of tape placed parallel to each other, creating a channel where you will paint the gold. Ensure the tape edges are sealed against the nail to prevent the gold polish from bleeding underneath.
- Painting: Using a metallic gold nail polish, paint carefully within the channel you've created with the tape. A single, smooth coat should be enough.
- Removal: This is a critical step. While the gold polish is still wet, carefully and slowly peel off the striping tape. If you wait for the polish to dry, it may crack or lift off along with the tape. Pull the tape away in the direction of the stripe for the cleanest line.
The Fine Brush Method
If you have a steady hand or enjoy a more freehand approach, using a fine nail art brush is an excellent option. This method offers more creative freedom for varying the stripe's thickness or even creating curved lines.
- Choose Your Tools: You will need a long, thin nail art brush (often called a striper brush) and a gold nail polish. You can also use gold acrylic paint for more control, but ensure it is sealed with a top coat.
- Load the Brush: Dip the tip of the brush into a small amount of gold polish. It's better to have less polish on the brush and reload if needed, as too much can lead to a thick, blobby line.
- Draw the Line: Rest your hand on a stable surface to minimise shaking. Starting from one end of the nail, draw the line in one continuous, confident stroke. If you're creating a vertical stripe, start at the cuticle and pull the brush straight down towards the tip. Don't press too hard; let the brush do the work.
- Corrections: If you make a small mistake, you can quickly clean it up using a small brush dipped in nail polish remover. Be very careful not to touch the black base.
Sealing Your Design with a Top Coat
The final step is arguably the most important for protecting your artwork. A good top coat will seal the design, prevent chipping, and add a beautiful, glossy shine that makes the colours pop. Wait for the golden stripe to be completely dry—at least 10-15 minutes—before applying the top coat. When you apply it, try to 'float' the brush over the nail. This means using a generous amount of top coat on the brush and applying it with a light touch, without letting the bristles drag across the design. This technique prevents the black and gold colours from smudging or streaking into each other. Be sure to cap the free edge of your nail by running the brush along the tip to further seal the manicure and prevent chips.


