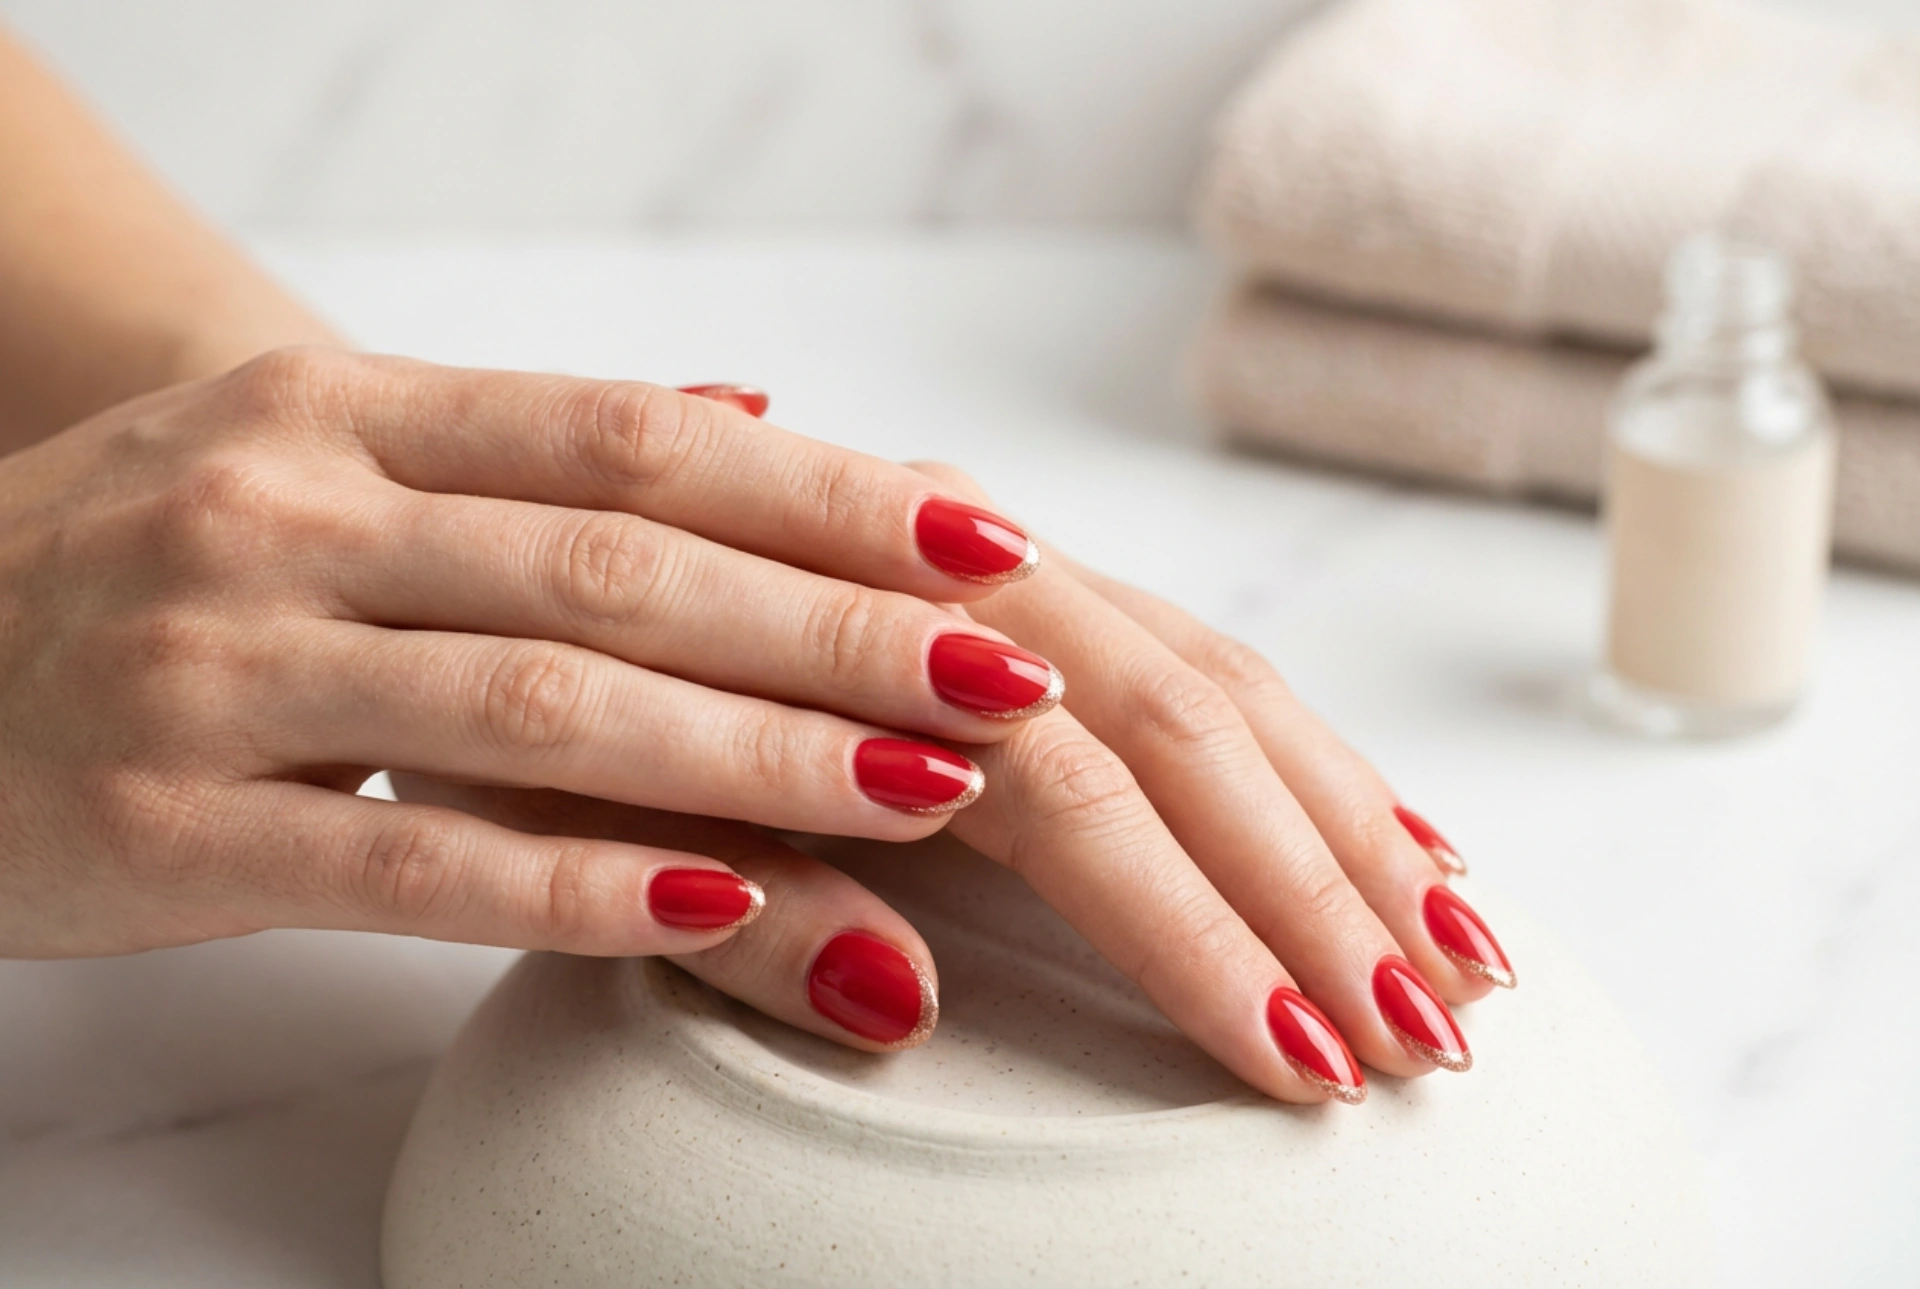


The classic French manicure is a symbol of timeless elegance, but modern interpretations offer exciting ways to express personal style. One such captivating variation is the red French manicure, enhanced with a delicate touch of glitter. This design combines the sophistication of the traditional French tip with a bold, contemporary twist. Achieving a professional-looking result at home centres on creating a perfectly even smile line and a glossy, durable finish. This guide will walk you through the steps to master this stunning nail art.
Preparing Your Nails for a Flawless Finish
Before you even think about picking up a polish bottle, proper nail preparation is the key to a long-lasting and beautiful manicure. A clean and smooth canvas allows for better polish adhesion and a more professional outcome. Follow these essential steps for the perfect base.
- Start by removing any old polish and thoroughly cleaning your nails. Gently wash your hands and nails with a mild soap and water.
- Shape your nails using a fine-grit nail file. Whether you prefer a square, oval, or almond shape, aim for consistency across all nails for a harmonious look.
- Gently push back your cuticles using a wooden or rubber-tipped cuticle pusher. Avoid cutting them, as they serve as a protective barrier for your nail bed.
- Lightly buff the surface of your nails with a soft buffing block. This removes shine and creates a slightly textured surface for the base coat to grip onto, but be careful not to over-buff and thin the nail.
- Wipe each nail with a lint-free pad soaked in nail polish remover or rubbing alcohol. This crucial step removes any natural oils and debris, ensuring maximum adhesion.
Creating the Perfect Red French Tip
The defining feature of a French manicure is its crisp 'smile line' – the curved boundary between the nail bed colour and the tip. Achieving this with a bold colour like red requires a steady hand and the right technique, but several methods can help you achieve a sharp, clean line.
Choosing Your Base and Red Polish
First, apply a thin layer of base coat to protect your nails and provide a smooth foundation. Once dry, apply one or two coats of a sheer base colour. Traditional options include pale pink, beige, or a translucent nude that complements your skin tone. For the tip, choose a vibrant red lacquer with good opacity. A highly pigmented polish will allow you to create the tip in a single, clean coat, minimising the chance of mistakes.
Techniques for a Crisp Smile Line
There are several methods to create a sharp line. The freehand technique involves using a very thin, long-bristled nail art brush to carefully paint the curve. This requires practice and a steady hand. For an easier approach, you can use French manicure guide strips. Place them firmly on the nail just below where you want the tip to end, paint the tip with your red polish, and carefully remove the strip while the polish is still wet to prevent a jagged edge. Another popular DIY method involves a silicone nail stamper. Paint a line of red polish onto the stamper and gently press the tip of your nail into it at an angle, rolling from one side to the other to create a perfect curve.
Adding the Glitter for a Touch of Sparkle
The glitter element elevates the red French from classic to glamorous. The key is subtlety; you want a delicate sparkle that catches the light rather than an overwhelming shimmer. This can be achieved in a few different ways depending on the look you want.
- Use a fine glitter polish. After the red tip is completely dry, you can apply a thin layer of a sheer polish containing fine glitter particles just along the smile line or over the entire red tip for an all-over sparkle.
- For more control, use loose cosmetic-grade glitter. While the red polish is still slightly tacky, dip a small, dry brush (like a fan brush or an eyeshadow brush) into the glitter, tap off the excess, and lightly press it onto the tip.
- You can also create a subtle glitter gradient. Concentrate the glitter application near the smile line and use a clean brush to gently feather it out towards the end of the nail, creating a beautiful fade effect.
Sealing Your Design with a High-Shine Top Coat
The final step is arguably the most important for both aesthetics and durability. A good quality, high-shine top coat will protect your design from chipping, smooth out any texture from the glitter, and deliver that enviable, glass-like finish.
Wait for the entire design, including the glitter, to be completely dry before applying the top coat to avoid smudging your hard work. Apply a generous layer, making sure to 'cap' the free edge of your nail by running the brush along the very tip. This seals the manicure and significantly extends its wear time. Allow it to dry completely for a hard, brilliant finish that highlights the bold red and makes the delicate glitter sparkle.


