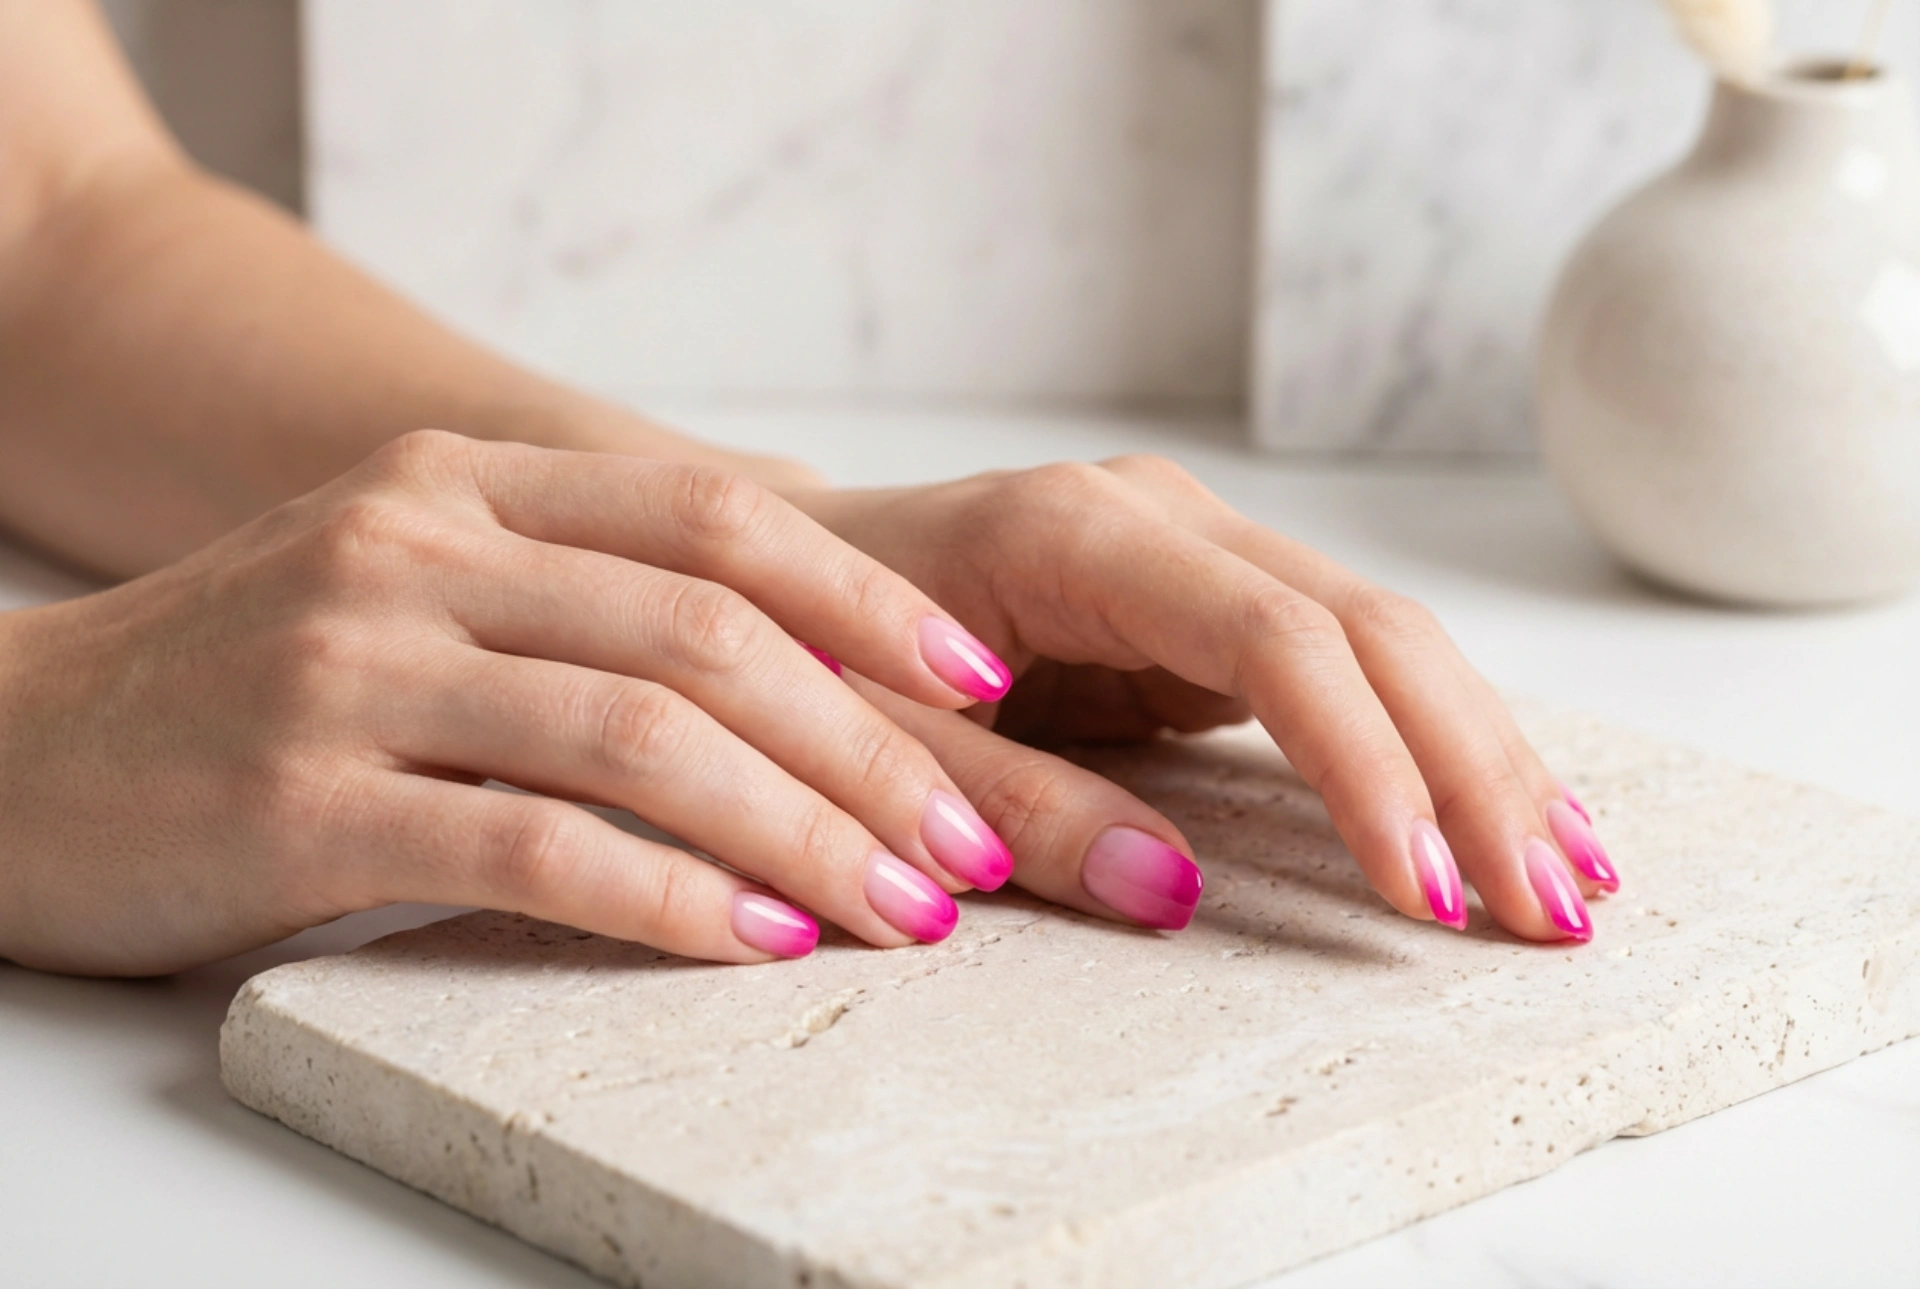


The fuchsia ombre effect is a stunning nail art style that combines the bold energy of vibrant pink with the subtle sophistication of a gradient blend. This technique creates a beautiful transition of colour, moving seamlessly from a deep, intense fuchsia to a softer, lighter hue without any harsh lines. It's a versatile look that can be adapted for any occasion, offering a modern and polished finish. If you've ever admired this flawless blend and wondered how to achieve it, this guide will walk you through the process, making it accessible even for beginners.
Understanding the Fuchsia Ombre Trend
Ombre, which means 'shaded' in French, is a technique involving a gradual blending of one colour hue to another, usually moving from light to dark or vice versa. When applied to nails with a striking colour like fuchsia, the effect is particularly eye-catching. A fuchsia ombre can transition into a baby pink, a creamy white, or even a subtle nude shade, creating depth and dimension. The key to a successful ombre is the seamlessness of the transition, which gives the manicure its professional and refined appearance.
Essential Tools and Nail Preparation
Before you begin the blending process, proper preparation is crucial for a smooth and long-lasting result. A well-prepped nail provides the perfect canvas for your art.
Gathering Your Supplies
- A base coat to protect your nails and provide a smooth surface.
- A vibrant fuchsia nail polish.
- A lighter, complementary nail polish (e.g., light pink, white, or nude).
- A high-gloss top coat to seal the design and add shine.
- A small, disposable, latex-free makeup sponge.
- Nail polish remover and a small brush or cotton bud for clean-up.
- Optional: Liquid latex or tape to protect the skin around your nails.
Preparing the Nail Canvas
Start by ensuring your nails are clean and free of any old polish. File and shape them to your desired length and form. Gently push back your cuticles, but avoid cutting them to maintain nail health. Lightly buff the surface of your nails to remove any natural oils and create a slightly rough texture, which helps the polish adhere better. Finally, apply a thin layer of your chosen base coat to all nails and allow it to dry completely.
A Step-by-Step Guide to the Perfect Fuchsia Ombre
With your nails prepped and your tools ready, it's time to create the beautiful gradient effect. This sponge technique is simple and effective for achieving a soft blend.
- Step 1: Apply the Base Colour. Paint one or two thin coats of your lightest colour polish over the entire nail. This will act as the background for your gradient and ensure the final look is bright. Let it dry completely.
- Step 2: Prepare the Sponge. On a flat, non-porous surface, paint horizontal stripes of your fuchsia and lighter polish directly onto the makeup sponge. The stripes should be wide enough to cover your nail and should overlap slightly where they meet to help initiate the blend.
- Step 3: Create the Gradient. Gently dab the polish-coated sponge directly onto your nail. You can press and roll it slightly from side to side to help blend the colours further. Don't worry if it looks a little textured; the top coat will smooth it out. Repeat this step to build up the colour intensity until you are happy with the gradient.
- Step 4: Clean Up the Edges. The sponging process can be messy. If you used a protective barrier like liquid latex, you can now peel it off. Otherwise, dip a small brush or cotton bud in nail polish remover and carefully clean up any polish on the skin around your nail.
- Step 5: Seal with a Top Coat. Once the ombre design is dry to the touch, apply a generous layer of a glossy top coat. This is a vital step as it not only protects your design but also smooths out the slightly bumpy texture left by the sponge, creating that flawless, high-shine finish.
Tips for a Flawless Finish
To elevate your home manicure, keep these tips in mind. For an easier clean-up, apply a liquid peel-off barrier or petroleum jelly to the skin around your nail before you start sponging. When choosing your polishes, try to select formulas with a similar consistency, as this helps them blend more evenly. If your sponge absorbs the polish too quickly, you can lightly dampen it with water and squeeze out the excess before applying the colours. Finally, be patient and allow each layer to dry to avoid smudging.


