


Creating a beautiful, long-lasting manicure at home is an appealing beauty ritual that offers both a moment of relaxation and a flawless finish. With the right tools and knowledge, achieving a professional-looking hybrid manicure is entirely within your reach. This comprehensive guide will walk you through everything you need to know about starting your adventure with hybrid nails, from selecting your first kit to mastering the application technique for a durable and glossy result.
What Should a Beginner's Hybrid Nail Kit Contain?
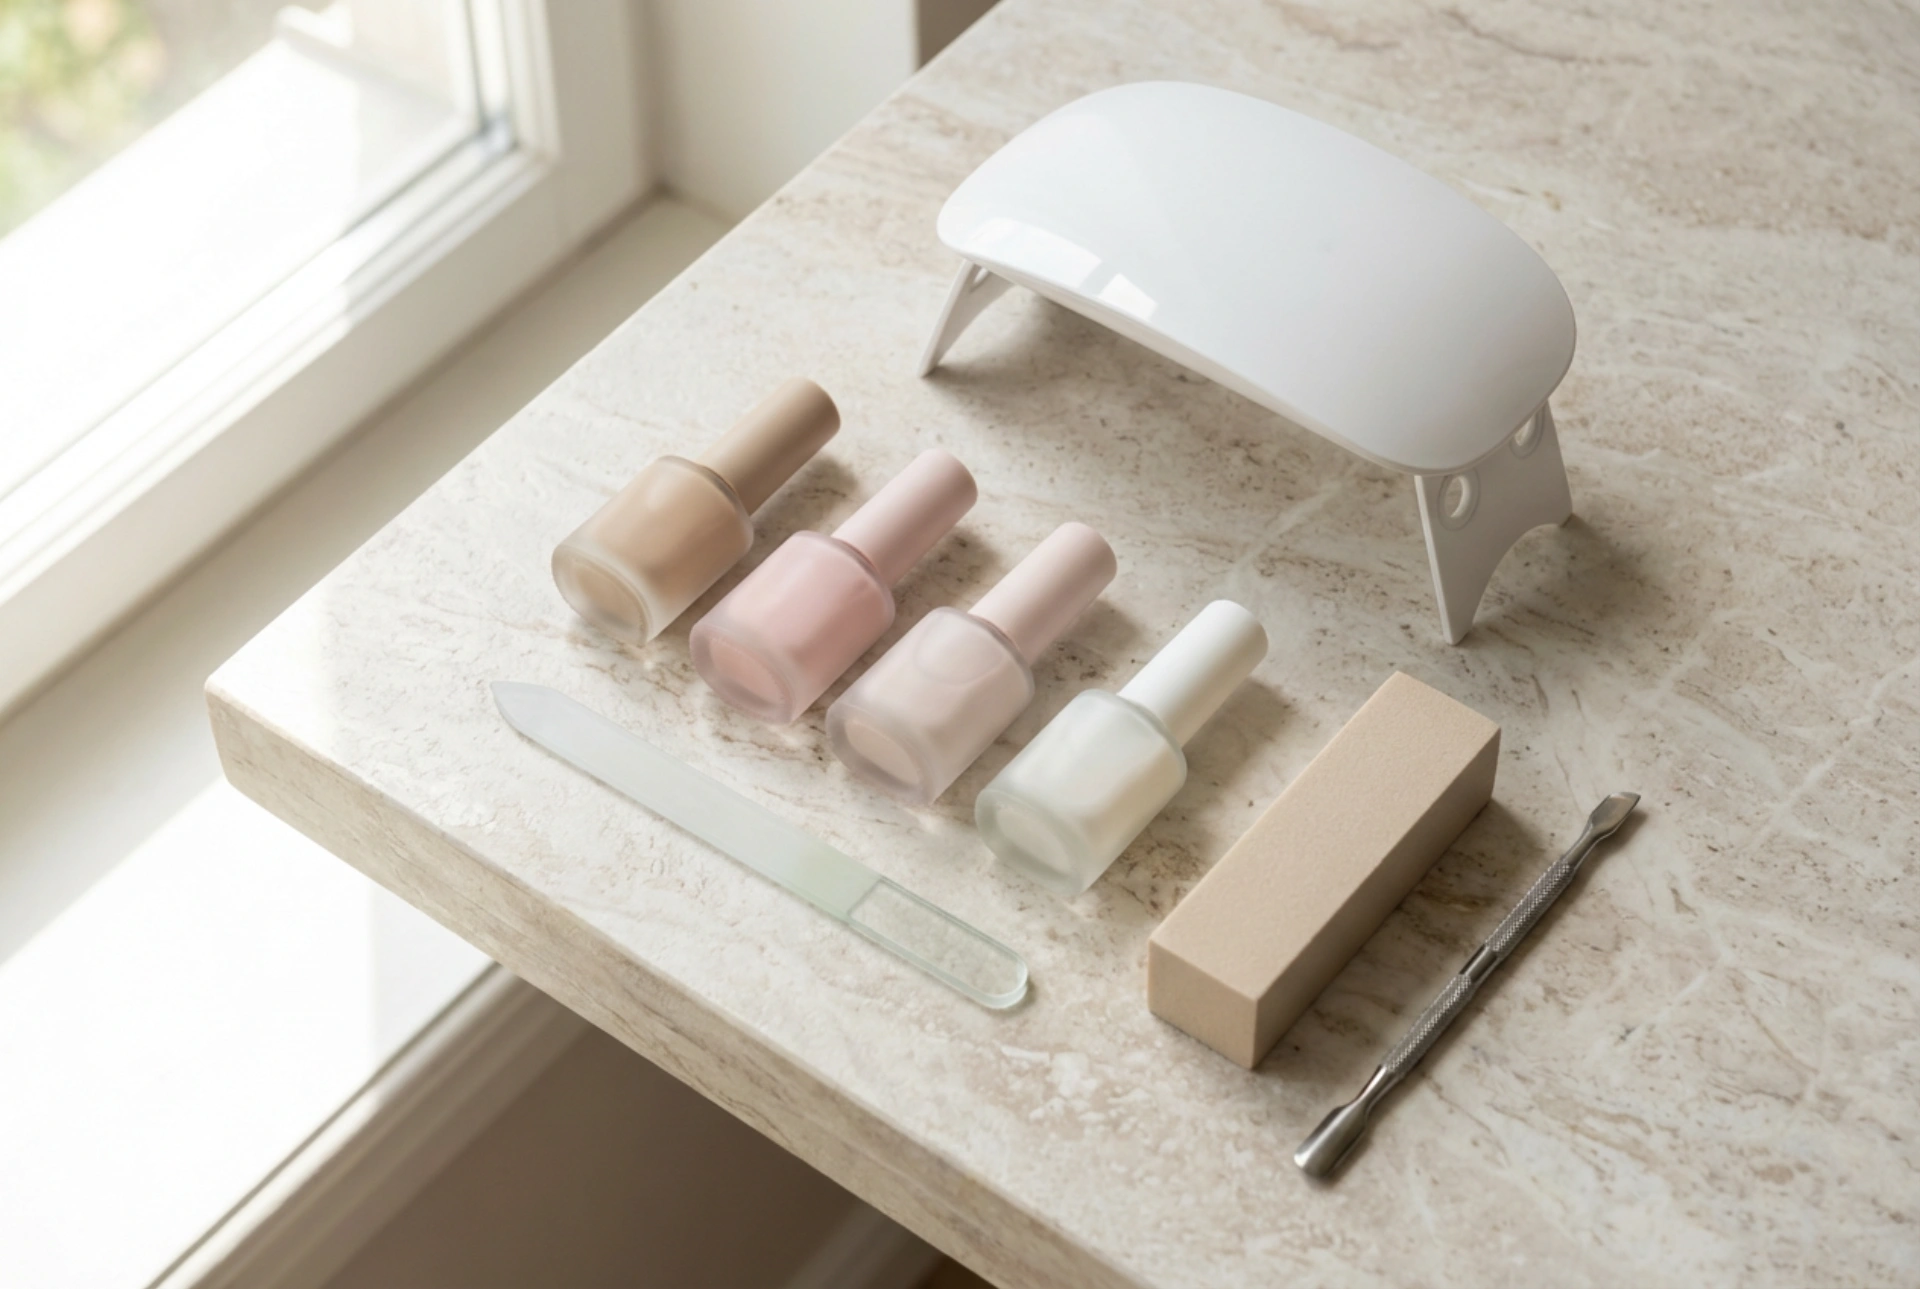
When you're just starting, it's best to look for a comprehensive kit that includes all the essential elements. This ensures you have everything you need without the confusion of purchasing items separately. A good starter set is the foundation for your future manicures.
The Curing Lamp: The Heart of the System
The lamp is the most crucial piece of equipment. It uses UV or LED light to cure, or harden, the polish. Most modern lamps are dual UV/LED, offering the best of both worlds by curing all types of hybrid and gel polishes quickly. When choosing, consider the lamp's power (measured in watts) – a higher wattage generally means a faster curing time. For home use, a lamp between 36W and 54W is more than sufficient.
Essential Liquids and Polishes
A hybrid manicure involves several layers, each with a specific purpose. Your kit should include:
- Nail Cleaner/Degreaser: A liquid used to cleanse the natural nail plate of oils and residue before application, ensuring better adhesion. It's also used at the final stage to remove the sticky 'inhibition' layer from the top coat.
- Base Coat: This is the first layer applied to the natural nail. It protects the nail plate and creates a foundation for the colour to adhere to.
- Colour Hybrid Polish: The star of the show! Starter kits usually come with a few classic, neutral shades that are perfect for learning.
- Top Coat: The final layer that seals in the colour, provides a high-gloss shine, and protects the manicure from chipping and scratching. Some top coats are 'no-wipe', meaning they don't leave a sticky layer after curing.
- Remover: A solution, typically based on acetone, designed to dissolve the hybrid polish for safe removal.
Tools for Preparation and Removal
Proper preparation is key to a long-lasting manicure. Your set should contain a few basic tools:
- Nail Files: You'll need at least two types – a coarser one (around 180 grit) for shaping the nail and a finer one (around 240 grit) for gentle refinement.
- Buffer Block: A soft block used to gently buff the surface of the nail plate. This removes the natural shine and creates a slightly rougher texture for the base coat to grip onto.
- Wooden Sticks or a Cuticle Pusher: Used to gently push back cuticles and clean up any polish that may have touched the skin before curing.
- Lint-Free Wipes: Essential for applying the cleaner and remover without leaving behind any fluff.
Your First Hybrid Manicure: A Step-by-Step Guide
Once you have your kit, it's time for the fun part. Follow these steps for a flawless application:
- Nail Preparation: Start by shaping your nails with a file. Gently push back your cuticles using a wooden stick or pusher. Next, use the buffer block to lightly buff the entire surface of each nail plate until it's matte.
- Degreasing: Soak a lint-free wipe in the nail cleaner and thoroughly wipe each nail to remove any dust and natural oils. From this point on, avoid touching your nails.
- Apply the Base Coat: Apply a very thin layer of the base coat, making sure to avoid flooding the cuticles. Cure it under the lamp for the time specified by the manufacturer (usually 30-60 seconds).
- Apply the Colour: Apply a thin, even layer of your chosen colour polish. Again, be precise and avoid the skin. Cure it under the lamp. For a deeper, more opaque colour, apply a second thin layer and cure it again.
- Apply the Top Coat: Apply a thin layer of the top coat, 'capping' the free edge of the nail to seal it. Cure for the recommended time.
- Final Wipe: If your top coat is not a 'no-wipe' formula, it will have a sticky layer after curing. Soak a lint-free wipe in the cleaner and firmly wipe each nail to reveal the hard, glossy finish.
- Nourish: Finish by applying a cuticle oil to hydrate the skin around your nails.
Tips for Longevity and Safe Removal
To make your manicure last, always apply thin layers of polish, as thick layers do not cure properly. Be careful not to get any polish on your skin or cuticles, as this can cause lifting. When it's time for a new manicure, never peel or pick off the hybrid polish. Instead, gently file the top layer of the top coat and soak your nails in the remover using foils or clips. After about 10-15 minutes, the polish should soften and can be gently pushed off with a wooden stick. Proper removal is vital for keeping your natural nails healthy and strong.


