


A beautiful, long-lasting manicure is a fantastic way to express your style and feel put-together. Gel polish manicures, known for their incredible durability and high-gloss finish, are no longer exclusive to salons. With the right kit and knowledge, you can achieve professional-looking results in the comfort of your own home. The sight of neatly arranged polish bottles, tools, and a UV lamp signifies the start of a rewarding self-care ritual that results in flawless nails for weeks. This guide will walk you through everything you need to know to get started.
What Should a Basic Gel Manicure Kit Contain?
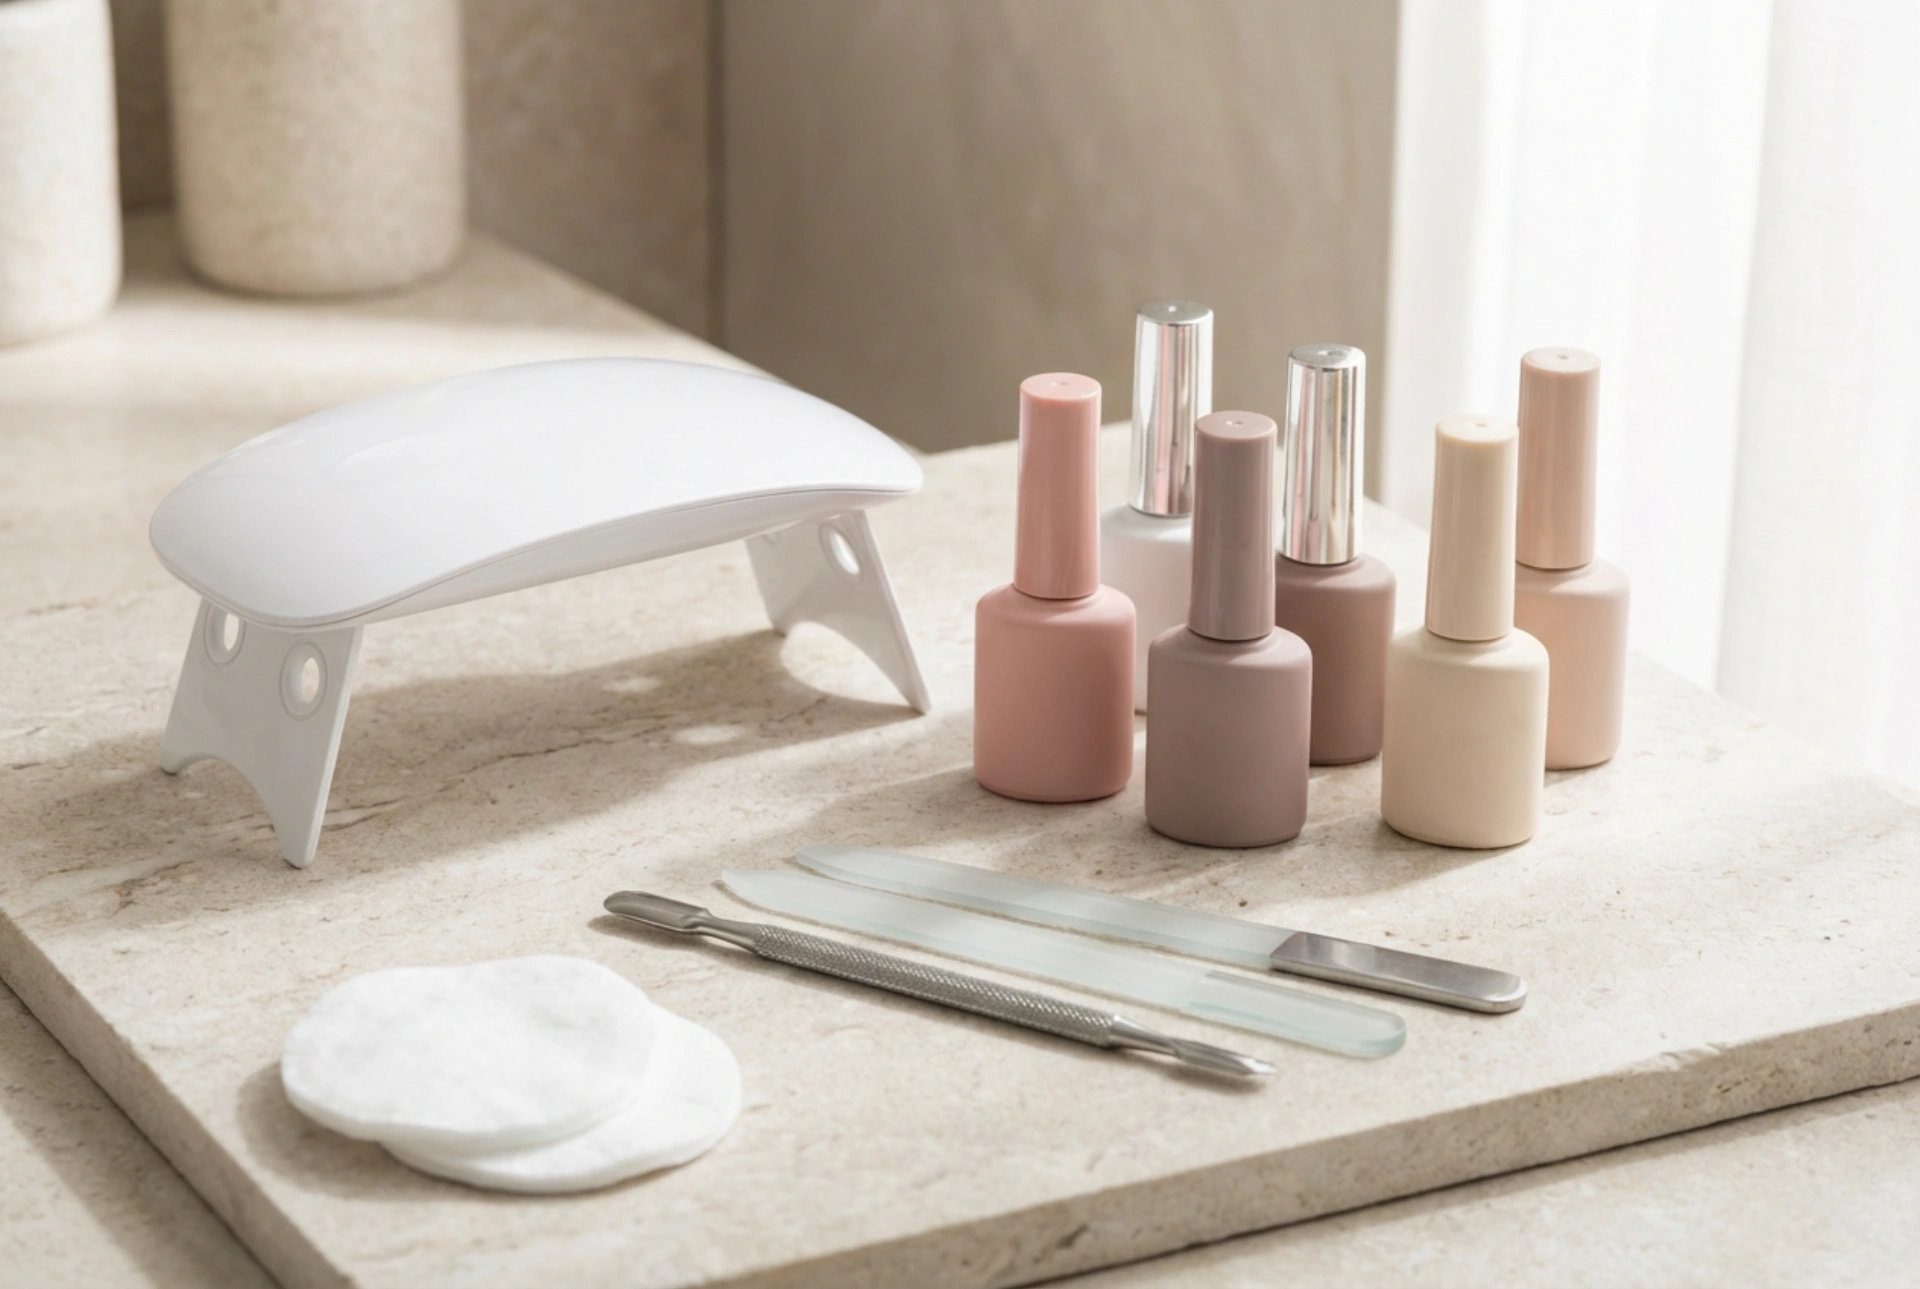
Assembling your first gel manicure kit can seem daunting, but it boils down to a few key essentials. Each component plays a crucial role in creating a durable and beautiful finish. A starter set is often a good investment as it usually contains perfectly matched products designed to work together.
Essential Equipment and Products
- UV or LED Lamp: This is the most critical piece of equipment. It cures (hardens) the gel polish. LED lamps work faster than traditional UV lamps, typically curing a layer in 30-60 seconds, whereas UV lamps might take 2-3 minutes.
- Base Coat: A special gel polish layer that is applied first. It helps the colour adhere to your natural nail and protects the nail plate from staining.
- Gel Colour Polish: The coloured layer of your manicure. It's best to start with a few versatile shades you love.
- Top Coat: The final layer that seals in the colour, provides a high-shine (or matte) finish, and protects the manicure from chipping and scratching.
- Nail Cleaner / Dehydrator: An alcohol-based solution used to cleanse the nail plate of any oils, dust, and residue before application. It is also used at the end to remove the sticky inhibition layer from the top coat.
- Gel Polish Remover: An acetone-based solution specifically designed to break down and dissolve gel polish for safe removal.
- Nail File and Buffer: A file (around 180 grit) is used for shaping the nails. A gentle buffer (around 240 grit or higher) is used to lightly rough up the nail surface, which helps the gel adhere better.
- Cuticle Pusher or Wooden Sticks: Used to gently push back the cuticles to create a clean and neat nail bed for polish application.
Preparing Your Nails for a Gel Manicure
Proper preparation is the secret to a long-lasting gel manicure. Skipping these steps can lead to the polish lifting or peeling prematurely. Take your time to create a perfect canvas for your colour.
Step 1: Shaping and Buffing
Start with clean, dry hands. Use a nail file to shape your nails to your desired length and form, whether square, round, or almond. File in one direction to prevent splitting. Next, take a soft buffer and gently go over the entire surface of each nail. The goal is not to thin the nail, but to remove the natural shine and create a slightly textured surface for the base coat to grip onto.
Step 2: Cuticle Care
Gently push back your cuticles using a wooden stick or a metal cuticle pusher. This creates a larger, cleaner nail surface and prevents the gel from being applied over the skin, which can cause lifting. Avoid cutting the cuticles yourself unless you are experienced, as this can lead to damage. After pushing them back, use a nail brush to sweep away any dust or debris.
Step 3: Degreasing the Nail Plate
This is a non-negotiable step. Soak a lint-free wipe with a nail cleaner solution and thoroughly wipe down each nail. Pay special attention to the side walls and the area near the cuticles. This removes any remaining oils and dust, ensuring maximum adhesion of the gel polish.
Step-by-Step Guide to Applying Gel Polish
With your nails prepped, you're ready for the application process. The key here is to apply thin, even layers.
Applying the Base Coat
Apply a very thin layer of the base coat to each nail, making sure to cover the entire surface but avoiding the skin and cuticles. 'Cap' the free edge of the nail by running the brush along the tip. This helps to seal the manicure and prevent chipping. Cure the base coat under your UV/LED lamp according to the product's instructions (usually 30-60 seconds for LED).
Applying the Colour
Apply your chosen gel colour in a thin, even layer. Again, avoid touching the skin. If you do get some on your skin, clean it off with a wooden stick dipped in cleaner before curing. Cure the layer under the lamp. Apply a second coat for full opacity, and if needed, a third coat for some lighter shades. Cure each layer separately. Thin coats are better than one thick coat, which may not cure properly.
Securing with a Top Coat
Once you are happy with the colour, apply a thin layer of top coat. This will protect your manicure and give it a beautiful shine. Be sure to cap the free edge again. Cure this final layer under the lamp, sometimes for a slightly longer duration as recommended by the manufacturer.
Removing the Sticky Layer
Most gel top coats leave a sticky (inhibition) layer after curing. Take a fresh lint-free wipe soaked in nail cleaner and firmly wipe the surface of each nail to reveal the hard, glossy finish underneath. Your manicure is now complete, dry, and smudge-proof!
How to Safely Remove Gel Polish
Never peel or pick off your gel polish, as this can strip away layers of your natural nail. To remove it safely, first use a file to gently buff the shine off the top coat. This breaks the seal and allows the remover to penetrate. Then, soak a piece of a cotton pad in gel polish remover, place it on the nail, and wrap the fingertip tightly in a small piece of aluminium foil. Wait for 10-15 minutes. After unwrapping, the gel should be soft and lifting. Use a wooden stick to gently scrape it off. If any gel remains, re-wrap the nail for a few more minutes rather than forcing it off. Finish by moisturising your nails and cuticles with a nourishing oil.


