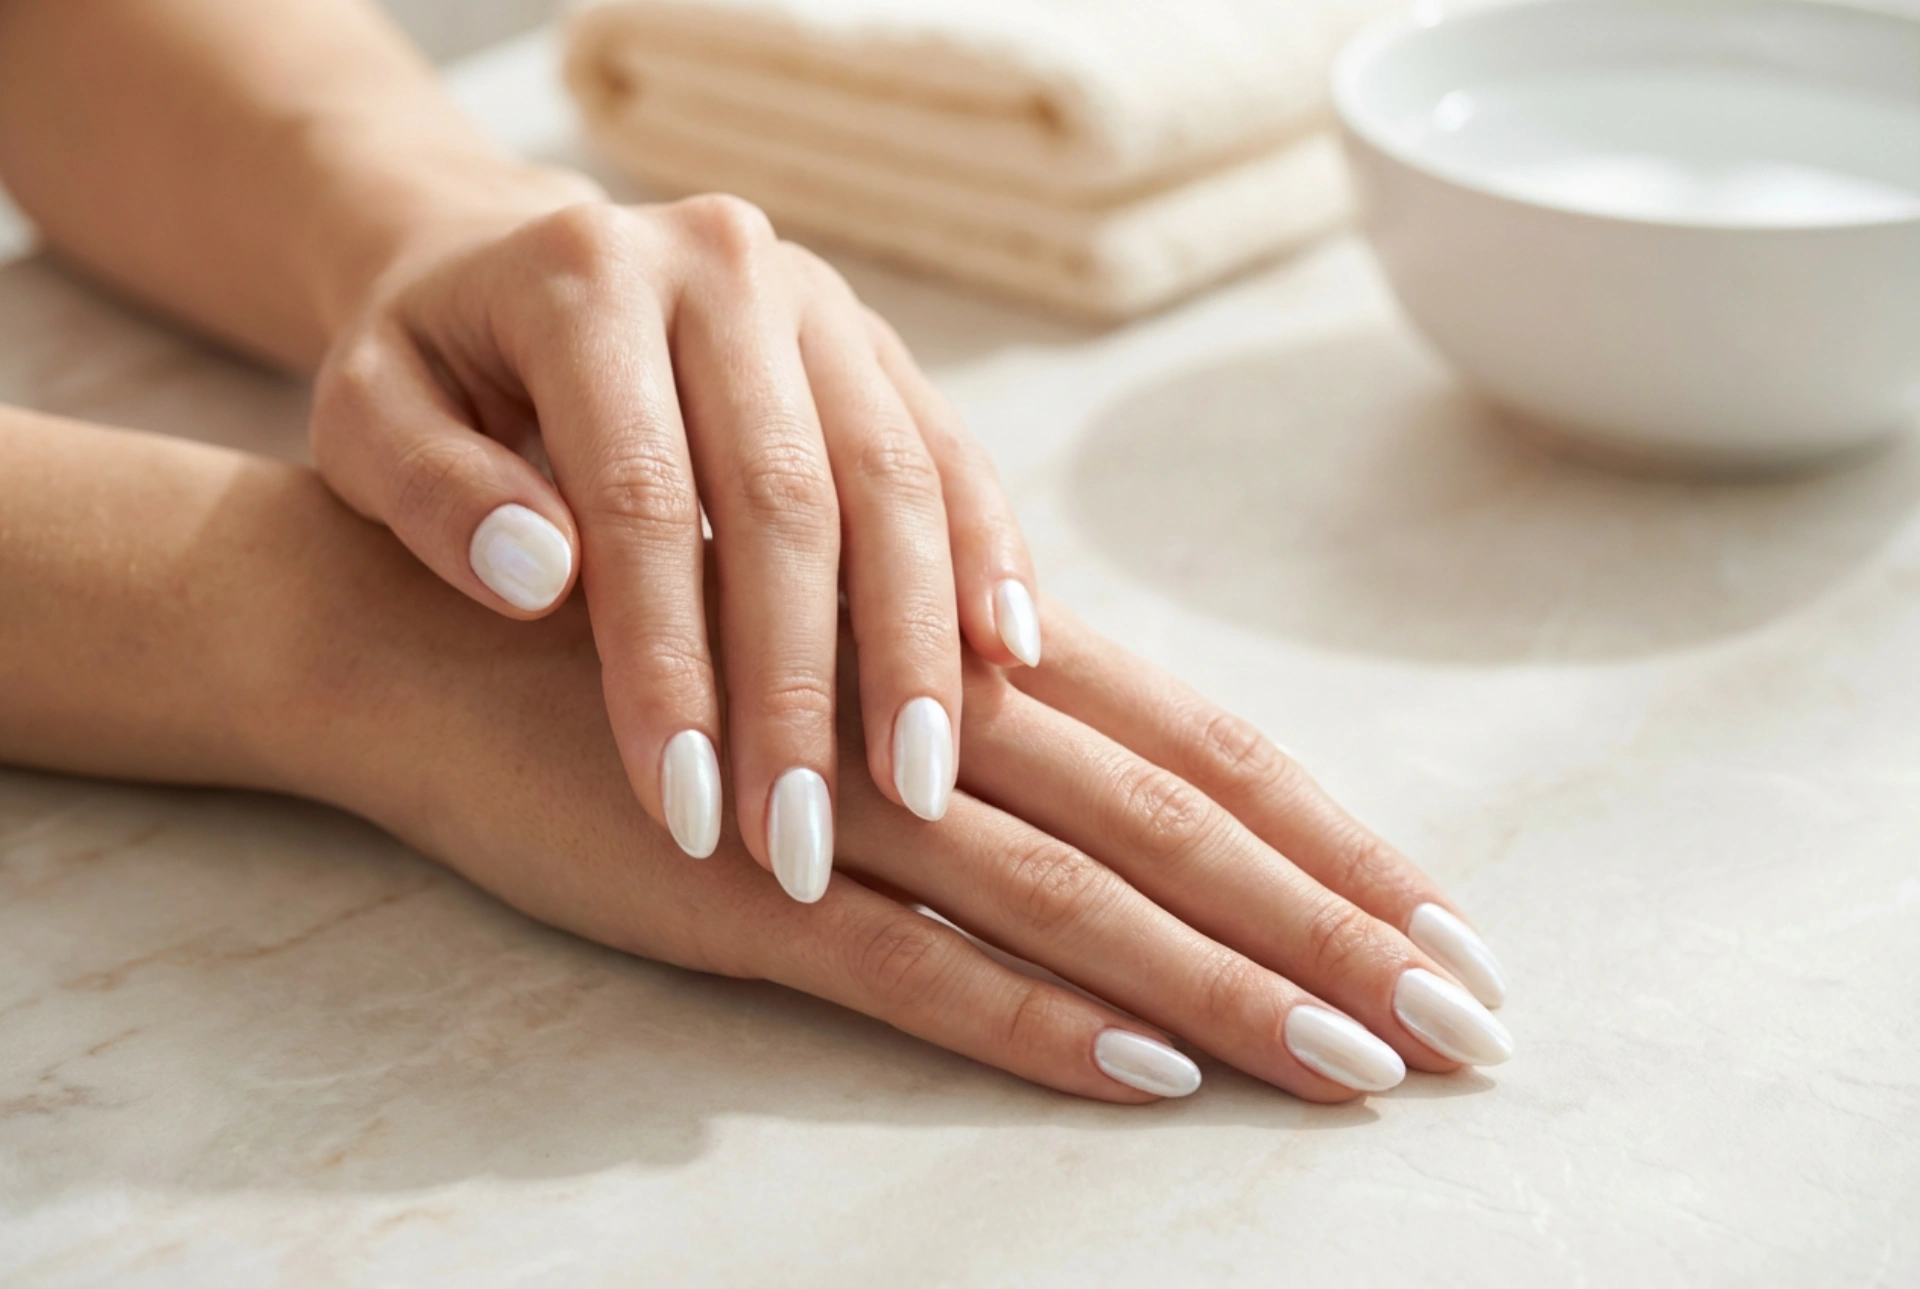


White pearlescent nails represent a pinnacle of timeless elegance and sophistication. Their luminous, iridescent finish catches the light beautifully, creating a subtle yet captivating effect reminiscent of a precious pearl or the inner lining of a seashell. This classic manicure style is versatile, suitable for everyday wear, special occasions, and everything in between. Achieving this refined, mirror-like sheen at home is easier than you might think. This guide will walk you through the steps to create the perfect white pearlescent manicure.
Understanding the Pearlescent Effect
What exactly makes a nail "pearlescent"? The effect is defined by its soft, multi-tonal lustre that mimics the surface of a pearl. Unlike a simple glitter or metallic finish, a pearlescent look has a deeper, more subtle iridescence. It plays with light, revealing delicate shifts in colour and creating a soft-focus glow. The "seashell" effect is a variation where the iridescence is more pronounced, often with subtle pink, blue, or green undertones, similar to mother-of-pearl. The "mirror" aspect refers to the high-gloss, reflective surface that makes the nails look incredibly smooth and polished.
Preparation: The Foundation for a Flawless Manicure
Before you even think about applying colour, proper nail preparation is essential. A clean and smooth canvas is the secret to a professional-looking and long-lasting manicure. Rushing this stage can lead to a lumpy finish and a manicure that chips quickly.
Start with Clean Nails
Begin by removing any old nail polish completely using a gentle remover. Afterwards, wash your hands to get rid of any oily residue. Gently push back your cuticles using a wooden or rubber cuticle pusher. Avoid cutting your cuticles, as this can lead to irritation; instead, focus on gently tidying them up. Next, file your nails into your desired shape. Whether you prefer a classic oval, a modern square, or a chic almond shape, ensure all nails are uniform in length and shape for a cohesive look.
Create a Smooth Surface
To achieve that signature mirror-like shine, your nail surface must be as smooth as possible. Use a soft buffing block to gently buff the surface of your nails. This step removes ridges and creates a perfect base for the polish to adhere to. Be careful not to over-buff, as this can weaken the nail. Once you are finished, wipe away any dust. The final and most crucial step in preparation is applying a quality base coat. A base coat not only protects your natural nails from staining but also fills in any minor imperfections, providing an even surface for the subsequent layers of polish.
How to Achieve the White Pearlescent Look
With your nails perfectly prepped, you are now ready to create the beautiful pearlescent effect. There are a couple of methods to achieve this look, depending on the products you have available. Both can yield stunning results.
Method 1: Using a Pearlescent Nail Polish
The most straightforward way is to use a nail polish specifically designed to have a white pearlescent or frosted finish.
- Apply the Base Colour: Start with one to two thin coats of a sheer or milky white polish. This will build the opaque white foundation. Allow each coat to dry completely before applying the next.
- Apply the Pearlescent Polish: Once your base is dry, apply one or two thin coats of your chosen white pearlescent polish. These polishes contain fine, light-reflecting particles that create the iridescent sheen. Applying in thin layers is key to avoiding streaks and achieving an even lustre.
- Seal with a Top Coat: Finish with a high-gloss top coat. This will amplify the mirror effect, protect the manicure from chipping, and ensure it lasts as long as possible.
Method 2: Using a Pearl Effect Powder
For a more intense, chrome-like pearl effect, using a special nail powder is an excellent option. This technique is often used with gel polishes for best results but can be adapted for regular polish too.
- Apply Base and Colour: Apply your base coat and two coats of your chosen white polish (gel or regular). If using gel polish, cure each layer under a UV/LED lamp as per the manufacturer's instructions.
- Apply a Special Top Coat: For gel, apply a no-wipe gel top coat and cure it. For regular polish, you need to work quickly while the final colour coat or a specific top coat is still slightly tacky, but not wet.
- Rub in the Powder: Dip a small, soft applicator (often an eyeshadow applicator works well) into the pearl powder. A little goes a long way. Gently but firmly rub the powder onto the surface of the nail until you see the mirror-like, pearlescent effect appear. Brush off any excess powder from around the nail.
- Seal the Manicure: To protect the powder and lock in the shine, apply one or two layers of a high-quality top coat (a gel top coat for gel manicures, or a water-based top coat followed by a regular one for standard polish to avoid smudging the effect).
Tips for a Perfect Finish
To ensure your pearlescent nails look their absolute best, keep these professional tips in mind.
- Work in Thin Coats: This is the golden rule of any manicure. Thin, even layers dry faster and create a more durable, professional-looking finish without bubbles or smudges.
- Choose Your White Carefully: A stark, opaque white will create a bold chrome-pearl look, while a sheer, milky white will give a more delicate and translucent seashell effect. Experiment to find the look you love.
- Don't Skip the Top Coat: A glossy top coat is non-negotiable for this style. It's what transforms the lustre into a high-shine, mirror-like surface and provides essential protection.
- Be Patient: Allow adequate drying time between each coat. Rushing the process is the most common cause of imperfections. If you're using regular polish, give it plenty of time to fully harden.
Maintaining Your Luminous Manicure
Once you've achieved your perfect white pearlescent nails, you'll want them to last. To extend the life of your manicure, apply cuticle oil daily to keep your nails and the surrounding skin hydrated. When doing household chores, especially those involving water or cleaning agents, wear gloves to protect your nails. For an extra boost of shine and protection, you can apply a fresh layer of top coat every two to three days. This simple step can help prevent chips and keep your nails looking freshly manicured for longer.


