


Creating a professional-looking manicure at home has become a popular and rewarding part of many beauty routines. The allure of a glossy, long-lasting finish, like the one seen with hybrid nails, is undeniable. A home hybrid nail kit brings this salon-quality experience into your own space, giving you the tools to create beautiful and durable nail styles. Understanding the components and the process is the first step towards mastering this skill and enjoying flawless results every time.
What Are Hybrid Nails?
Before diving into the kit itself, it’s helpful to understand what a hybrid manicure is. It's a type of nail styling that combines the best features of traditional nail polish and gel polish. A hybrid polish is applied like a regular polish but is cured (hardened) under an LED or UV lamp, just like a gel. This process results in a manicure that is significantly more durable than traditional polish, lasting up to two or three weeks without chipping. It maintains a high-gloss shine and provides a strengthening layer over the natural nail.
Essential Components of a Starter Kit
A good starter kit should contain everything you need to perform a complete manicure from preparation to finish. While contents can vary slightly, these are the core items you should look for.
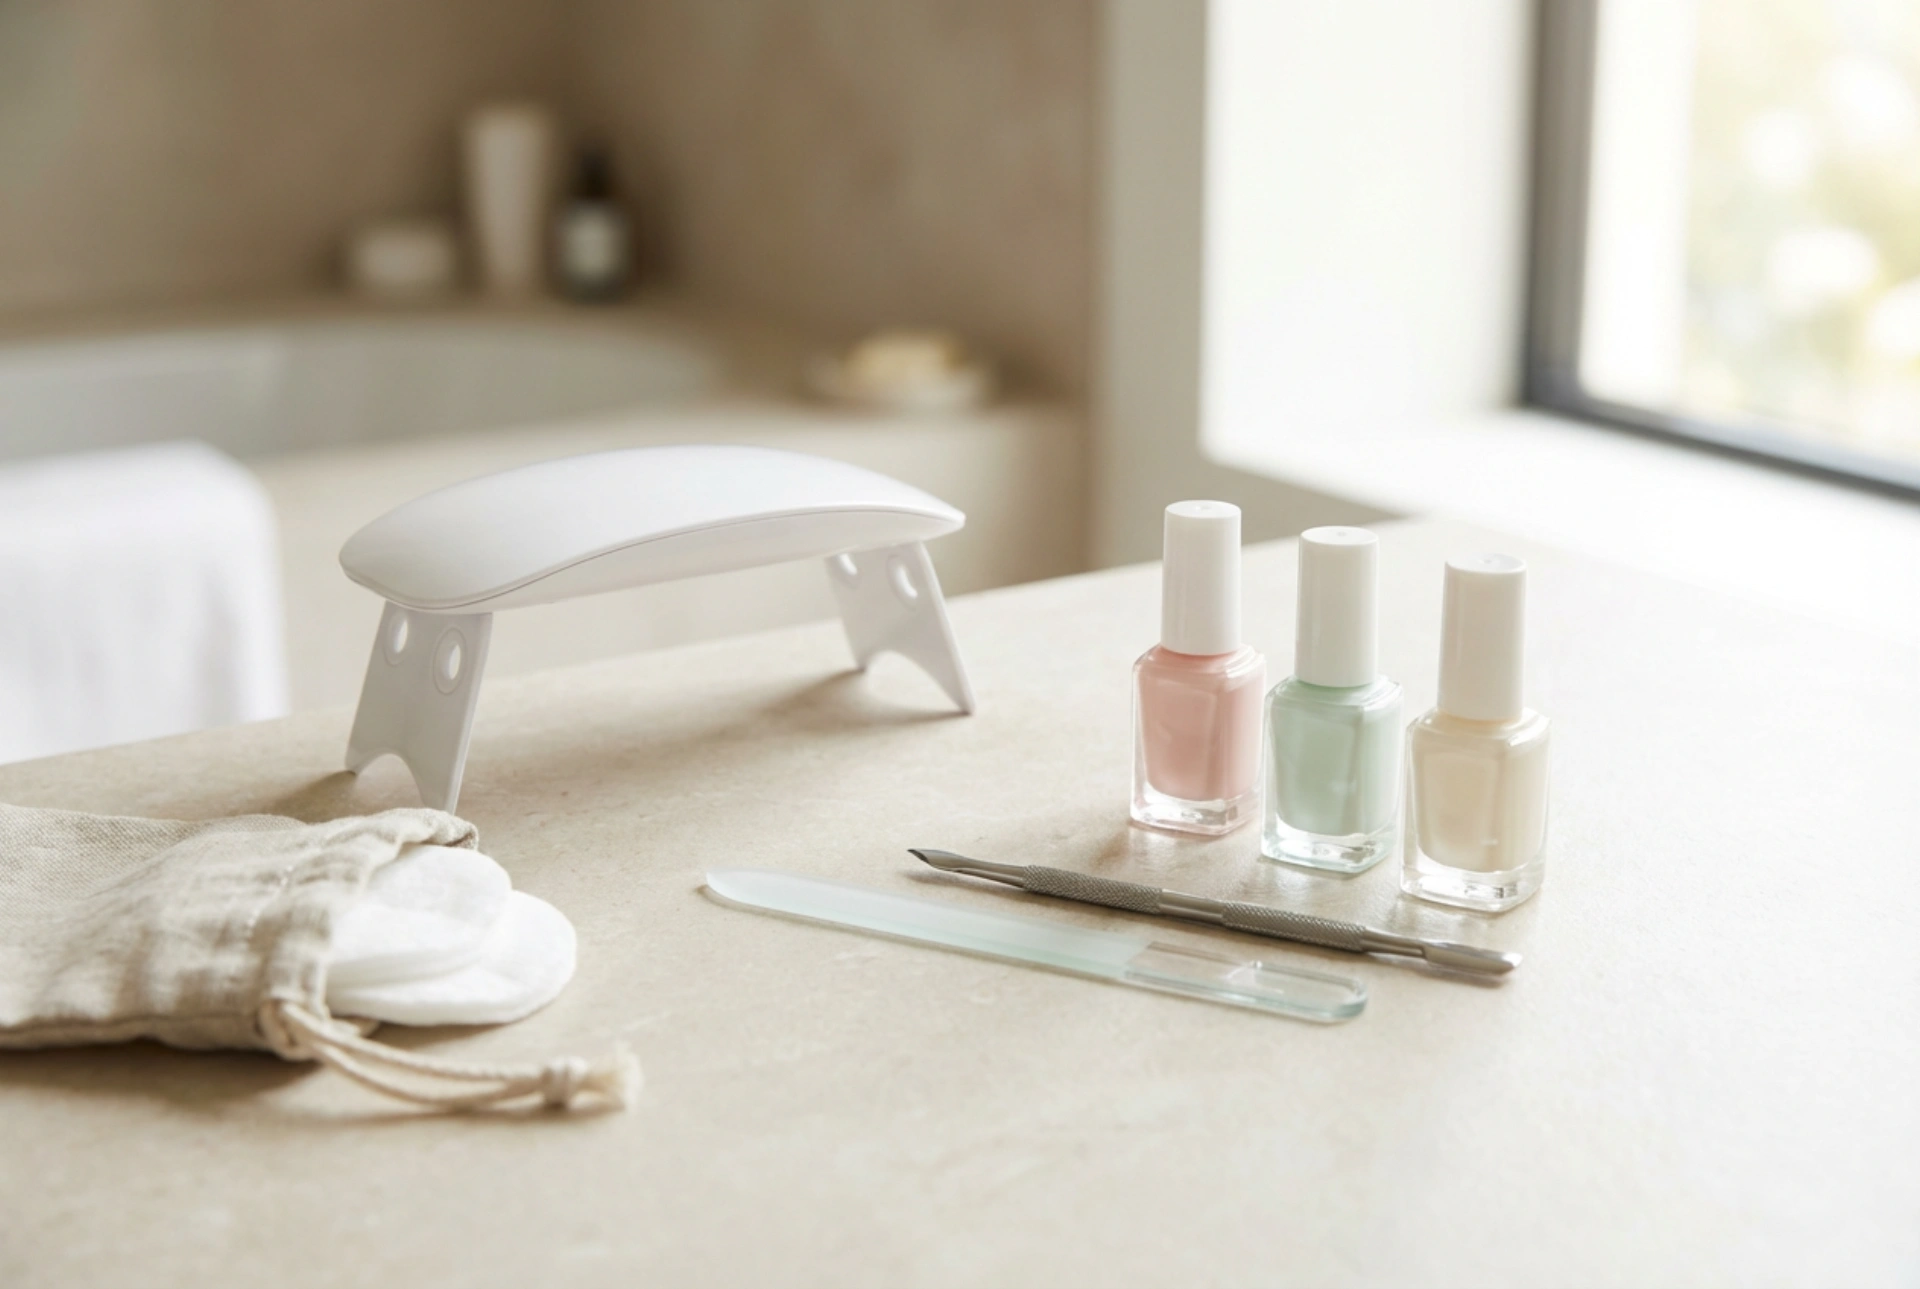
LED/UV Lamp
This is the most crucial piece of equipment. The lamp emits specific wavelengths of light that cure the hybrid polish, changing it from a liquid to a solid, durable state. LED lamps generally cure faster than older UV models and their bulbs have a longer lifespan. For home use, a compact, user-friendly LED lamp is typically sufficient.
Base and Top Coats
These two products are fundamental for a successful hybrid manicure. The Base Coat is the first layer applied to the natural nail. It serves two purposes: it helps the coloured polish adhere better to the nail plate and creates a protective barrier. The Top Coat is the final layer. It seals in the colour, provides the signature high-gloss shine, and protects the manicure from scratches and chipping. Some top coats are 'no-wipe', meaning they don't have a sticky residue after curing.
Hybrid Nail Polishes
These are the coloured polishes designed specifically for this system. They cannot air-dry and must be cured under a lamp. Starter kits usually include a few classic or popular shades. The key to application is to apply them in thin, even layers to ensure they cure properly.
Supporting Liquids and Tools
Several other items are necessary for preparation and finishing:
- Nail Cleaner (Degreaser): This is a special alcohol-based solution used to wipe the natural nail plate before applying the base coat. It removes any oils, dust, and moisture, ensuring optimal adhesion. It is also used at the very end to remove the sticky inhibition layer left by some top coats after curing.
- Remover Solution: A solution, usually acetone-based, specifically designed to break down the hybrid polish for safe removal. It is much more effective than standard nail polish remover.
- Nail File and Buffer: A nail file is used to shape the nails, while a buffer is used to gently roughen the surface of the nail plate. This light buffing helps the base coat to grip the nail more effectively.
- Cuticle Pusher or Wooden Sticks: These are used to gently push back the cuticles for a neat appearance and to clean up any polish that may have gotten onto the skin before curing.
- Lint-Free Wipes: Essential for use with the cleaner and remover. Unlike cotton balls, they do not leave behind small fibres that could get trapped in the polish.
Step-by-Step Guide to Application
Achieving a perfect manicure requires patience and precision. Follow these steps for the best results:
1. Nail Preparation: Start by shaping your nails with a file. Gently push back your cuticles. Use a buffer to lightly take the shine off the entire surface of your nail plate. This is a critical step for adhesion. Finally, wipe each nail thoroughly with a lint-free wipe soaked in nail cleaner.
2. Apply the Base Coat: Apply a very thin layer of the base coat to the nail, making sure to 'cap' the free edge by running the brush along the tip. Be careful not to get any on your skin. Cure under the lamp for the time specified by the manufacturer (usually 30-60 seconds for an LED lamp).
3. Apply the Colour: Apply a thin, even layer of your chosen hybrid polish. Again, avoid touching the skin and cap the free edge. Cure under the lamp. For a deeper, more opaque colour, apply a second thin coat and cure it as well. Two thin coats are always better than one thick coat.
4. Apply the Top Coat: Apply a layer of top coat to seal everything in. Ensure you cover the entire nail and cap the edge. Cure one last time under the lamp. This final cure may be slightly longer to ensure the top layer is completely hard.
5. The Final Wipe: If your top coat is not a 'no-wipe' formula, it will have a sticky layer after curing. Simply take a fresh lint-free wipe with some nail cleaner and wipe each nail firmly to reveal the smooth, glossy finish.
Tips for Longevity and Safe Removal
To make your manicure last, apply cuticle oil daily to keep your nails and skin hydrated. When it's time for a change, proper removal is key to keeping your natural nails healthy. Gently file the shiny surface of the top coat to break the seal. Soak a piece of a lint-free wipe in the remover solution, place it on your nail, and wrap it tightly with a small piece of aluminium foil. Wait for 10-15 minutes, then gently scrape off the softened polish with a wooden stick. Never force or peel the polish off, as this can damage your natural nail.


