


The allure of 1920s beauty is truly timeless, characterised by its intricate structures and glossy, polished finish. Hairstyles from this era, like the meticulously sculpted finger waves and elegant low chignons, exude a unique sophistication that continues to captivate and inspire. While they may look complex, these iconic looks can be recreated at home with the right techniques and a little patience. Whether you're preparing for a special event or simply wish to infuse your look with some vintage glamour, this guide will walk you through the steps to achieve flawless 1920s hair.
The Essence of Twenties Glamour
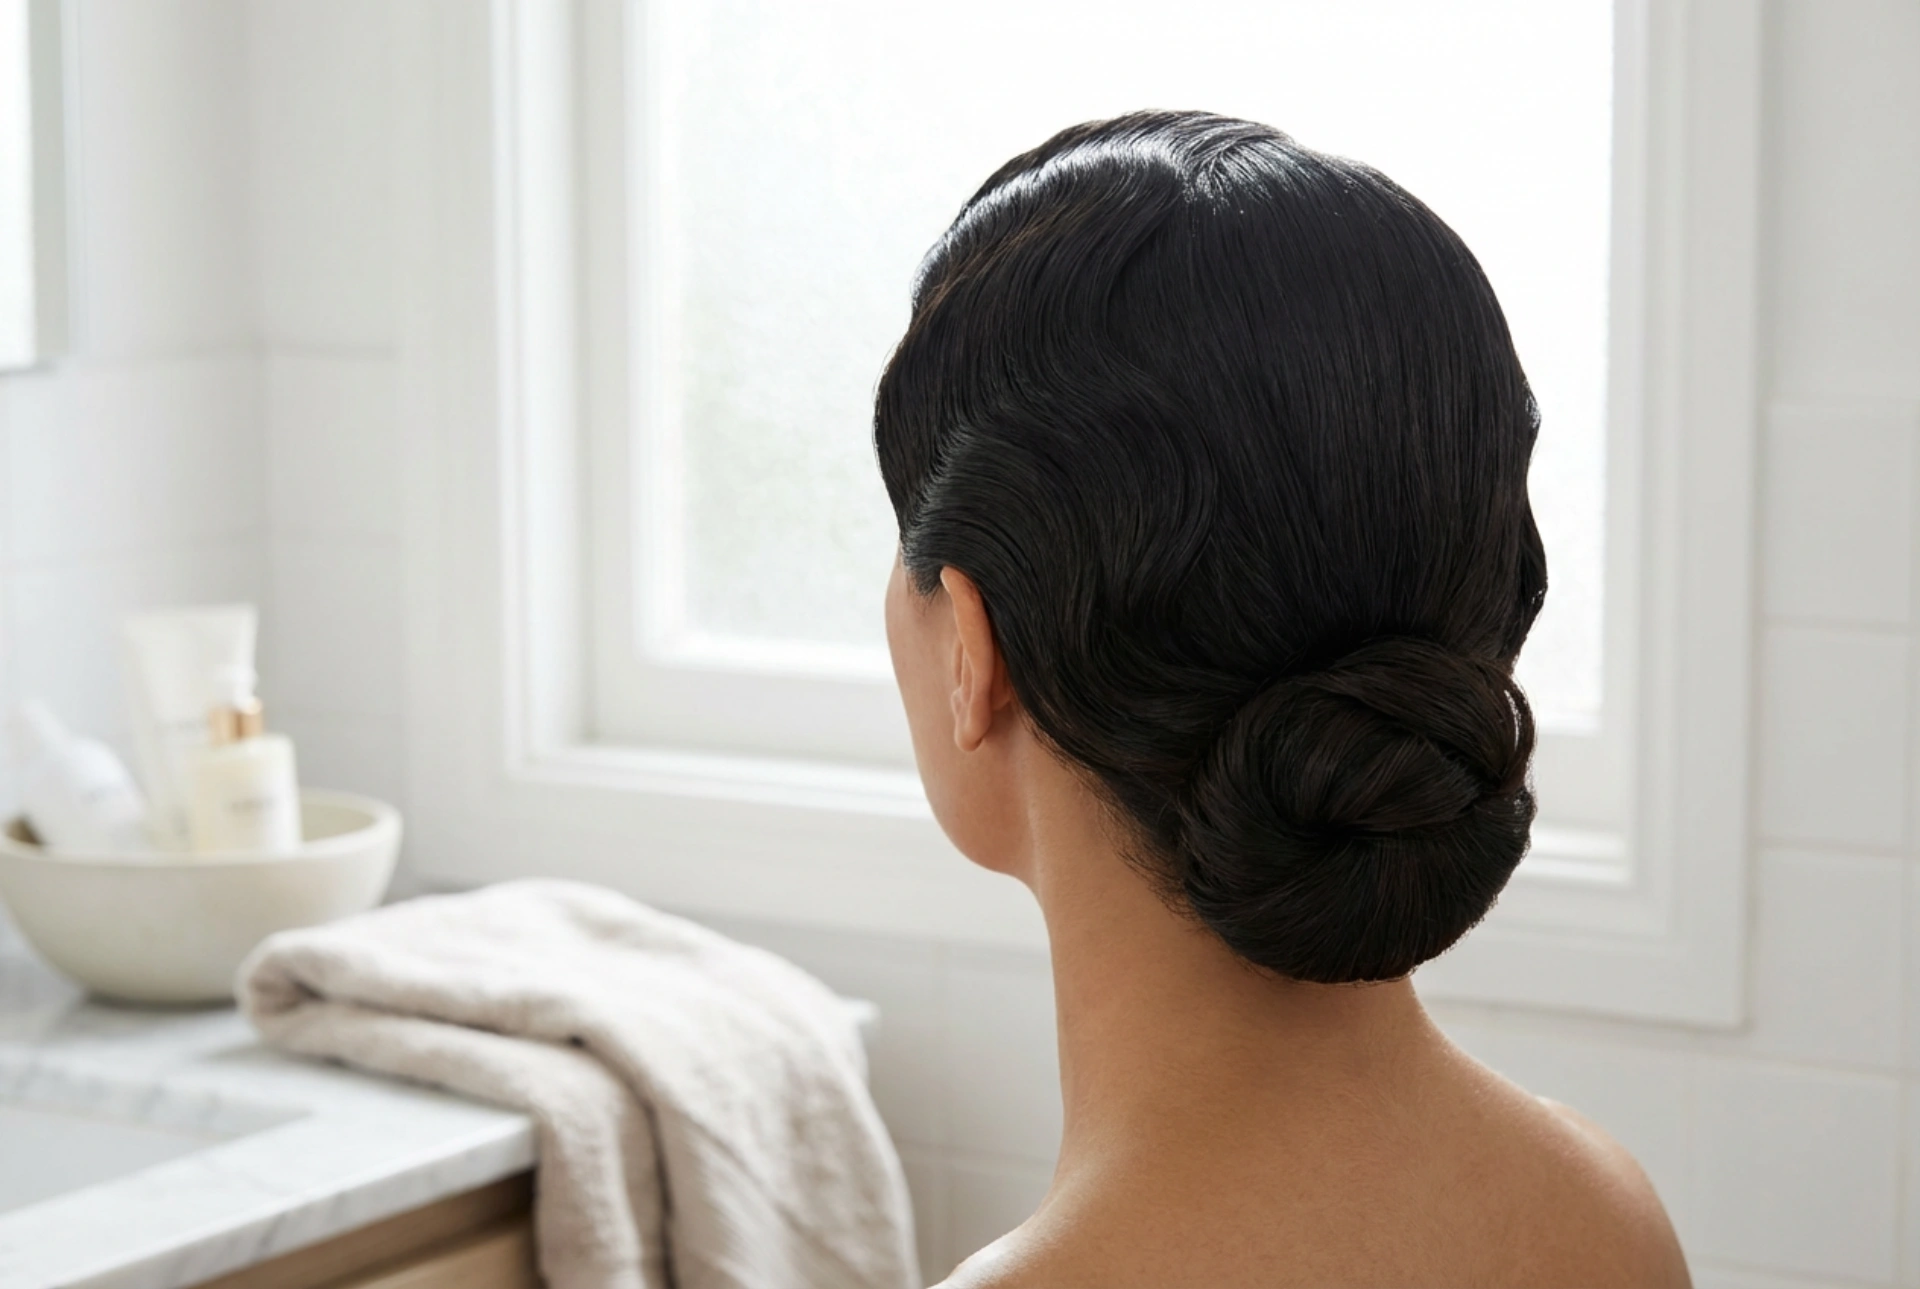
The Roaring Twenties was a decade of profound social and cultural change, and hairstyles reflected this new-found freedom. As hemlines rose, so did hair, with the bob cut becoming the signature look of the 'flapper'. These shorter styles provided the perfect canvas for sculptural styling. Finger waves, which hug the scalp in a series of S-shaped curves, and neat, compact buns (or 'chignons') worn at the nape of the neck, were the epitome of chic. They were polished, deliberate, and undeniably elegant, moving beautifully with the wearer.
How to Create Flawless Finger Waves
Finger waves are the cornerstone of many 1920s looks. The key to success is working with very damp hair and using a strong styling product to set the shape. This technique requires precision but yields stunning results.
Essential Tools and Products
Before you begin, gather your essentials. You will need a simple set of tools to create the authentic wave pattern.
- A strong-hold styling gel or a traditional setting lotion
- A fine-toothed comb
- Wave clips or flat, long metal clips
- A water spray bottle to keep hair damp
- A finishing hairspray with strong hold
The Step-by-Step Method
Start with clean, towel-dried hair. It needs to be damp, not dripping wet, for the product to distribute evenly and for the waves to set properly.
- Generously apply your gel or setting lotion from roots to ends, ensuring every strand is saturated. This will give the hair the pliability and hold it needs.
- Create a deep side part using your fine-toothed comb for a classic 1920s look.
- Starting at the parting, place your comb into the hair about an inch from the hairline. Lay your index finger parallel to the comb.
- Gently push the comb forward towards your face to create the start of a ridge. Without lifting your finger, comb the hair under your finger in the opposite direction. This forms the first 'S' shape.
- Secure this ridge by placing a wave clip along it. The clip should hold the defined shape in place.
- Move down to the next section of hair, placing your finger below the first clip. Repeat the process, this time pushing the hair in the opposite direction to form the next wave. Secure this new ridge with another clip.
- Continue this pattern down the side of your head. You can choose to wave the entire head or just the front sections for a more modern interpretation.
- Allow your hair to dry completely. Air-drying is the best option to avoid disturbing the waves, though a hooded dryer or a diffuser on the lowest setting can speed up the process. Do not touch the hair while it is drying.
- Once bone dry, carefully remove the clips. The waves will be stiff. Gently use your fingers or the wide-toothed end of a comb to soften them slightly if desired, but be careful not to brush them out completely. Finish with a generous mist of strong-hold hairspray.
Crafting the Perfect 1920s Elegant Bun
The low chignon was another staple of the era, often combined with finger waves at the front. It's a look of pure, understated elegance that perfectly complements the sculptural waves.
From Waves to a Chignon
This style works beautifully on hair that already has texture, making it the perfect way to finish a finger-waved look. If you are starting with straight hair, creating some texture with a little backcombing at the crown can help. The style is best achieved on hair that isn't freshly washed, as the natural oils provide better grip.
The Bun-Making Process
The beauty of this bun is its neatness and low placement.
- Smooth your hair back and gather it into a low ponytail at the nape of your neck. If you have finger waves at the front, carefully gather only the back section of your hair, leaving the waves untouched.
- Secure the ponytail with a hair tie.
- Twist the ponytail tightly from the base to the ends.
- Wrap the twisted hair around the base of the ponytail, creating a compact, circular bun.
- Secure the bun firmly against your head using bobby pins. The trick is to hide the pins by tucking them underneath and into the base of the bun.
- Smooth any stray hairs or flyaways with a small amount of gel or a spritz of hairspray on your fingertips. The final look should be sleek and perfectly contained.
Tips for Longevity and a Modern Feel
To ensure your vintage style lasts, product is your best friend. A strong-hold hairspray is non-negotiable. For a softer, more modern take on finger waves, use a lighter mousse instead of a heavy gel and create looser, wider waves. You can also style just the fringe area with waves and leave the rest of your hair in a simple low pony or bun. To protect your style overnight, consider loosely wrapping your hair in a silk or satin scarf to reduce friction and preserve the shape.


