


The festive season is the perfect opportunity to add a touch of sparkle and elegance to your look, and a beautiful manicure is a key detail. A well-executed gel polish application not only complements your holiday outfits but also brings a sense of polished refinement. Whether you prefer classic shades or minimalist designs, creating a festive manicure that is both stunning and durable is entirely achievable. This guide will walk you through choosing the right colours, creating simple yet effective decorations, and ensuring your manicure lasts through all the celebrations.
Choosing the Perfect Festive Colours
The colour palette you choose sets the entire mood for your festive nails. The holidays offer a wonderful excuse to embrace rich tones, shimmering finishes, and classic combinations. Think about your personal style and the events you'll be attending to select the perfect shades.
Classic Reds and Greens
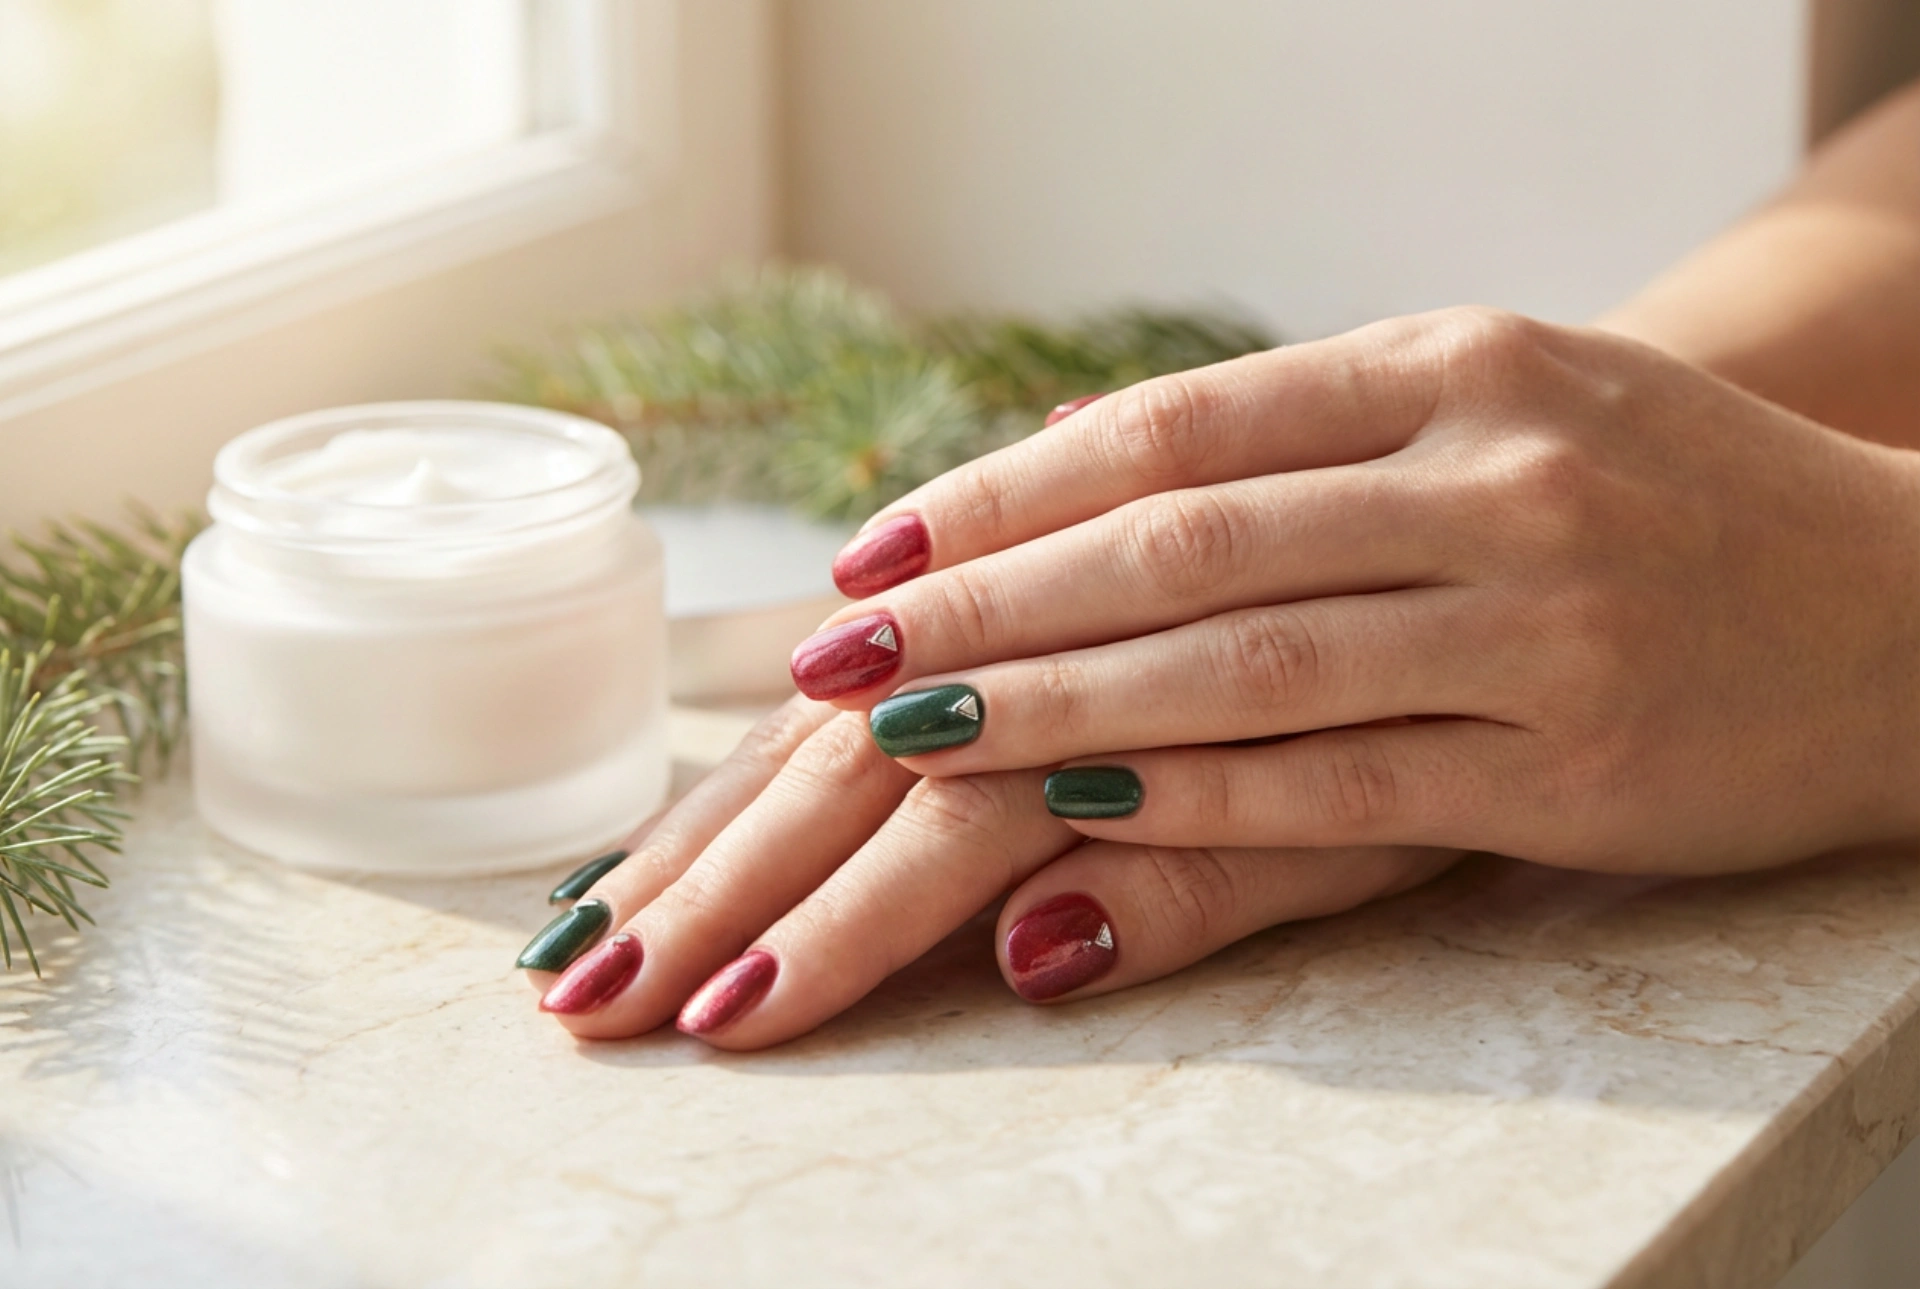
You can never go wrong with the timeless colours of the season. A deep cranberry or ruby red exudes sophistication and warmth, while a rich forest or emerald green offers a touch of natural elegance. These shades are incredibly versatile and look stunning on their own or as a base for simple nail art. For a modern twist, consider a red with a subtle shimmer or a metallic green.
Elegant Neutrals and Metallics
If bold colours aren't your preference, a neutral manicure can be just as festive and chic. Consider shades like creamy white, soft beige, or pale grey. To elevate these understated colours, introduce metallic accents. A touch of gold, silver, or champagne glitter can transform a simple manicure into a celebratory statement. You could paint one accent nail in a metallic shade or add fine glitter to the tips of each nail for a subtle sparkle.
Modern and Moody Hues
For a more contemporary and unique holiday look, explore deeper, more unexpected colours. A dark navy blue, a rich plum, or a deep charcoal grey can be incredibly stylish, especially when paired with a glossy top coat. These shades provide a beautiful canvas for silver or gold art, such as simple stars or delicate lines, creating a look that is both festive and fashion-forward.
Simple DIY Festive Nail Art
You don't need to be a professional artist to create beautiful festive designs. Simple techniques can yield impressive results, adding a personalised touch to your gel manicure.
Minimalist Lines and Dots
One of the easiest ways to add flair is with minimalist patterns. Using a very thin nail art brush, you can paint a single vertical or horizontal line in a contrasting colour, such as gold over a green base. A dotting tool can be used to create simple patterns like a small triangle of dots at the base of the nail or a single dot in the centre. This understated approach is modern, elegant, and quick to execute.
Subtle Glitter Gradients
A glitter gradient, or ombré, is a stunning effect that is surprisingly easy to achieve. After applying your base colour, use a small sponge or a brush to gently dab a glitter gel polish starting from the tip of the nail and fading towards the cuticle. This creates a beautiful cascade of sparkle that catches the light wonderfully. You can also use loose cosmetic glitter, pressing it onto the tacky layer of the gel before applying the top coat.
Stickers and Decals
For perfectly intricate designs with minimal effort, nail stickers and water decals are your best friend. Available in countless festive themes like snowflakes, stars, and holly, they provide a flawless finish. Simply apply your gel colour, cure it, and then place the sticker or decal. Seal it in with a top coat to ensure it is fully protected and integrated into the manicure for a smooth, professional look.
Tips for a Flawless and Lasting Application
The longevity of your gel manicure depends heavily on proper preparation and application. Following these steps will help you avoid chipping and lifting, keeping your nails perfect for weeks.
Thorough Nail Preparation
The foundation of a durable manicure is a well-prepared nail plate. Start by gently pushing back and trimming your cuticles. Next, lightly buff the surface of your nails with a fine-grit buffer to remove any natural shine. This creates a slightly rough surface for the gel to adhere to. Finally, cleanse the nail plate with a specialised dehydrating solution to remove all oils and residue. This step is crucial for ensuring maximum adhesion.
Apply Thin, Even Coats
A common mistake is applying gel polish too thickly. This can prevent the polish from curing properly under the lamp, leading to bubbling and peeling. It's far more effective to apply two or three very thin coats than one thick one. Each layer should be applied evenly, from the cuticle to the tip, and cured for the recommended time before applying the next.
Capping the Free Edge
To prevent chips and seal the manicure, always 'cap' the free edge of your nail. After painting the surface of the nail with each coat (base, colour, and top), run the brush lightly along the very tip of the nail. This creates a seal that protects the most vulnerable part of the manicure from daily wear and tear, significantly extending its life.


