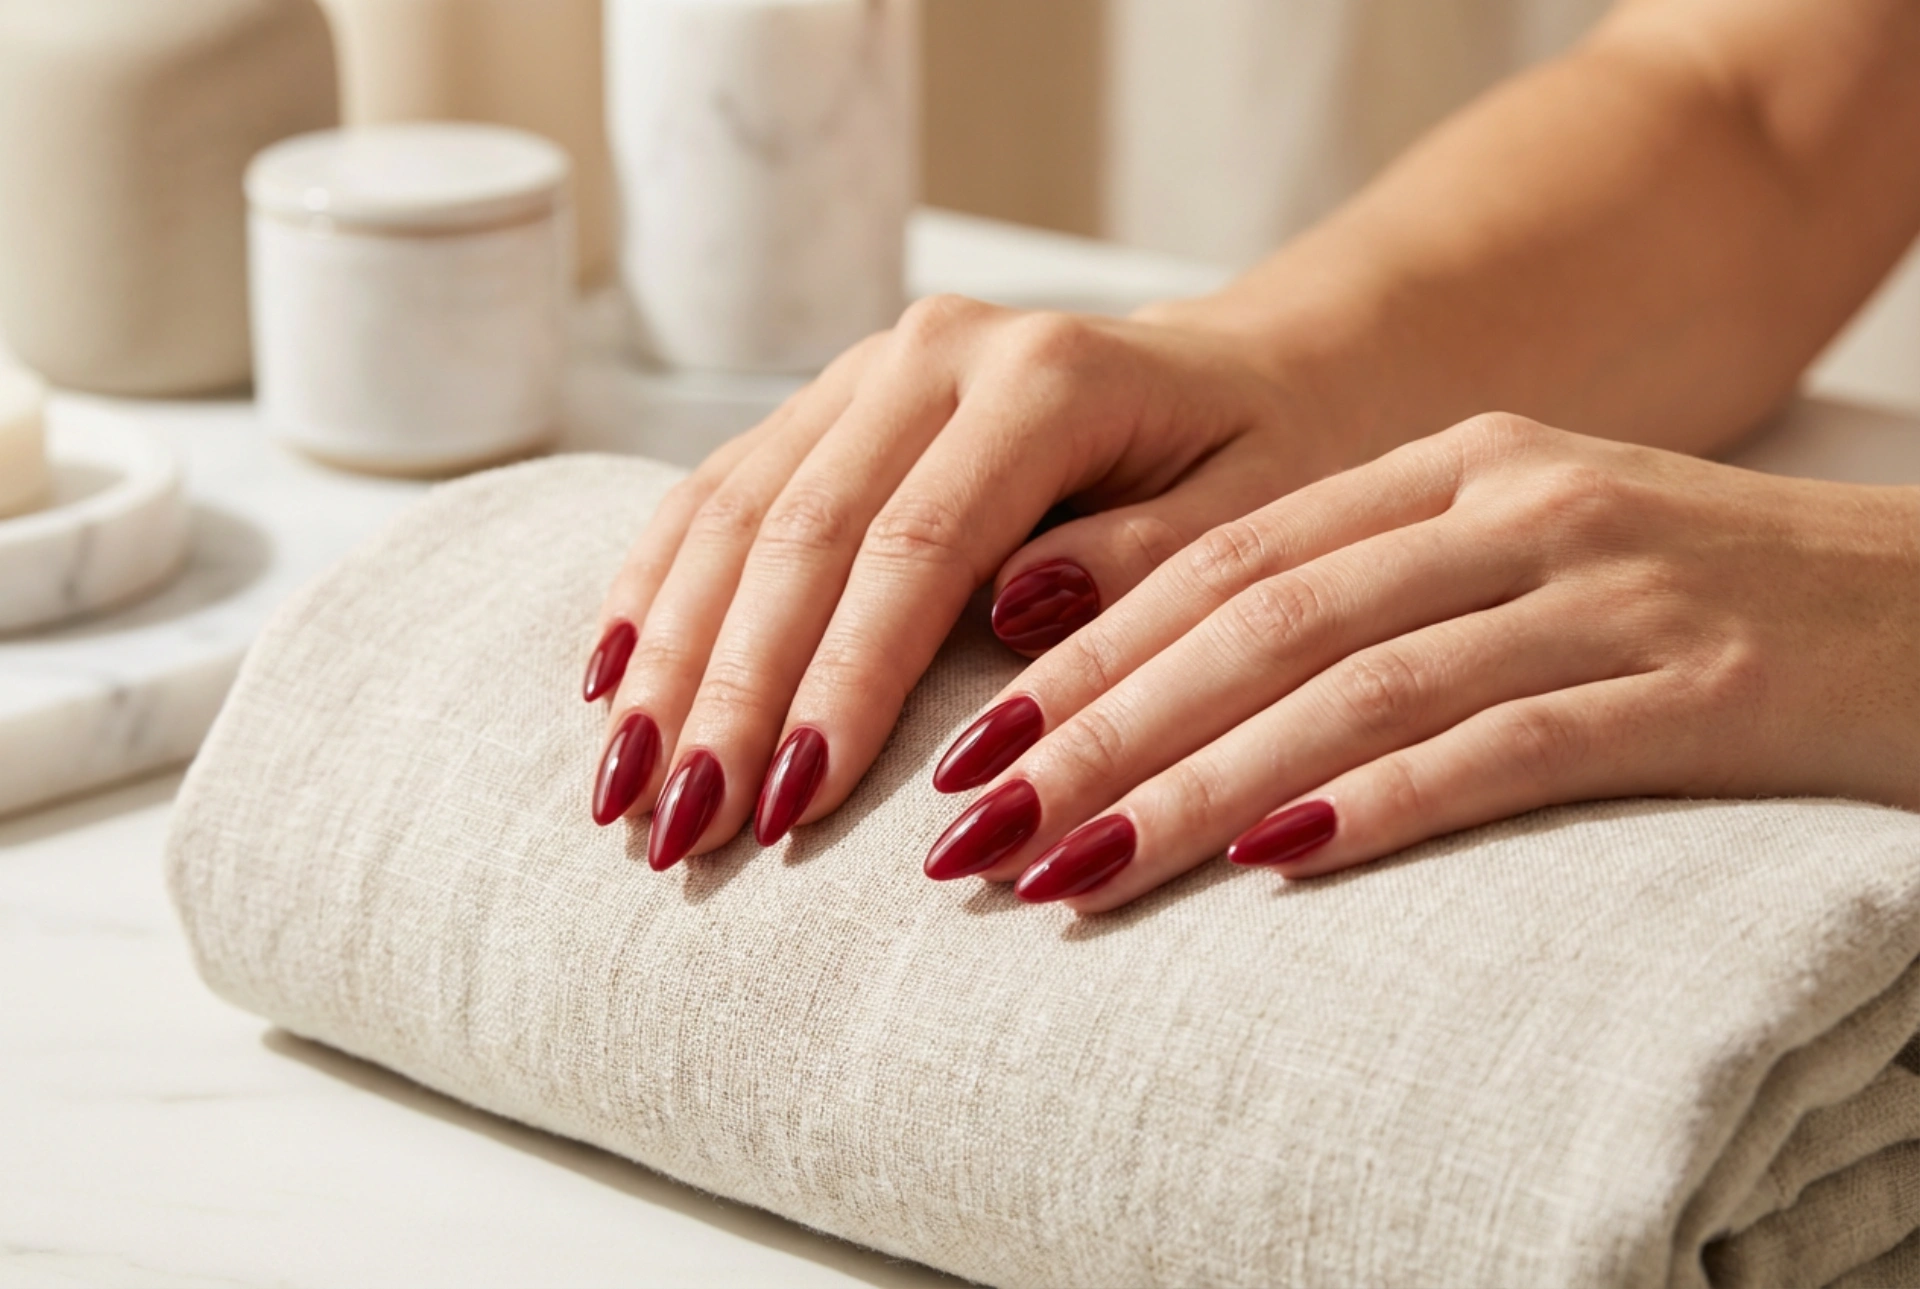


Burgundy nails are the epitome of elegance and sophistication. This deep, rich shade is timeless, suitable for any season and occasion, adding a touch of refined glamour to your look. Achieving that perfect, long-lasting, high-gloss finish, as seen on beautifully manicured hands, is possible with a gel manicure. The process involves several key stages, from meticulous preparation to building a strong structure and applying colour flawlessly. This guide will walk you through the essential steps to create stunning burgundy gel nails that are both durable and beautiful.
Preparing Your Nails for a Gel Manicure
Proper preparation is the foundation of a long-lasting gel manicure. Skipping this stage can lead to lifting and chipping. The goal is to create a clean, dry, and slightly textured surface for the gel products to adhere to.
Cleaning and Shaping
Begin with clean, dry hands and nails. Remove any old polish completely. Next, file your nails to your desired shape, whether it's a classic almond, a sharp square, or a soft oval. When filing, move the file in one direction from the side to the centre of the nail to prevent splitting. Once you are happy with the shape, gently push back your cuticles using a wooden or rubber-tipped cuticle pusher. Avoid cutting the cuticles yourself, as this can lead to irritation; their role is to protect the nail matrix.
Preparing the Nail Plate
For the gel to adhere properly, the natural shine of the nail must be removed. Use a fine-grit buffer to gently buff the entire surface of the nail plate. The aim is to create a matte finish, not to thin the nail. After buffing, dust and debris must be removed. Use a lint-free wipe saturated with a nail cleanser or isopropyl alcohol to thoroughly wipe each nail. This step dehydrates the nail plate and removes any remaining oils, ensuring maximum adhesion for the base coat.
Building the Gel Structure
The structure of a gel nail provides its strength and durability. This is achieved by applying a base coat and, if desired, a builder gel to create a perfect arch and shape.
Applying the Base Coat
The base coat acts as a crucial barrier between your natural nail and the coloured gel, preventing staining. It also creates a sticky layer for the subsequent coats to bond to. Apply a very thin, even layer of gel base coat to the entire nail, making sure to 'cap' the free edge by running the brush along the tip. This helps to prevent chipping. Cure the base coat under a UV or LED lamp according to the product's specific instructions, which is typically between 30 to 60 seconds.
Creating Strength with Builder Gel
For added strength and a more pronounced, elegant shape, you can apply a layer of builder gel over the cured base coat. Builder gels have a thicker consistency and allow you to build an 'apex'—the highest point of the nail, usually in the centre—which provides structural support. Apply a small bead of builder gel and guide it over the nail to create a smooth, even surface. You may need to turn your finger upside down for a moment to let gravity help form the perfect arch. Cure this layer thoroughly under the lamp. After curing, if there are any bumps or unevenness, you can lightly file the surface to refine the shape before applying colour.
Applying the Burgundy Colour and Top Coat
This is the stage where your nails come to life with rich colour and a brilliant shine. The key to a professional-looking result is applying thin, even coats.
Achieving the Perfect Burgundy Hue
Apply your chosen burgundy gel colour in a thin, even coat. Thinner coats cure more effectively and prevent the gel from wrinkling or bubbling. Start near the cuticle line and brush towards the tip. Be careful not to let the gel touch your skin or cuticles. As with the base coat, remember to cap the free edge. Cure the first layer of colour under the lamp. The first coat may look sheer, but this is normal.
Deepening the Colour and Finalising the Look
Apply a second coat of the burgundy gel colour to achieve full opacity and depth. This second layer will intensify the shade and create a smooth, uniform finish. Cure this layer completely. Finally, to protect the colour and provide that signature high-gloss finish, apply a layer of gel top coat. A 'no-wipe' top coat is a convenient option as it cures to a non-sticky, brilliant shine. Ensure you cover the entire nail and cap the free edge once more. Perform the final cure under the lamp, and your stunning burgundy gel manicure is complete.
Aftercare for Long-Lasting Gel Nails
With the right care, your gel manicure can last for several weeks without losing its shine. Following a few simple rules will help maintain their flawless appearance.
- Nourish your cuticles and the surrounding skin daily with a good quality cuticle oil. This keeps them hydrated and healthy, promoting strong nail growth.
- Wear protective gloves when performing household chores, especially those involving prolonged contact with water or harsh cleaning chemicals.
- Avoid using your nails as tools to open cans, scrape things, or type aggressively. Treat them gently to prevent stress and potential breakage.
- Never pick or peel off your gel manicure. This can strip away layers of your natural nail, leaving them weak and damaged. Proper removal is essential for maintaining nail health.


