


The trend for luminous, pearlescent nails has captured the imagination of beauty enthusiasts everywhere. This elegant effect, reminiscent of a polished pearl, can be achieved at home using a special fine powder. The process involves delicately applying the powder onto a prepared nail to create a mesmerising, iridescent sheen that shifts beautifully in the light. Whether you prefer hybrid or gel manicures, learning the correct technique is key to achieving a flawless and long-lasting finish. This guide will walk you through the entire process, from preparation to final touches.
What is Pearl Nail Powder?
Pearl nail powder is an ultra-fine, shimmering pigment designed to be rubbed onto a nail surface to create a unique effect. Unlike glitter, which consists of larger particles, this powder is milled to a silky-smooth consistency. When buffed onto a nail, it creates a seamless, reflective surface similar to chrome powders but with a softer, more delicate pearlescent glow. It is available in various shades, though the most popular is a classic white or iridescent hue that mimics the lustre of a natural pearl. The final look can be dramatically altered by the base colour it is applied over.
Essential Tools and Preparation
Before you begin, it's important to gather the right tools. A successful application depends on having everything ready. You will need:
- Your completed hybrid or gel manicure, cured and ready for the effect (base coat and colour coats applied).
- Pearl nail powder.
- A no-wipe top coat. This is crucial as its unique surface after curing is what allows the powder to adhere correctly.
- An applicator, such as a small sponge eyeshadow applicator or a dedicated silicone tool.
- A soft, fluffy brush (like a fan brush or a large makeup brush) to dust off excess powder.
- A UV/LED lamp for curing.
Step-by-Step Application on a Hybrid Manicure
Applying pearl powder over a hybrid manicure is a straightforward process. The key lies in the timing of curing the top coat.
- Prepare Your Nails: Complete your standard hybrid manicure up to the point of applying the final top coat. This means you should have a cured base coat and two cured coats of your chosen colour.
- Apply a No-Wipe Top Coat: Apply a thin, even layer of a no-wipe top coat over the entire nail, making sure to cap the free edge.
- Cure Partially: This is the most critical step. Cure the no-wipe top coat under your lamp for approximately half the manufacturer's recommended time (e.g., 15-30 seconds in an LED lamp instead of 60). The surface should be warm to the touch and dry, but not fully hardened. It should not have a sticky inhibition layer.
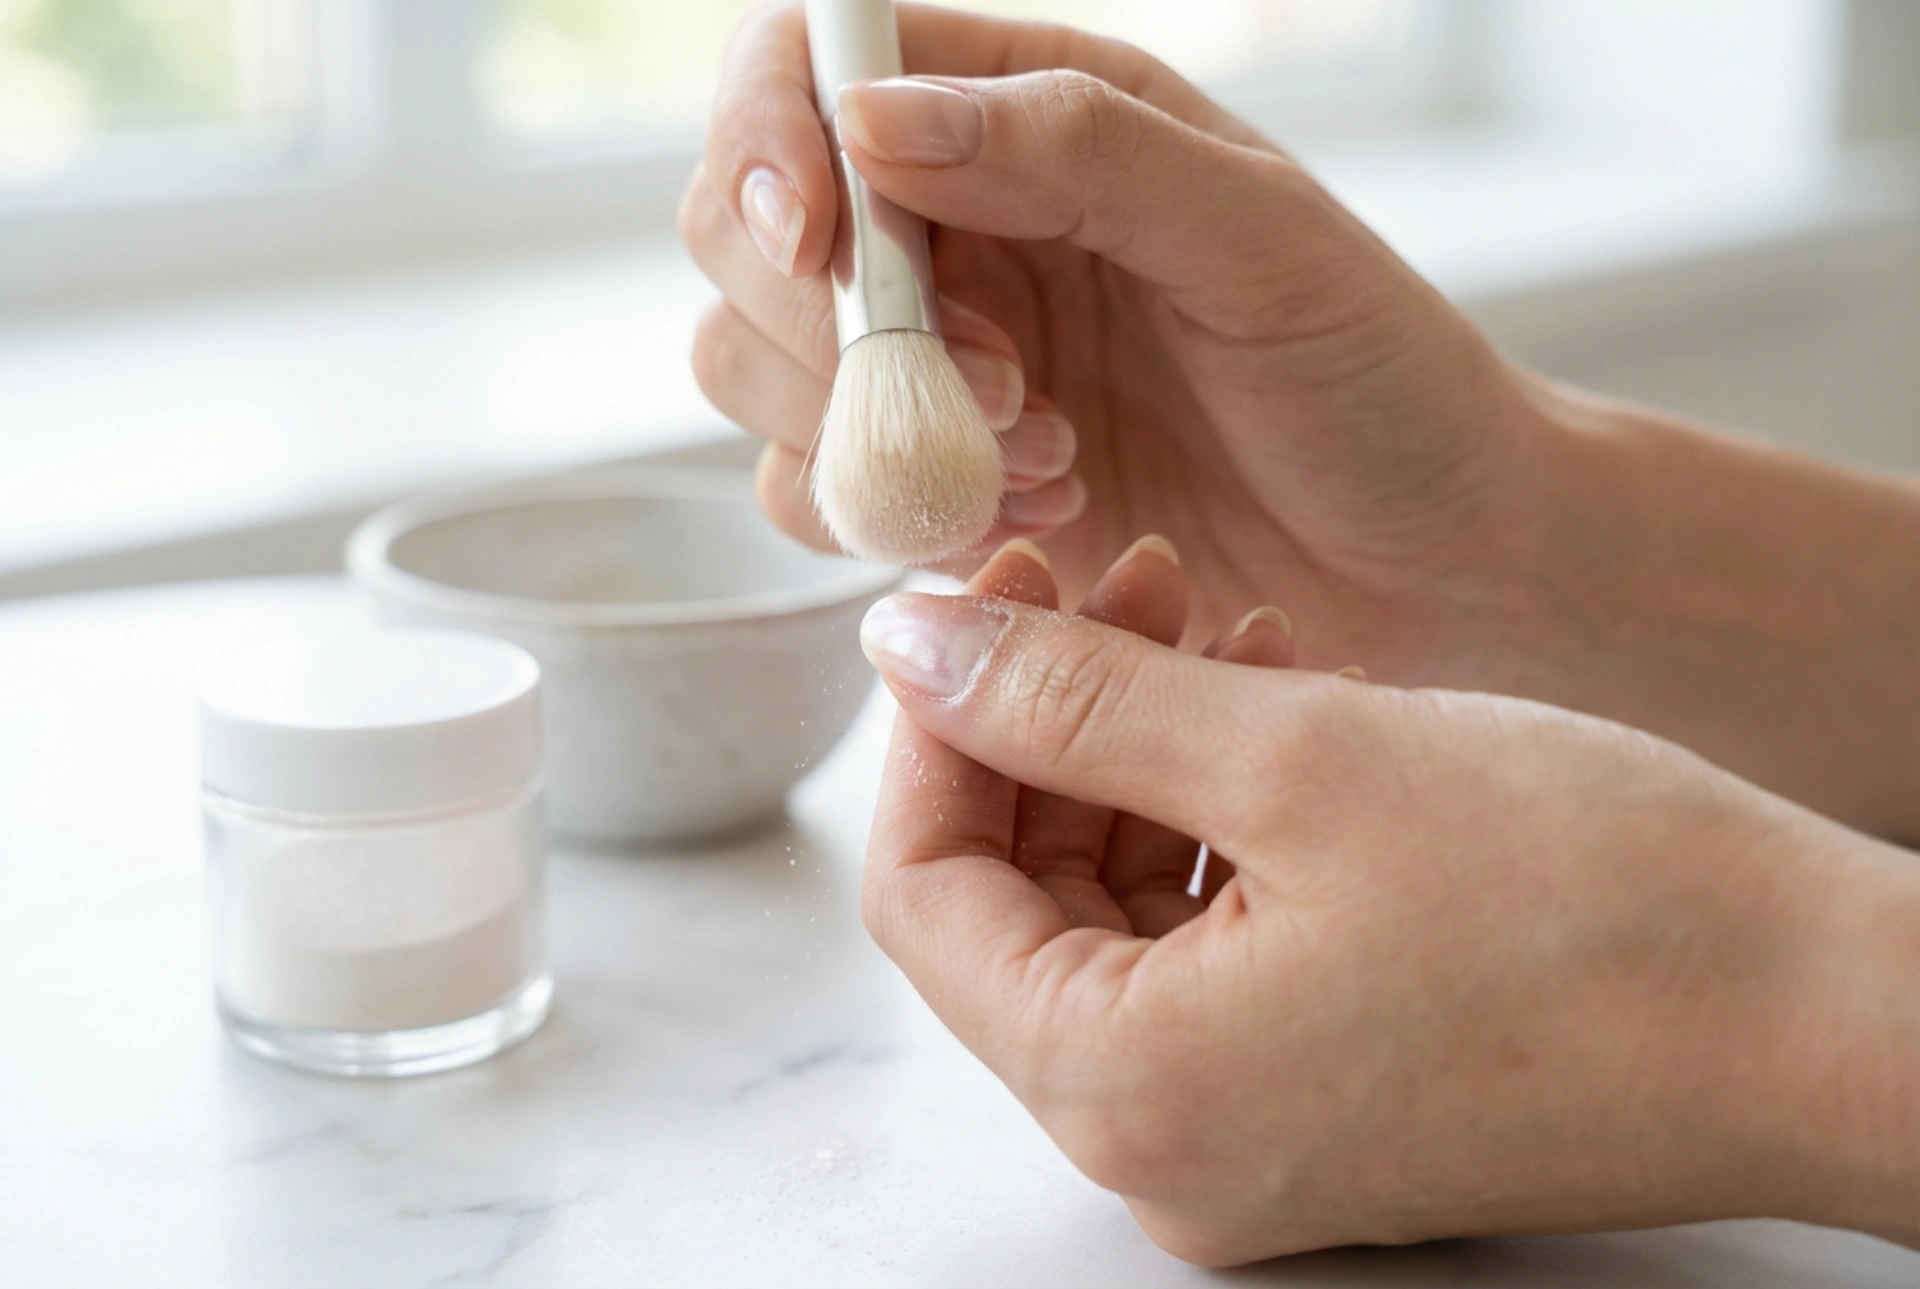
- Apply the Powder: Dip your applicator into the pearl powder, picking up a small amount. Gently but firmly rub the powder onto the surface of the nail using circular or back-and-forth motions. Start from the cuticle and work your way to the tip. Continue buffing until the entire nail is covered and the surface looks smooth and metallic.
- Remove Excess Powder: Using your soft, clean brush, gently dust away all loose powder particles from the nail and the surrounding skin. Pay close attention to the cuticle area and sidewalls. Any leftover particles will be sealed under the final top coat and spoil the finish.
- Seal the Effect: Apply a final, thin layer of the no-wipe top coat over the entire nail. Be sure to cap the free edge again to prevent chipping.
- Final Cure: Cure this final top coat for the full recommended time to ensure maximum durability and shine.
Step-by-Step Application on a Gel Manicure
The method for applying pearl powder on gel nails is almost identical to the hybrid technique. You will follow the same principles after you have built, shaped, and applied colour to your gel extensions or overlays.
- Prepare the Gel Nail: Once your gel nail is constructed, filed into shape, and you have applied your chosen gel polish colour (curing each layer), you are ready for the powder.
- Apply and Half-Cure the Top Coat: Just as with the hybrid method, apply a no-wipe top coat and cure it for a fraction of the full time. The goal is to create that perfect, non-sticky but receptive surface.
- Rub in the Powder: Use your applicator to buff the pearl powder onto the warm top coat until you achieve a uniform, pearlescent sheen.
- Dust Off and Seal: Carefully remove all excess powder with a soft brush. Then, apply a final layer of no-wipe top coat, sealing the free edge thoroughly.
- Complete the Cure: Place your hand in the lamp for the full curing time recommended for your top coat. This will protect the delicate powder effect and give it a high-gloss finish.
Common Mistakes and Simple Fixes
Even with a guide, you might encounter some issues. Here’s how to troubleshoot them:
- The powder won't stick or looks patchy: This usually happens if the top coat was cured for too long before application, making the surface too slick. Alternatively, using a standard 'wipe' top coat will leave a very sticky layer that causes the powder to clump rather than buff. Fix: Ensure you are using a no-wipe top coat and reduce the initial curing time. Experiment to find the sweet spot for your specific lamp and product.
- The finish appears grainy or dull: This is caused by not buffing the powder in sufficiently or by failing to remove all the excess loose particles before applying the final top coat. Fix: Apply more pressure when rubbing in the powder to create a mirror-like surface. Be meticulous about dusting off every stray particle with a soft brush.
- The effect chips at the tips: The most common reason for premature wear is not sealing the free edge of the nail properly. Fix: When applying both the initial top coat (before the powder) and the final top coat, make sure you run the brush along the very edge of your nail tip. This 'capping' action creates a seal that protects the manicure.


