


Nail powders are a fantastic way to add a touch of magic to your manicure, transforming a simple colour into a stunning chrome, holographic, or iridescent finish. While the effect looks professional and intricate, applying nail powder at home is surprisingly straightforward with the right technique. This guide will walk you through the entire process, from preparing your nails to sealing the design for a durable, eye-catching result. With a little practice, you can master this popular nail art trend.
Preparing Your Nails for Powder Application
The key to a flawless powder finish lies in the preparation. A smooth and correctly prepared base is essential for the powder to adhere evenly and create the desired effect. Rushing this stage can lead to a patchy or short-lived manicure.
The Base Layer
Start with clean, dry nails. Shape them and gently push back your cuticles. Apply a quality base coat and cure it according to the manufacturer's instructions. Next, apply one or two coats of your chosen gel polish colour. Black is a popular choice as it makes most chrome and holographic powders pop, but you can experiment with any colour. Cure each layer thoroughly. The next step is the most critical: you need a specific surface for the powder to stick to. You have two main options:
- The Tacky Layer: After curing your final colour coat, do not wipe away the sticky dispersion layer that remains. This layer is perfect for grabbing the powder.
- No-Wipe Top Coat: Alternatively, apply a thin layer of a 'no-wipe' top coat over your cured colour and cure it fully. This creates a super smooth, non-tacky surface that is ideal for achieving a true mirror-like chrome effect.
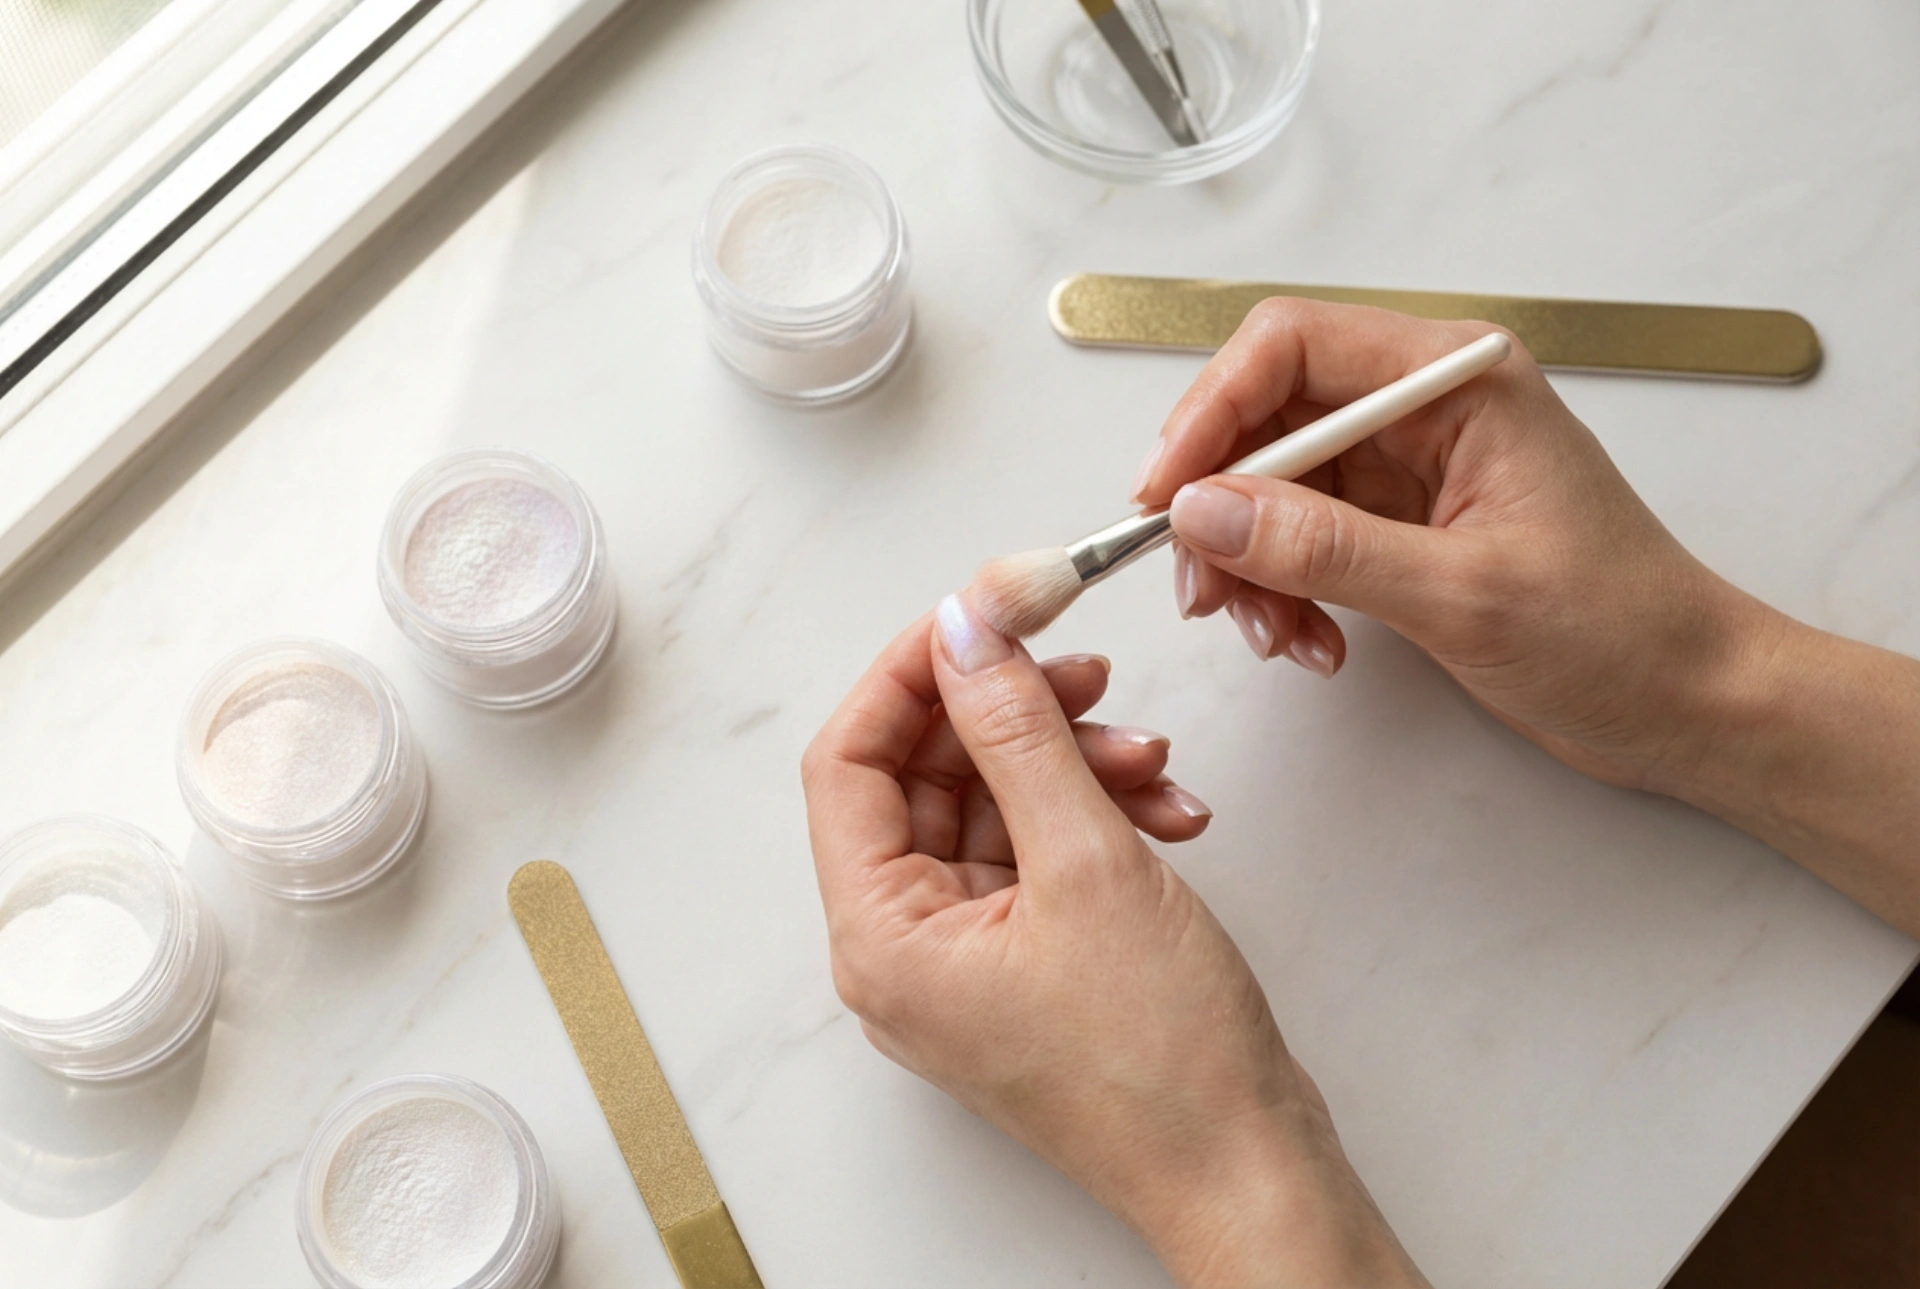
Step-by-Step Guide to Applying Nail Powder
Once your base is ready, it's time for the fun part. Work one nail at a time to ensure the surface is perfect for application. You will need the nail powder of your choice and a dedicated applicator, such as a small sponge-tipped eyeshadow applicator, a silicone tool, or even your gloved fingertip.
- Load the Applicator: Dip your applicator lightly into the powder. A little goes a long way, so you only need a small amount to cover the entire nail.
- Rub the Powder Onto the Nail: Gently but firmly rub the powder onto the nail surface. If you are using the tacky layer of a colour coat, the powder will adhere instantly. If you are using a cured no-wipe top coat, you will need to burnish the powder into the surface with firm pressure to create the reflective sheen.
- Build the Effect: Use circular or back-and-forth motions to spread the powder evenly. Continue rubbing until the entire nail is covered and the desired effect—be it a smooth mirror finish or a sparkling holographic shimmer—is achieved. The surface should look smooth and metallic, not glittery.
- Remove Excess Powder: Once you are happy with the effect, use a soft, fluffy brush (like a fan brush or a clean makeup brush) to gently dust away all loose powder particles from the nail and the surrounding skin. This is a crucial step to prevent specks from getting trapped in your top coat.
Securing the Powder for a Long-Lasting Finish
Applying the powder is only half the battle; sealing it correctly is what ensures your beautiful manicure lasts. Without a proper top coat, the powder will rub off within hours. The goal is to encase the powder layer completely without smudging the delicate finish you just created.
The Sealing Process
First, and most importantly, you must 'cap the free edge'. Using your top coat, run the brush along the very tip of your nail. This creates a seal that prevents the manicure from chipping and peeling from the edge. After capping the edge, apply a thin, even layer of a high-quality gel top coat over the entire nail surface. Be careful not to apply too much pressure with the brush, as this could drag the powder and create streaks. Cure the top coat under your lamp for the recommended time. For extra protection, especially with chrome powders, you can apply a second layer of top coat, curing again after application. This ensures a durable, high-gloss finish that will last for weeks.
Common Mistakes to Avoid
Achieving a perfect powder manicure can involve some trial and error. Being aware of common pitfalls can help you get it right the first time.
- Applying to the Wrong Surface: Nail powder will not stick to a dry, wiped nail or a standard cured top coat. You must use either the tacky inhibition layer of a gel polish or a cured no-wipe top coat.
- Using Too Much Powder: Piling on the powder will result in a clumpy, textured finish rather than a smooth, reflective one. Start with a tiny amount and add more only if necessary.
- Not Removing Excess Powder: Failing to brush away loose particles before applying the top coat will leave you with a gritty, speckled finish instead of a clean, sleek one.
- Forgetting to Cap the Free Edge: This is the number one cause of chipping. Sealing the tip of the nail is essential for the longevity of any gel manicure, but it is especially critical for powder designs.
- Contaminating Your Top Coat: If you dip the top coat brush directly back into the bottle after applying it over the powder, you will transfer loose particles into your clear polish. Always wipe the brush clean on a lint-free wipe before returning it to the bottle.


