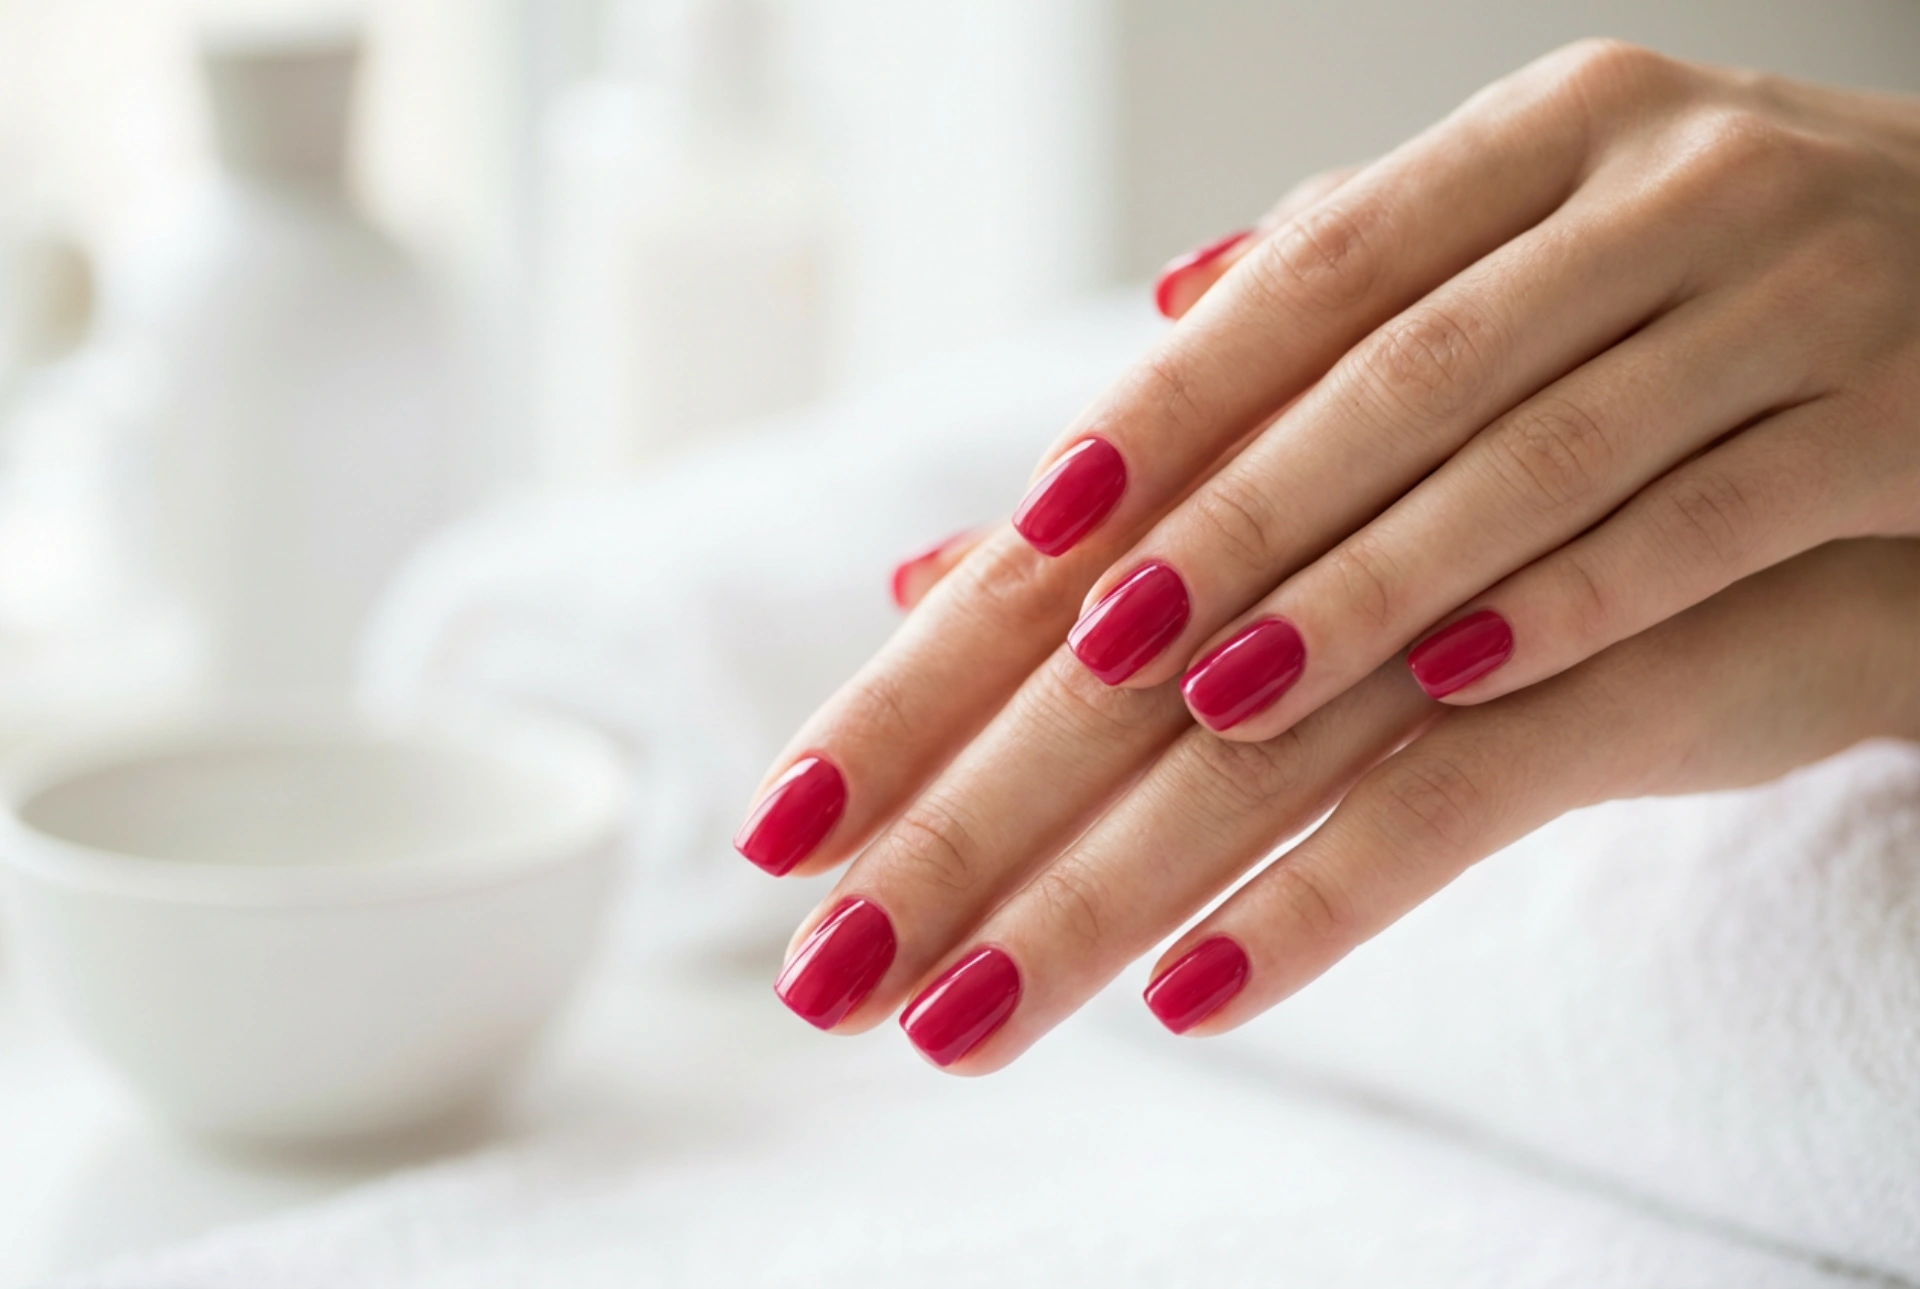


A vibrant raspberry shade on the nails is a timeless choice that combines elegance with a touch of modern flair. It's a versatile colour that suits various skin tones and occasions, from a casual day out to an elegant evening event. Achieving a salon-quality finish at home, with a smooth application and a brilliant shine, is entirely possible with the right technique and a bit of patience. This guide will walk you through the essential steps to get perfect raspberry-coloured nails that look professionally done, smooth, and impressively glossy.
Preparing Your Nails for a Perfect Manicure
The foundation of any beautiful manicure is well-prepared nails. Skipping this stage can lead to a streaky application and a shorter-lasting result. Before you even open your bottle of raspberry polish, dedicate some time to nail care.
Key Preparation Steps:
- Clean the Nail Plate: Start with clean, dry nails. Remove any old polish completely using a gentle nail polish remover. Afterwards, wash your hands with soap and water to remove any oily residue, which can prevent the new polish from adhering properly. Dry your hands and nails thoroughly.
- Shape Your Nails: Use a soft nail file (a glass or crystal file is a great choice) to shape your nails. File in one direction only, from the side to the centre, to prevent splitting and weakening the nail. Avoid sawing back and forth. Whether you prefer a square, oval, or almond shape, ensure all nails are a consistent length and shape.
- Cuticle Care: Healthy cuticles are essential. Instead of cutting them, which can lead to irritation, gently push them back using an orangewood stick or a cuticle pusher. You can soften them first by applying a cuticle remover solution or soaking your fingertips in warm water for a few minutes.
- Buff the Surface: Lightly buff the surface of your nails with a fine-grit buffer. This smooths out any ridges and creates a perfect canvas for the polish. Be very gentle to avoid thinning the nail. The goal is to create a subtle texture for the polish to grip, not to shine the nail.
The Art of Even Application
The secret to a flawless, even coat of colour lies in the application technique. Rushing this process often results in streaks, bubbles, and a messy finish. The key is to apply thin, deliberate layers.
Applying the Polish:
- Start with a Base Coat: Never skip the base coat. It serves multiple purposes: it protects your natural nails from staining (especially important with rich colours like raspberry), helps the polish adhere better, and provides a smooth surface for the colour application. Apply one thin layer and let it dry completely.
- The First Colour Coat: Shake the polish bottle gently to mix the pigment. Wipe one side of the brush on the bottle's neck to remove excess polish. You want just enough on the brush for one nail. Apply the polish using the 'three-stripe' method: one stripe down the centre of the nail, followed by one on each side. Keep the coat thin. Don't worry if it looks a bit sheer; the second coat will provide full coverage.
- The Second Colour Coat: Once the first coat is completely dry to the touch (wait at least two to three minutes), apply a second thin coat using the same three-stripe technique. This layer will deepen the raspberry colour and cover any patchiness, resulting in a rich, uniform appearance.
- Clean Up Mistakes: It's normal to get some polish on the skin around your nails. For a crisp, clean look, dip a small, stiff brush or a cotton bud in nail polish remover and carefully trace around your cuticle line to clean up any smudges. Do this before the polish fully dries.
Achieving That High-Gloss Shine
The final step to achieving that coveted, high-shine finish is the top coat. It's a non-negotiable step for both gloss and longevity.
A good quality top coat not only imparts a brilliant, gel-like shine but also seals in the colour, protecting it from chipping and fading. When applying the top coat, be sure to 'cap' the free edge of your nail. This means running the brush horizontally along the very tip of your nail. This simple trick creates a seal that significantly reduces the likelihood of chipping and helps your manicure last much longer. For an extra durable and glossy finish, consider a top coat specifically designed for high shine and quick drying. Allow the top coat ample time to harden completely to avoid smudges.
Tips for a Long-Lasting Raspberry Manicure
Once you've perfected your beautiful raspberry manicure, you'll want it to last as long as possible. With a few simple habits, you can extend its life by several days.
- Reapply a Top Coat: To maintain the shine and add an extra layer of protection, apply a fresh, thin layer of top coat every two to three days.
- Wear Gloves: Protect your nails from harsh chemicals and prolonged water exposure. Wear rubber gloves when washing dishes, cleaning the house, or gardening.
- Moisturise: Keep your hands and cuticles hydrated by regularly applying hand cream and cuticle oil. Healthy, moisturised skin and cuticles frame your manicure beautifully and prevent hangnails.
- Be Gentle: Avoid using your nails as tools to open cans, scrape off labels, or press small buttons. This is one of the quickest ways to cause chips and breaks.


