


Achieving a flawless, long-lasting manicure with a beautiful gloss is no longer exclusive to beauty salons. With the right tools and techniques, you can create a professional-looking hybrid manicure in the comfort of your own home. This process, which combines the durability of gel with the ease of application of traditional polish, allows for a refined finish that can last for weeks. This guide will walk you through every step, from preparing your nails to the final curing, ensuring a beautiful and durable result.
Gathering Your At-Home Hybrid Manicure Kit
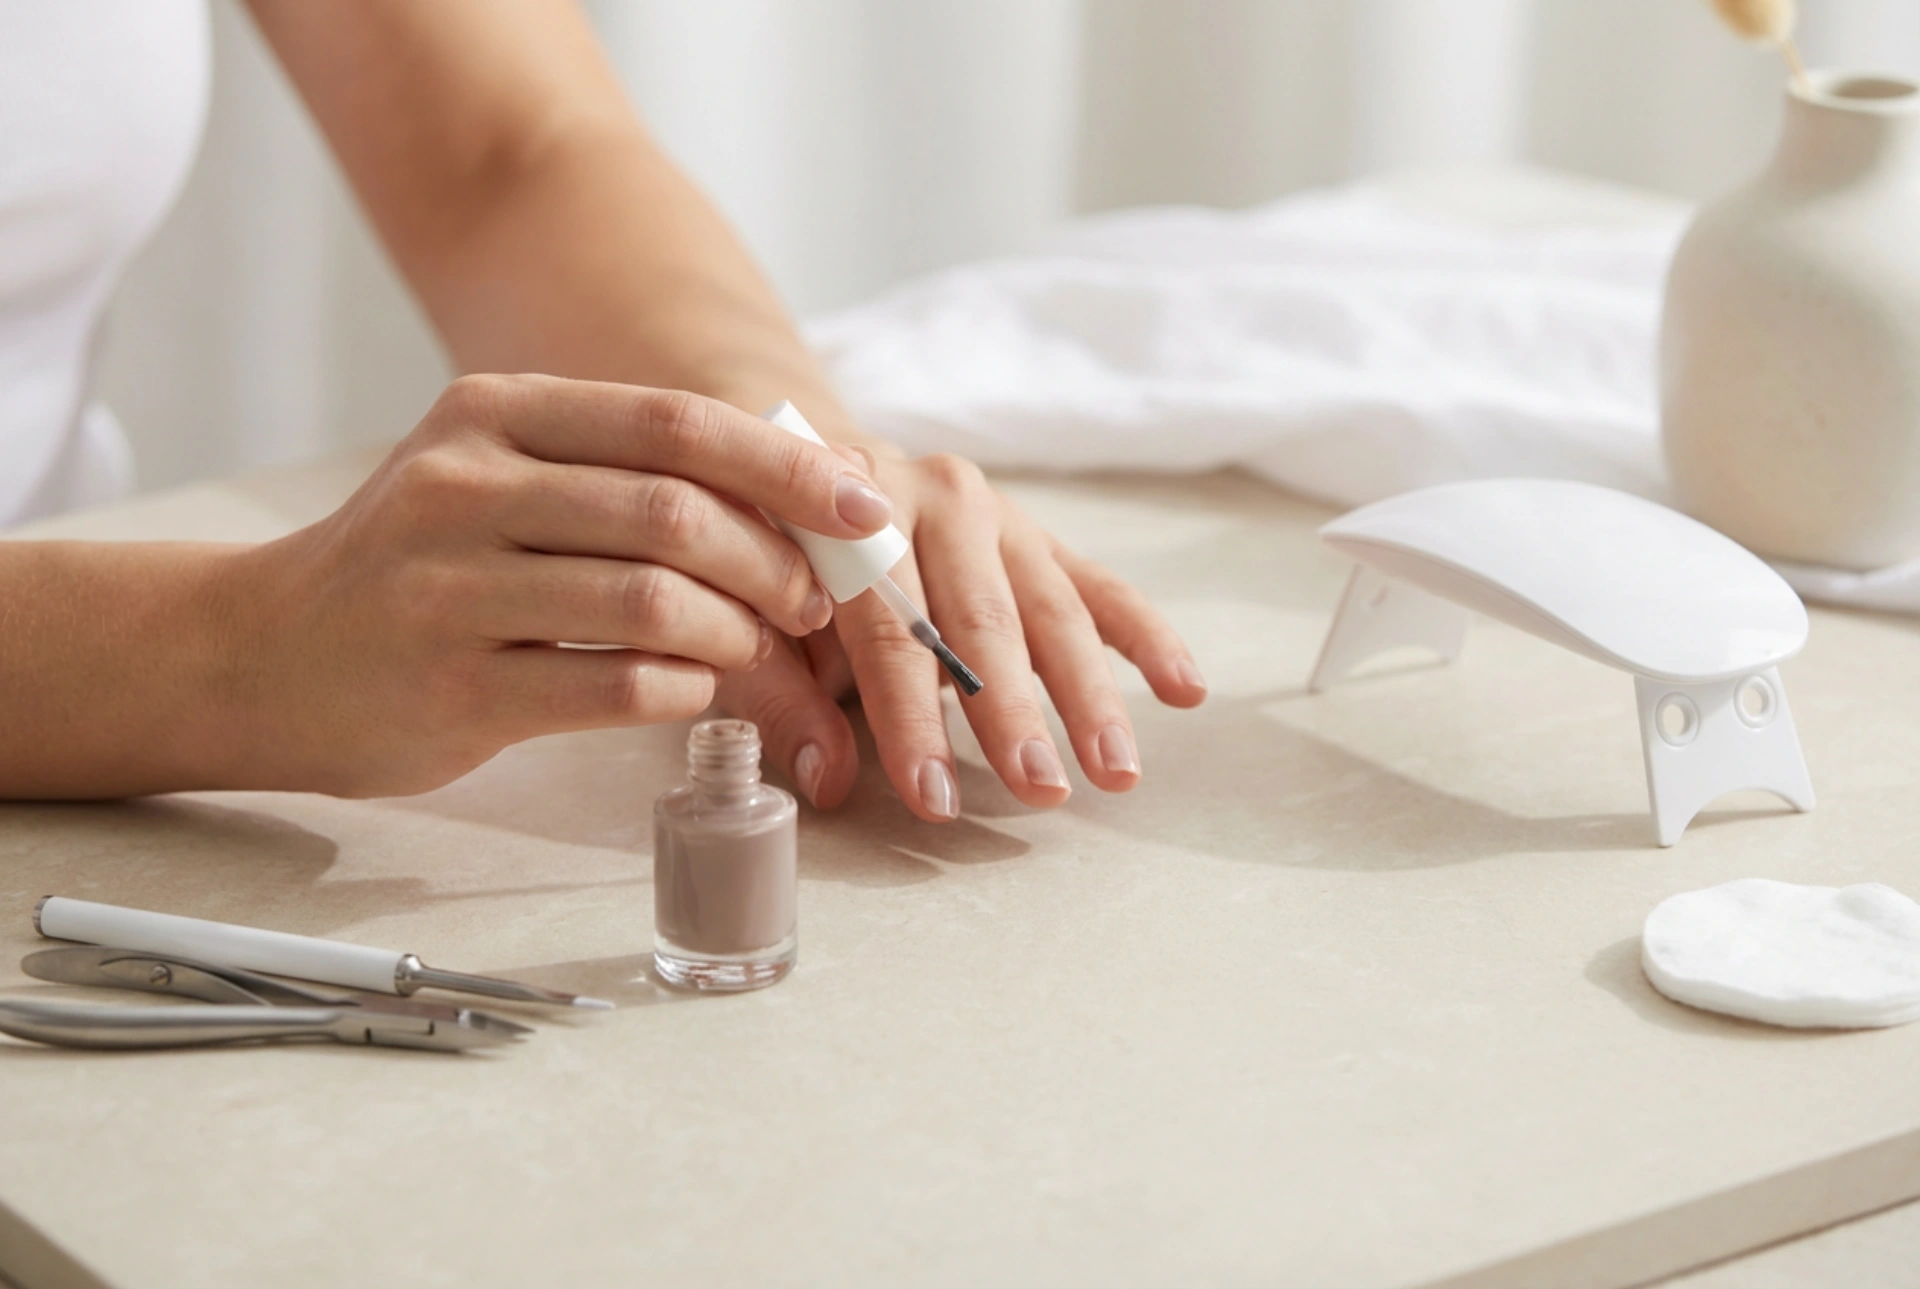
Before you begin, it’s essential to have all the necessary tools and products ready. A well-organised setup will make the process smoother and more enjoyable. Here is a list of what you will need:
- Nail File and Buffer: A file (180/240 grit is ideal) to shape the nails and a gentle buffer block to mattify the nail plate.
- Cuticle Pusher or Wooden Stick: For gently pushing back the cuticles.
- Nail Degreaser/Cleaner: A special alcohol-based solution to remove oils and moisture from the nail plate, ensuring better adhesion.
- Lint-Free Wipes: To use with the cleaner without leaving any fluff behind.
- Hybrid Base Coat: This creates a protective layer and helps the colour polish adhere to the nail.
- Hybrid Colour Polish: Choose your desired shade. It's best to start with lighter, more forgiving colours if you're a beginner.
- Hybrid Top Coat: This seals the colour, provides a high-gloss shine, and protects the manicure from chipping. Some are "no-wipe," while others require cleansing after curing.
- LED or UV Lamp: Essential for curing (hardening) each layer of the hybrid polish. LED lamps generally cure faster than UV lamps.
- Cuticle Oil: To nourish the skin around your nails after the manicure is complete.
Step 1: Meticulous Nail Plate Preparation
Proper preparation is the most critical step for a long-lasting hybrid manicure. Do not rush this stage, as it directly impacts how well the polish will adhere and how long your manicure will last. Start by removing any old nail polish. Then, follow these steps:
Shaping and Cuticle Care
First, use a nail file to gently shape your nails to your desired length and form. Always file in one direction to prevent the nail from splitting. Next, apply a cuticle remover solution if you have one, or simply soak your fingertips in warm, soapy water for a few minutes to soften the cuticles. Use a wooden stick or a metal pusher to gently push them back. Avoid cutting your cuticles at home, as this can lead to skin irritation and creates a risk of minor injuries.
Buffing and Degreasing
Once your cuticles are neat, take a soft buffer block and gently buff the entire surface of each nail plate. The goal is not to thin the nail, but simply to remove the natural shine and create a slightly rough surface for the base coat to grip onto. After buffing, use a lint-free wipe soaked in nail cleaner to thoroughly degrease each nail. Pay special attention to the areas around the cuticles and the free edge. From this point on, avoid touching your nails with your fingers to prevent transferring oils back onto the surface.
Step 2: The Art of Application
Applying hybrid polish requires precision and patience. The key is to apply very thin, even layers. Thick layers may not cure properly and can lead to a "wrinkled" or lumpy finish.
Applying the Base Coat
Start by applying a very thin layer of the base coat to one hand. Make sure to cover the entire nail plate but avoid flooding the cuticles. If any polish gets on your skin, clean it off with a wooden stick dipped in cleaner before curing. "Cap" the free edge of the nail by running the brush along the tip; this helps to prevent chipping. Cure the base coat under your LED/UV lamp according to the product's instructions (typically 30-60 seconds for an LED lamp).
Applying the Colour
Next, apply your chosen colour polish in a thin, even layer. Again, avoid contact with the skin and remember to cap the free edge. Cure this layer under the lamp. Most colours will require a second coat for full opacity. Apply the second layer just as thinly as the first and cure it again. Applying thin coats ensures that the light from the lamp can penetrate and harden the polish completely.
Applying the Top Coat
The final layer is the top coat. Apply it carefully over the entire nail to seal in the colour and provide that signature high-gloss finish. Be sure to cap the free edge one last time. Cure the top coat under the lamp for the recommended time, which might be slightly longer than for the colour or base coats. This final curing is crucial for durability.
Step 3: Curing, Finishing, and Aftercare
The curing process hardens the polish, making it instantly dry and durable. Always follow the manufacturer's recommended curing times for your specific lamp and polishes.
The Final Cleanse
After the final cure, many standard top coats will leave a sticky or tacky "inhibition layer." This is perfectly normal. To remove it, take a fresh lint-free wipe saturated with nail cleaner and wipe each nail firmly. This will reveal the smooth, hard, and shiny surface underneath. If you used a "no-wipe" top coat, you can skip this step entirely.
Nourish and Admire
To complete your at-home manicure, apply a drop of cuticle oil to the skin around each nail and gently massage it in. This will rehydrate the skin after being exposed to the cleaner and lamp, giving your manicure a truly professional and pampered finish. Now you can enjoy your beautiful, chip-free nails for up to two or three weeks!


