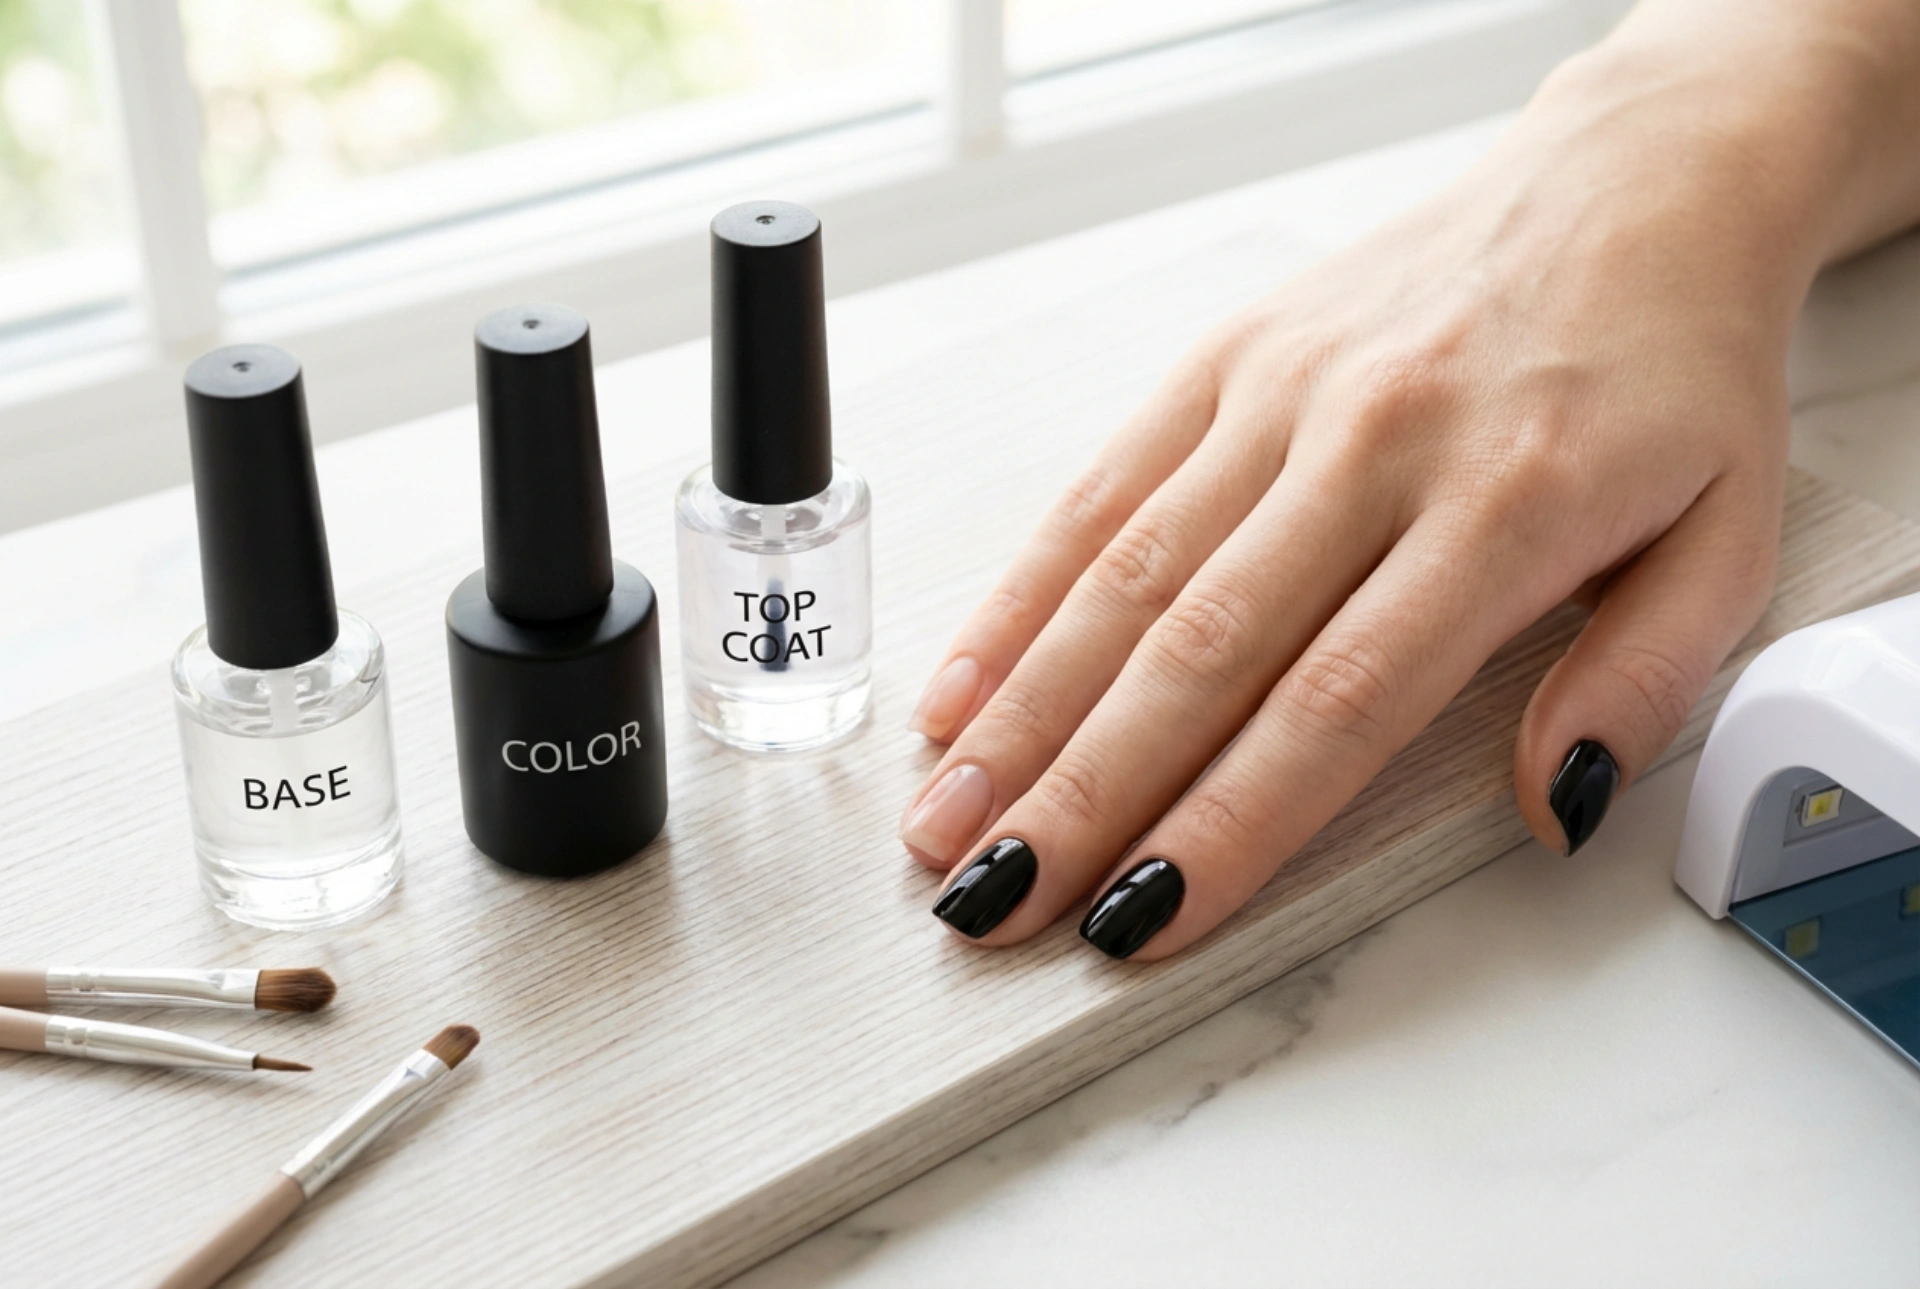


Black nails are a timeless statement of elegance and sophistication. Achieving that perfect, deep, glossy black finish that lasts for weeks is entirely possible with a gel polish manicure. While it may seem daunting, especially with a colour as bold as black, breaking it down into key stages ensures a professional-looking result. This guide will walk you through the essential process, from preparing your nails to applying the final high-shine top coat, ensuring a flawless and durable manicure.
Preparation is Key: Getting Your Nails Ready
The longevity of your gel manicure depends heavily on proper nail preparation. Skipping this stage can lead to lifting and chipping. Before you even think about opening a bottle of polish, focus on creating the perfect canvas.
Steps for Nail Preparation:
- Shape and File: Gently file your nails to your desired shape. Whether you prefer square, oval, or almond, ensure all nails are uniform. Use a fine-grit file to smooth the free edge.
- Cuticle Care: Apply a cuticle remover and gently push back your cuticles using a wooden stick or a metal pusher. Avoid cutting the cuticles, as this can lead to irritation. The goal is to create a clean nail plate free from any skin.
- Buff the Surface: Using a soft buffer block, lightly buff the entire surface of your nail. This removes the natural shine and creates a slightly rough texture for the gel to adhere to. The key is to be gentle; you are not trying to thin the nail, just remove the surface oils.
- Cleanse and Dehydrate: This is a critical step. Wipe each nail thoroughly with a lint-free wipe soaked in a nail cleaner or isopropyl alcohol. This removes all dust, oils, and residue, dehydrating the nail plate and ensuring maximum adhesion for the base coat.
The Essential First Layer: Applying the Base Coat
The base coat acts as the foundation of your entire manicure. It serves two main purposes: protecting your natural nail from the pigment of the colour polish and creating a sticky surface for the colour to grab onto. Always use a base coat specifically designed for a gel polish system.
How to Apply the Base Coat:
- Apply a Thin Layer: The rule for all gel polish is 'thin to win'. Apply a very thin, even layer of the base coat over the entire nail, from the cuticle area to the free edge.
- Cap the Free Edge: Gently swipe the brush along the tip of your nail. This technique, known as 'capping the edge', helps to seal the polish and prevent chipping from the tip.
- Avoid the Skin: Be meticulous about not getting any base coat on your cuticles or the surrounding skin. If you do, clean it up with a wooden stick or a small brush dipped in cleaner *before* you cure. Gel on the skin will cause lifting.
- Cure Correctly: Cure the base coat under your LED or UV lamp according to the manufacturer's instructions. Curing times can vary, so always check the product's guidelines. The surface will remain slightly tacky after curing; this is normal and necessary for the colour to adhere.
Building the Perfect Black: Colour Application
Applying black gel polish requires patience and precision. Unlike lighter shades, black is unforgiving of mistakes and requires thin, even coats to cure properly and achieve a rich, opaque finish.
Applying the Black Colour:
Start by applying your first layer of black gel polish. This coat should be extremely thin. It might look streaky or semi-sheer, which is perfectly fine. The goal is not full coverage on the first go. A thick coat will not cure properly in the middle, leading to wrinkling and peeling. Cap the free edge and, after ensuring there is no polish on the skin, cure it for the recommended time.
Now, apply a second thin coat of black polish. This layer will build on the first, providing the opacity you're looking for. Again, apply it evenly, cap the free edge, and cure. For most high-quality black gel polishes, two coats are sufficient. However, if you still see any unevenness, you can apply a third, very thin coat, curing it just as you did the previous ones.
The Finishing Touch: The High-Shine Top Coat
The top coat is the final, protective shield for your manicure. It seals in the colour, provides that coveted high-gloss shine, and protects your nails from scratches and chips, ensuring your manicure lasts.
Sealing the Deal:
- Apply an Even Layer: Apply a slightly more generous layer of top coat than you did for the colour coats, ensuring you cover the entire nail.
- Cap the Free Edge Again: Capping the edge with the top coat is crucial for a long-lasting, chip-free finish.
- Final Cure: Cure the top coat under the lamp for the specified time, which might be slightly longer than the colour coats to ensure it's fully hardened.
- Remove the Tacky Layer: Unless you are using a 'no-wipe' top coat, the nail will have a sticky inhibition layer after the final cure. Use a lint-free wipe with your nail cleaner to wipe this layer off each nail, revealing a hard, smooth, and brilliantly shiny surface.
Finish your manicure by applying a nourishing cuticle oil to the skin around your nails and a hydrating hand cream. Your perfect black gel manicure is now complete, ready to be admired for weeks to come.


