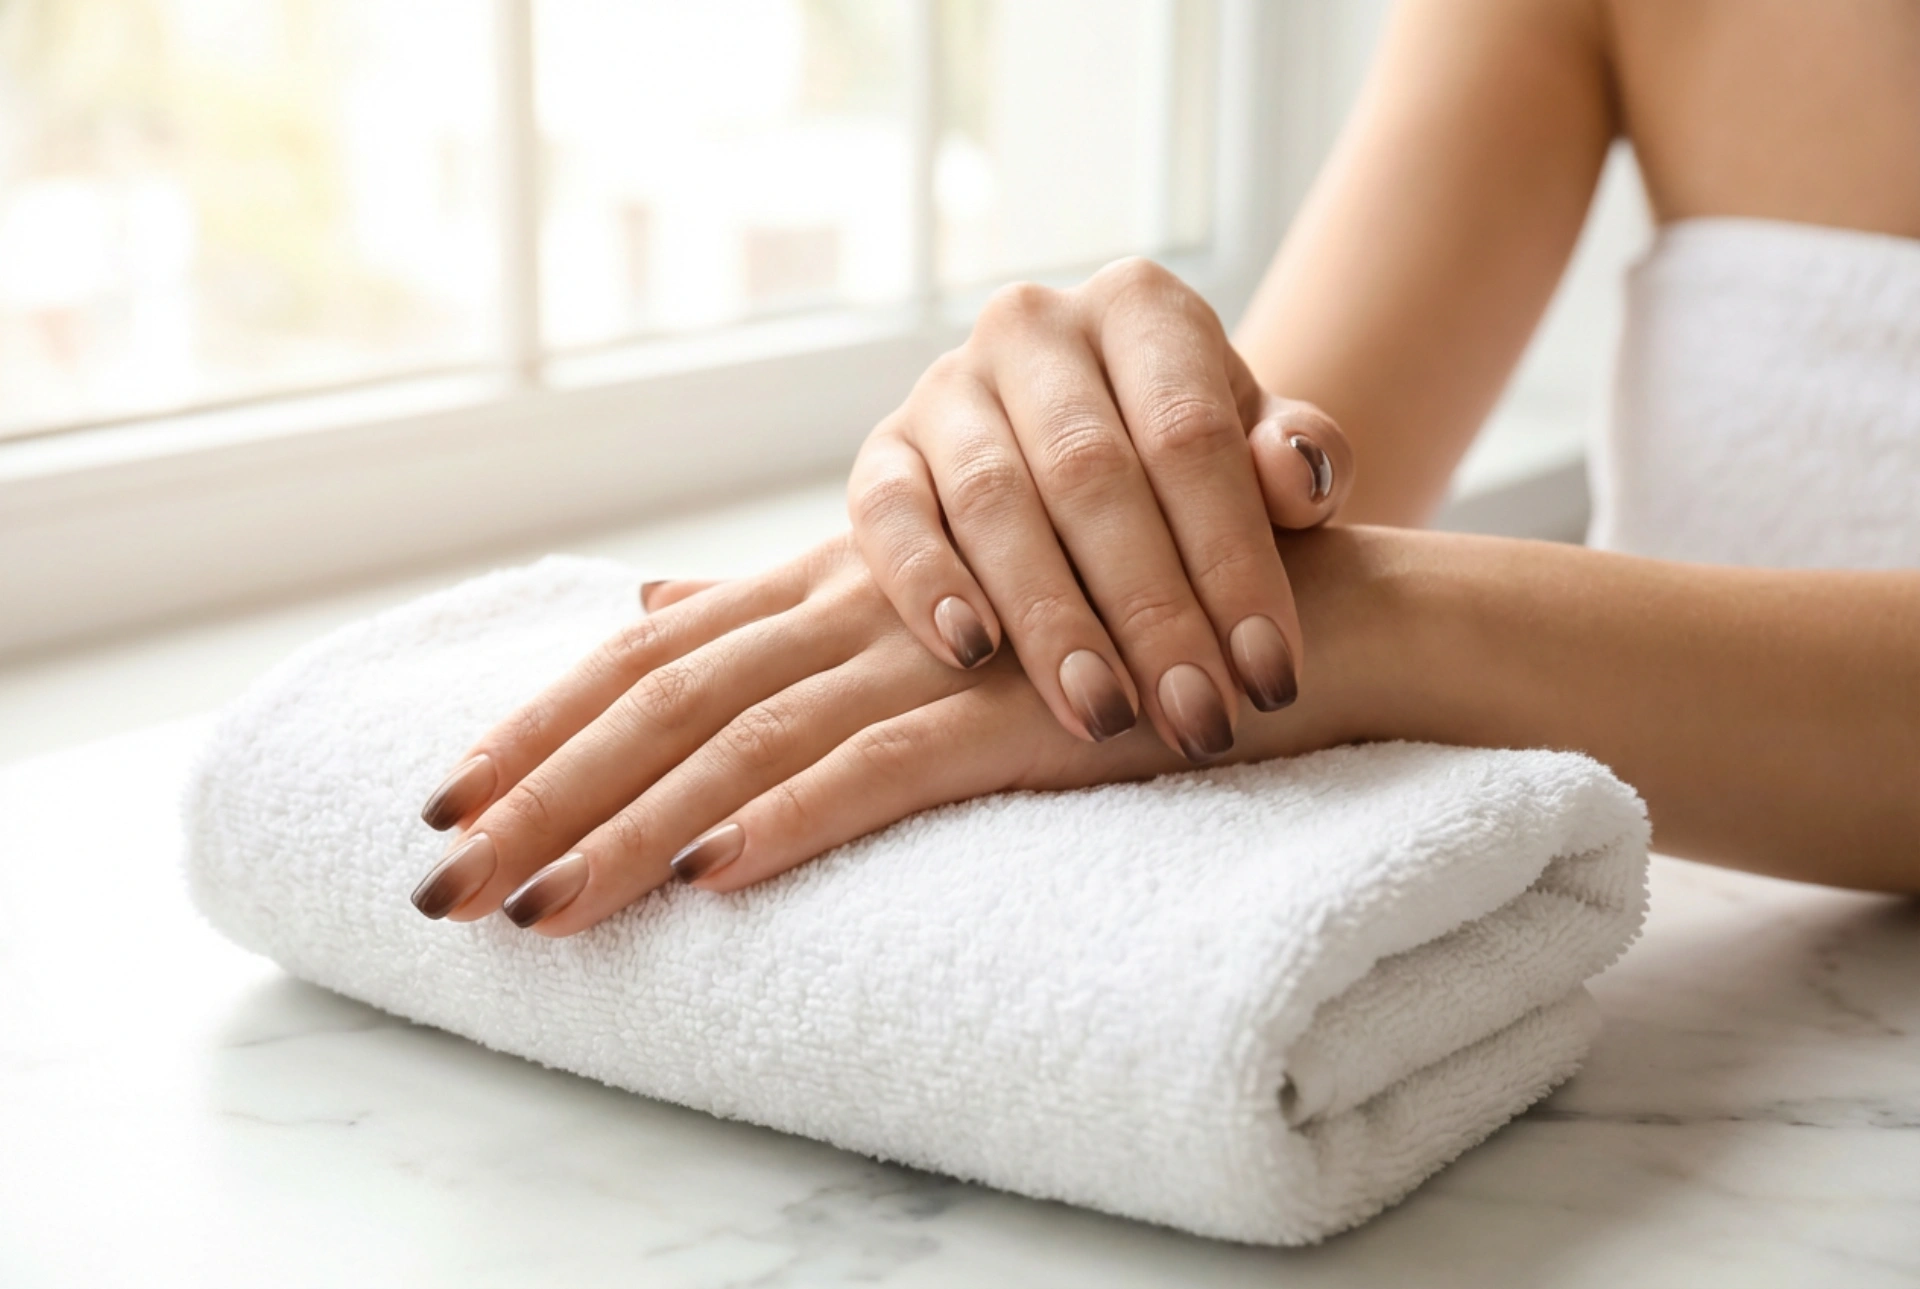


A beautifully executed manicure is a hallmark of personal style, and among the most enduringly elegant trends is the ombre effect. Brown ombre nails, in particular, offer a warm, sophisticated look that transitions seamlessly from season to season. This style, characterized by a smooth gradient from a light, creamy base to a deep, rich brown tip, exudes a quiet luxury. Achieving this flawless blend requires careful colour selection and a specific application technique, both of which can be mastered for a stunning result.
The Timeless Appeal of Brown Ombre
The popularity of brown ombre nails lies in their versatility and understated charm. Unlike bolder colour combinations, the earthy tones of brown are neutral and complement a wide range of skin tones and outfits. This manicure is equally appropriate for a professional setting as it is for a casual weekend or a special event. The gradient effect adds depth and visual interest, making the nails appear elongated and graceful. Whether you opt for a subtle transition from beige to mocha or a more dramatic shift from nude to dark chocolate, the brown ombre style remains a classic choice that never fails to look chic.
Choosing Your Palette for a Warm Gradient
The key to a successful ombre is the harmonious selection of colours. For a warm brown gradient, you will typically need three shades: a light base, a dark tip, and a transitional mid-tone to ensure a seamless blend.
Selecting the Perfect Base
Your base colour is the lightest shade in the gradient, typically applied over the entire nail. It sets the foundation for the entire look. Excellent choices for a warm brown ombre include soft nudes with peachy or yellowish undertones, creamy beiges, or even a pale latte shade. The goal is to choose a colour that is significantly lighter than your darkest shade but still within the same warm colour family. This creates a soft starting point for the gradient to build upon.
Defining the Deep Brown Tip
The darkest shade provides the 'pop' at the tips of your nails. This is where you can express your personal preference for depth and intensity. Rich, warm browns work best for this style. Consider shades like milk chocolate, deep caramel, warm chestnut, or a luxurious espresso brown. This colour will be the most prominent part of the gradient, so choose a tone you love and that complements your base colour well.
The Crucial Transitional Colour
While you can create an ombre effect with just two colours, adding a third, mid-tone shade is the secret to a professional-looking, seamless blend. This colour should sit perfectly between your light base and your dark tip. For example, if your base is a light beige and your tip is a dark chocolate, a medium caramel or taupe would be an ideal transitional shade. It helps to soften the transition, preventing any harsh lines and making the gradient appear smoother and more natural.
A Step-by-Step Guide to Ideal Shading
Creating a beautiful ombre effect at home is achievable with a little patience and the right tools. A small, disposable makeup sponge is essential for this technique.
- Step 1: Preparation is Key. Start with clean, dry nails. File and shape them as desired. Gently push back your cuticles and buff the nail surface lightly to help the polish adhere better. Always apply a clear base coat to protect your nails and create a smooth canvas.
- Step 2: Apply Your Base Colour. Apply one or two thin coats of your chosen light base colour to the entire nail. Ensure the polish is completely dry before moving on to the next step. This is crucial for a clean gradient.
- Step 3: Create the Gradient on the Sponge. Take your makeup sponge and paint horizontal stripes of your chosen polishes directly onto it. Start with the lightest colour at the bottom, followed by the mid-tone, and then the darkest colour at the top. Overlap the edges of the colours slightly to encourage blending.
- Step 4: Transfer the Gradient to the Nail. Gently press and roll the sponge onto your nail. Use a dabbing motion to transfer the polish. The first layer may appear sheer, which is normal. Let it dry for a minute or two, then reapply the polishes to the sponge and dab onto the nail a second time to build opacity and intensity.
- Step 5: Clean Up and Seal. The sponging technique will inevitably get polish on the skin around your nails. Dip a small brush or a cotton swab in nail polish remover and carefully clean up the edges for a neat finish. Once your nails are dry, apply a high-gloss top coat. This not only seals and protects your design but also helps to further blend the colours, giving the surface a smooth, unified appearance.
Maintaining Your Elegant Manicure
To keep your brown ombre nails looking fresh and flawless for as long as possible, a little aftercare goes a long way. Reapply a thin layer of your top coat every two to three days to prevent chipping and maintain a high-gloss shine. Keep your hands and cuticles hydrated by regularly applying cuticle oil and hand cream. When doing household chores, wear gloves to protect your manicure from harsh chemicals and excessive water exposure. These simple steps will help preserve the beauty of your warm gradient design.


