


Expressing your personality through nail art is a wonderful form of creativity, and you don't need to visit a salon to achieve stunning results. Creating colourful nail designs at home can be a relaxing and rewarding activity. With a few polishes and a bit of imagination, you can turn your nails into a miniature canvas, experimenting with different hues, patterns, and finishes that reflect your mood and style. Whether you prefer a subtle pop of colour or a bold, multi-toned statement, the possibilities are endless.
Understanding Colour Theory for Nails
Before you start painting, a basic understanding of colour combinations can elevate your nail art from simple to sophisticated. The colour wheel is your best friend here. It helps you see the relationships between different shades.
Key Colour Schemes:
- Complementary Colours: These are colours opposite each other on the colour wheel, like blue and orange or purple and yellow. They create a high-contrast, vibrant look that really stands out.
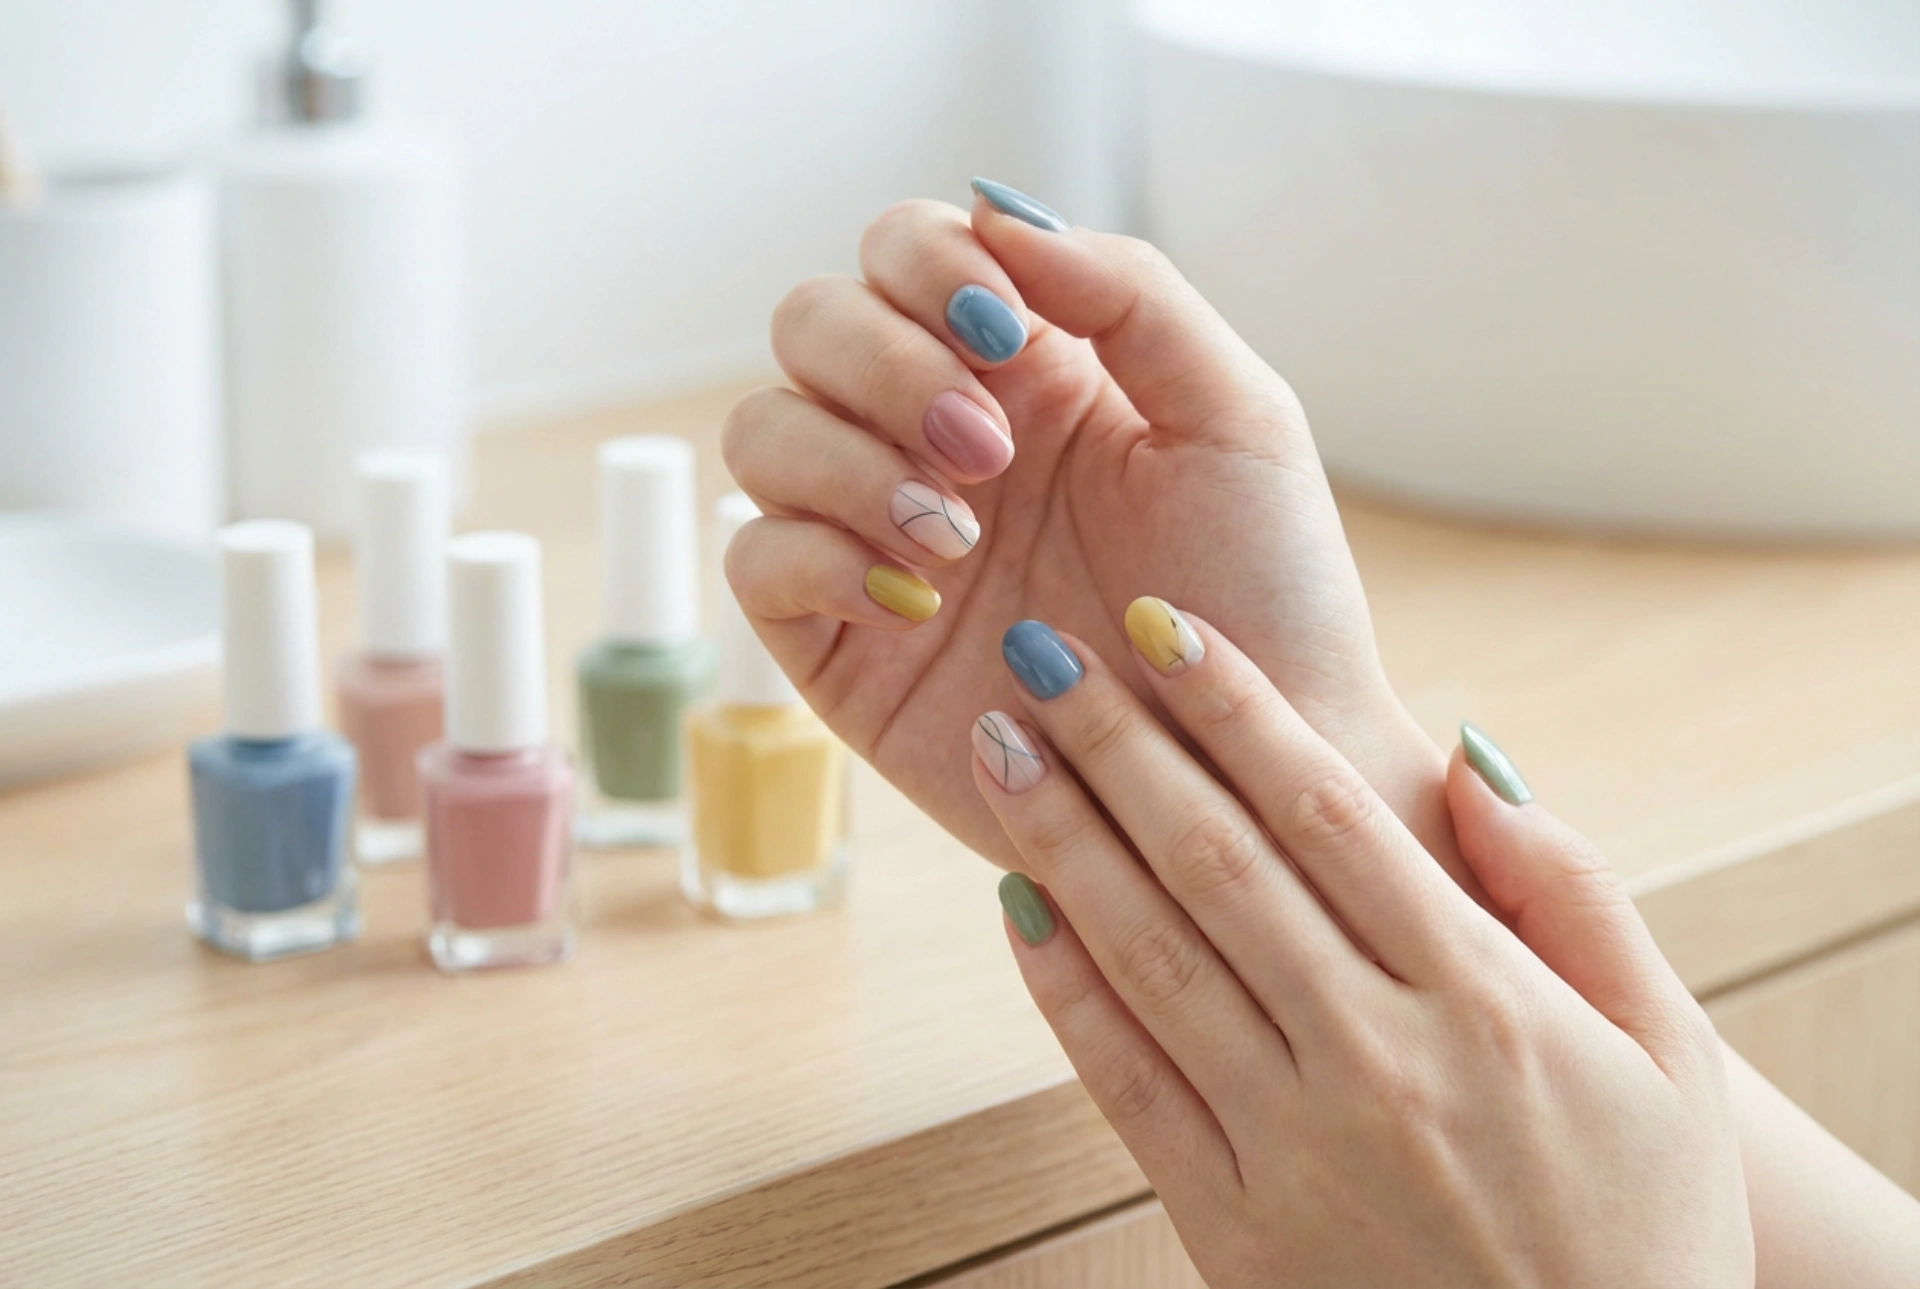
- Analogous Colours: These are colours that sit next to each other on the colour wheel, such as blue, teal, and green. This combination results in a more harmonious and serene design.
- Triadic Colours: This involves three colours that are evenly spaced on the colour wheel, like red, yellow, and blue. A triadic scheme is bold and dynamic, offering a playful yet balanced look.
Don't forget the power of neutrals like white, black, grey, and beige. They can be used to tone down a bright design, create a sophisticated background, or act as a separator between bold colours.
Creative Compositions for Every Skill Level
You don't need to be a professional artist to create eye-catching nail designs. There are many simple techniques that deliver impressive results. Start with these ideas and build your confidence.
Simple yet Effective Designs:
- The Accent Nail: This is a classic for a reason. Paint one nail on each hand (traditionally the ring finger) a different colour or with a unique design. It’s an easy way to add a point of interest to a standard manicure.
- Alternating Colours: The simplest way to create a colourful look. Choose two or more colours and paint each nail with a different one, either in a repeating pattern or a random assortment.
- The Gradient (Ombré): This technique creates a beautiful faded effect. Apply two or more colours in stripes onto a small makeup sponge, then gently dab the sponge onto your nail. It might take a bit of practice, but the result is a professional-looking blend.
- Minimalist Details: Use a dotting tool or the end of a bobby pin to add simple polka dots. A thin brush can be used to create stripes or a colourful twist on a classic French manicure by painting just the tips in a vibrant shade.
The Magic of Finishes: Matte, Glossy, and More
The finish of your nail polish can completely change the overall look of your manicure. The two most common finishes are glossy and matte, but experimenting with others can add another layer of creativity.
Exploring Finishes:
- Glossy Finish: A high-shine top coat is the traditional choice. It makes colours appear brighter and more vibrant, giving your nails a healthy, polished look. It also helps to smooth over any minor imperfections in the polish application.
- Matte Finish: A matte top coat provides a non-reflective, velvety finish. It can make bold colours look more subdued and sophisticated. A matte finish on dark colours like navy or burgundy looks particularly chic.
- Combining Finishes: Try mixing finishes for a subtle but interesting effect. For example, you could have a matte nail with a glossy tip (a modern French manicure) or add glossy dots or stripes over a matte base.
- Glitter and Shimmer: A glitter or shimmer top coat can be applied over any colour to add sparkle and dimension. You can apply it to all nails or just an accent nail for a touch of glamour.
Preparation and Tools for a Lasting Manicure
To ensure your colourful creation lasts, proper preparation is key. A few extra minutes spent at the beginning will pay off with a longer-lasting, chip-free manicure.
Start by cleaning your nails and removing any old polish. File and shape them to your desired length and gently push back your cuticles. Buff the surface of the nail lightly to create a smooth base for the polish. Always begin with a base coat; this protects your natural nail from staining and helps the colour adhere better. Apply your chosen colours in thin, even layers, allowing each layer to dry before applying the next. Finally, seal your design with a high-quality top coat. This not only adds your desired finish (matte or glossy) but also protects the polish from chipping and extends the life of your manicure.


