


Achieving salon-quality, durable nails at home is more accessible than ever, thanks to comprehensive acrylic nail kits. These sets provide the essential tools and products to create strong, elegant nail enhancements that last for weeks. While the process may seem intricate at first, understanding the components and following the correct steps can lead to beautiful results. This guide will walk you through the contents of a typical starter kit and explain how to begin your journey with acrylic nails safely and effectively.
What's Inside a Starter Acrylic Nail Kit?
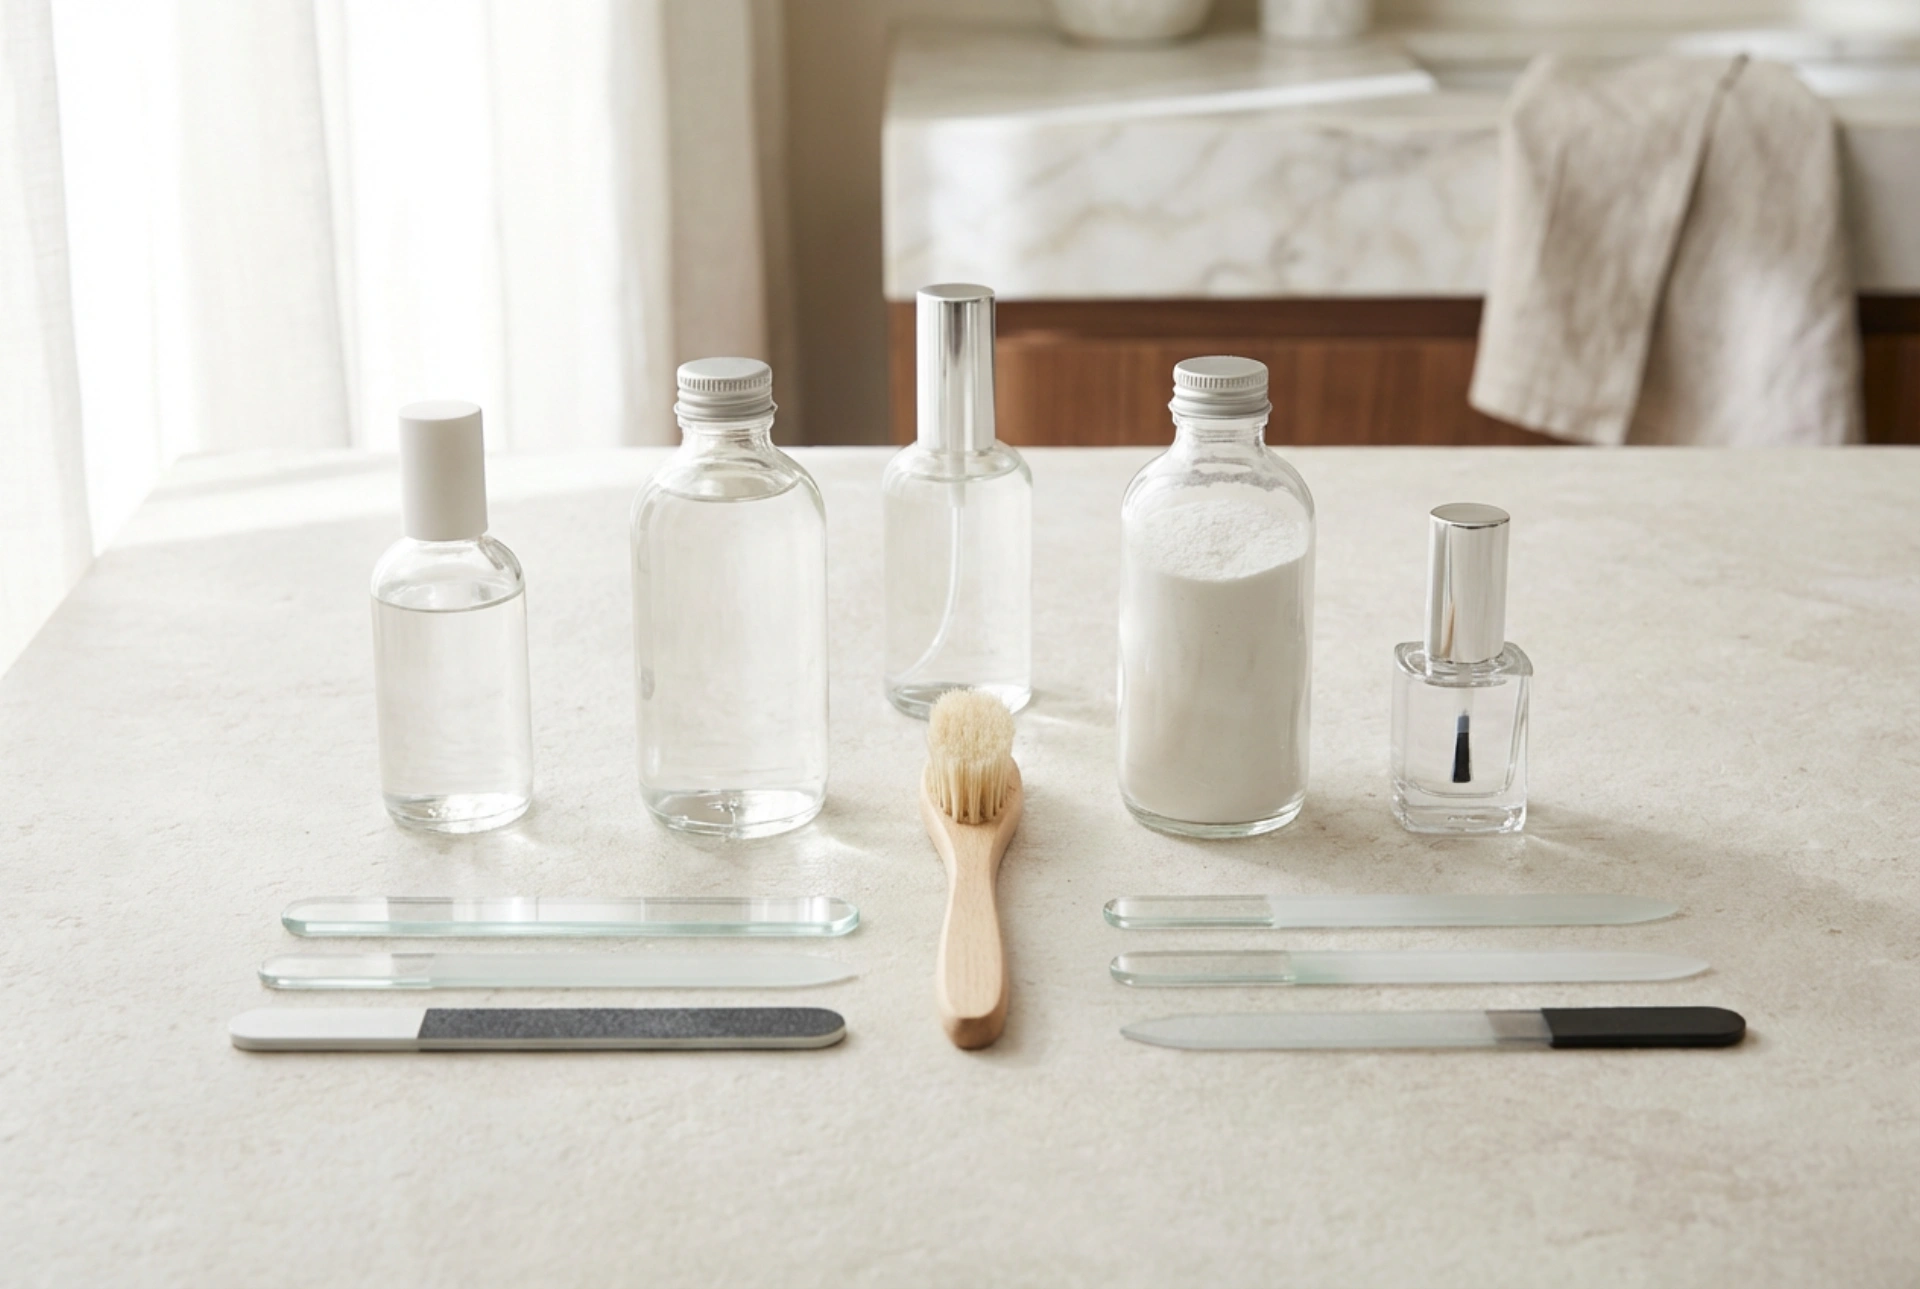
A beginner's acrylic nail kit is designed to provide everything you need for your first few applications. While contents can vary slightly, most will include a core set of items essential for the process. Familiarising yourself with each component and its purpose is the first step towards mastering the technique.
Key Components and Their Functions:
- Acrylic Liquid (Monomer): This is a chemical liquid that reacts with the acrylic powder to form a malleable bead. It has a strong, distinctive odour, so it's crucial to work in a well-ventilated area.
- Acrylic Powder (Polymer): Available in various colours, including clear, white, and pink, this powder combines with the monomer to create the durable acrylic substance that forms the nail enhancement.
- Acrylic Brush: This is a special brush, often made from natural hair, designed to pick up the correct ratio of liquid and powder. The quality of your brush significantly impacts the application's smoothness.
- Dappen Dish: A small, sturdy glass or ceramic pot used to hold the monomer during application. Its design helps prevent spills and allows for easy dipping of the brush.
- Nail Primer: A crucial preparatory product applied to the natural nail before the acrylic. It dehydrates the nail plate and improves adhesion, helping to prevent lifting.
- Nail Files and Buffers: A set of files with different grits is needed for shaping the acrylic, while a softer buffer is used to smooth the surface for a flawless finish.
- Cuticle Pusher: Used during the preparation phase to gently push back cuticles and remove non-living tissue from the nail plate, ensuring a clean canvas.
Preparing Your Nails for Application
Proper preparation is the most critical stage for ensuring the longevity of your acrylic nails and protecting your natural nail health. Rushing this step can lead to lifting, poor adhesion, and potential damage. Take your time to create a clean and prepped surface.
The Essential Prep Steps:
First, wash your hands and ensure your nails are completely dry. Gently push back your cuticles using a cuticle pusher. Next, using a fine-grit file, lightly shape the free edge of your natural nails. Following this, take a soft buffer and gently remove the shine from the entire surface of your nail plate. This creates a slightly rough texture that the acrylic can grip onto. Be careful not to over-file. Once buffed, cleanse the nail with a lint-free wipe and an alcohol-based solution to remove all dust and oils. Finally, apply a thin layer of nail primer to the natural nail, avoiding contact with the skin. Allow it to air dry completely as per the product's instructions.
The Acrylic Application Process for Beginners
Applying acrylic is a skill that requires practice, particularly when it comes to achieving the ideal liquid-to-powder ratio. Don't be discouraged if your first attempts aren't perfect. Focus on the technique and aim for gradual improvement.
Forming and Placing the Bead:
Pour a small amount of monomer into your dappen dish. Dip your acrylic brush into the liquid, wiping any excess on the side of the dish. Next, gently drag the tip of the moist brush through the acrylic powder until a small, round bead forms on the end. The ideal bead should be moist and controllable, not too wet or too dry. Place this bead onto the nail, typically starting near the tip or in the middle. Using the body of the brush, gently pat and press the bead into place, guiding it to form the desired shape and length. Work in small beads, building the nail structure gradually. Ensure you leave a tiny margin around the cuticle and sidewalls to avoid the product touching your skin.
Shaping, Finishing, and Aftercare
Once the acrylic has been applied, it will begin to harden through a chemical reaction, a process that doesn't require a lamp. You can test for hardness by tapping the surface with your brush handle; it should make a clicking sound. This is when the final, creative part begins.
Achieving the Perfect Finish:
Once the acrylic is fully set, use a coarse nail file to shape the side walls and the free edge to your desired length and shape (e.g., square, oval, almond). Next, use the file to refine the surface of the nail, smoothing out any lumps and bumps to create a balanced structure. Pay attention to the apex (the highest point of the nail), which provides strength. After filing, use a finer grit buffer to smooth the entire surface until it's perfectly even. Finally, wash your hands to remove all dust, dry them thoroughly, and apply a high-shine top coat to seal your work and give it a professional finish. Remember to apply cuticle oil daily to keep the surrounding skin hydrated and healthy.


