


The combination of red and gold is a timeless classic that exudes luxury and sophistication. A manicure featuring these two colours can be both a bold statement and a subtle expression of elegance. Achieving the perfect balance, however, depends on understanding proportions and choosing the right finishes. Whether you're aiming for a look suitable for a grand evening or a touch of everyday glamour, mastering the art of red and gold nail design is a valuable skill for any beauty enthusiast. This guide will explore how to create stunning and balanced looks with this powerful colour duo.
The Foundation: Choosing the Perfect Red
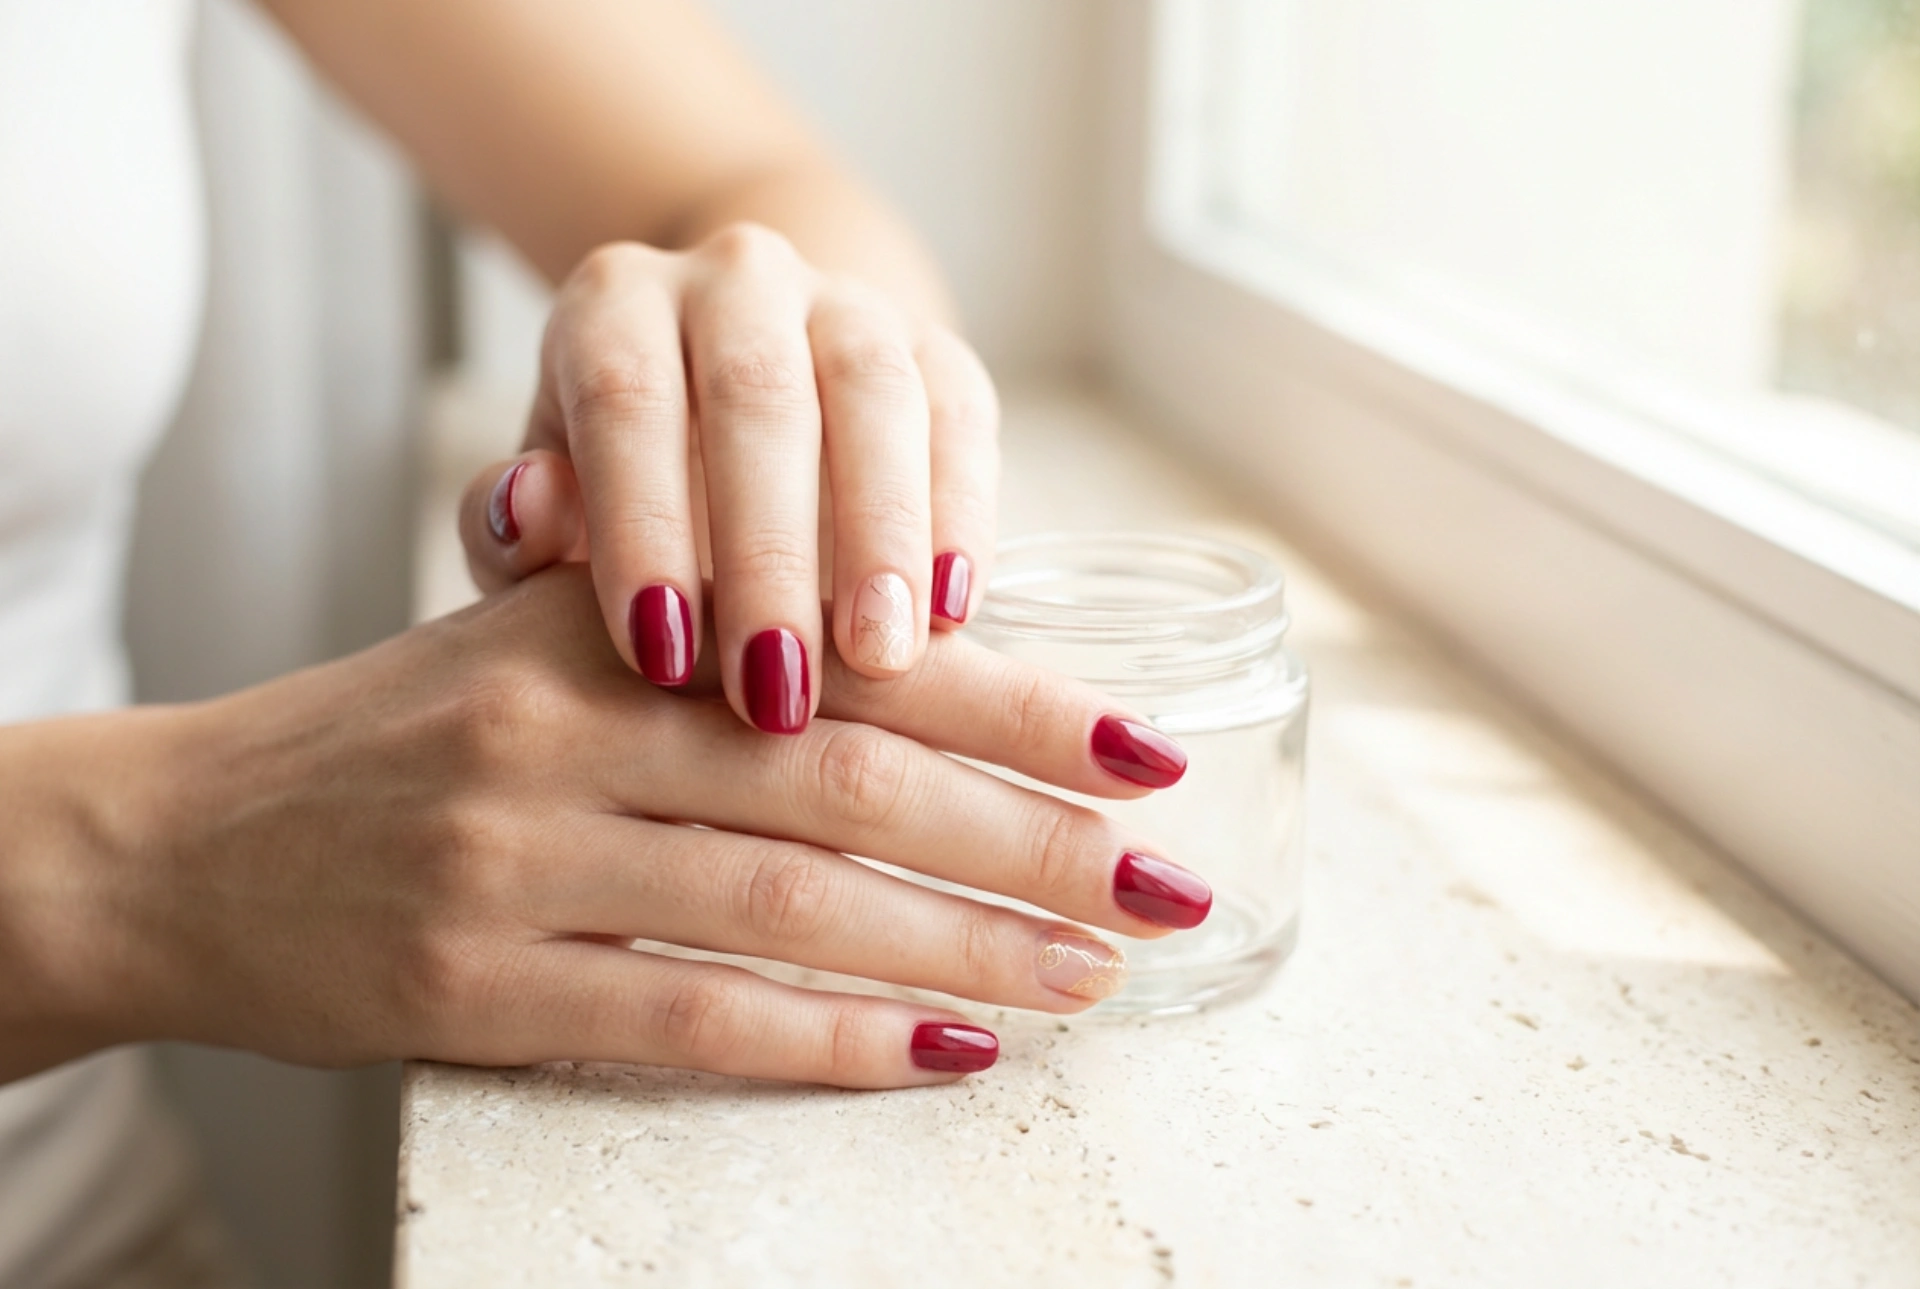
Before adding any golden touches, selecting the right shade of red is crucial as it sets the tone for the entire manicure. Not all reds are created equal, and their undertones can significantly impact how they pair with gold. A bright, cherry red offers a vibrant and modern feel, while a deep crimson or burgundy provides a more dramatic and opulent backdrop. Consider your skin tone and the occasion when making your choice. A blue-based red often creates a striking contrast with warm gold, whereas a warmer, orange-based red results in a more harmonious and fiery combination. The finish of the red polish also plays a role. A high-gloss finish enhances the richness of the colour, while a matte or velvet finish offers a contemporary and understated canvas for the golden accents to shine.
The Art of Proportion: Balancing Gold Accents
The key to a refined red and gold manicure is proportion. Too much gold can overwhelm the classic red base, making the design appear cluttered rather than chic. The goal is to use gold as an enhancement, not the main feature, unless you are specifically creating a bold accent nail.
Subtle Touches for Everyday Elegance
For a sophisticated look that is suitable for daily wear, minimalism is your best friend. Simple golden details can elevate a red manicure without being distracting. Consider these ideas:
- A Fine Golden Line: A single, delicate vertical or horizontal line drawn with a thin brush can add a touch of modern artistry.
- The Micro French Tip: Instead of a classic white tip, apply a very thin line of gold polish to the edge of the nail for a subtle yet luxurious twist.
- A Single Dot: Placing a tiny dot of gold glitter or polish at the base of the nail, near the cuticle, is a minimalist detail that catches the light beautifully.
- Cuticle Accent: Tracing the cuticle with a fine line of gold offers a unique and trendy way to incorporate the metallic shade.
Bolder Statements for Special Occasions
When the occasion calls for more drama, you can be more generous with the gold, while still maintaining a sense of balance. An 'accent nail'—typically the ring finger—is a popular way to feature a more intricate design. You could cover the entire accent nail in fine gold glitter or apply a geometric pattern using gold striping tape. Other options include abstract gold foil flakes scattered over a few nails or delicate, hand-painted golden patterns like leaves or swirls that flow across the nail's surface.
Exploring Golden Finishes
The type of gold product you use will define the texture and final look of your design. There is a wide variety of options available to achieve different effects, from a subtle shimmer to a high-impact metallic shine.
- Gold Nail Polish: The simplest option. Look for polishes with fine shimmer for a subtle glow or a more opaque metallic finish for solid lines and shapes.
- Loose Glitter: Available in various sizes, from ultra-fine powder to larger hexagonal shapes. It can be sprinkled over wet polish or mixed into a clear top coat.
- Gold Foil Flakes: These delicate, irregularly shaped flakes create a luxurious, textured effect. They are best applied with tweezers onto a wet top coat and then sealed.
- Transfer Foils: These allow for intricate, pre-made patterns to be transferred onto the nail surface using a special adhesive, resulting in a clean and professional look.
- Metallic Powder: Often used to create a chrome or mirror effect, this fine powder is rubbed onto a no-wipe top coat to create a seamless, liquid-metal finish.
Achieving a Seamless Application
To ensure your design looks polished and lasts, proper application is key. Always start with a smooth base coat to protect your nails and create an even surface. When painting with red, apply two thin coats for full, even coverage, allowing each to dry completely. For intricate gold details, use a fine-tipped nail art brush. If you're using foils or flakes, apply a thin layer of top coat or nail glue to the area, gently place the decoration, and then press it down. The final, most crucial step is the top coat. Apply a generous layer of a high-quality, quick-drying top coat over the entire nail to seal in the design, smooth out any texture, and provide a durable, glossy finish that will protect your manicure from chipping.


