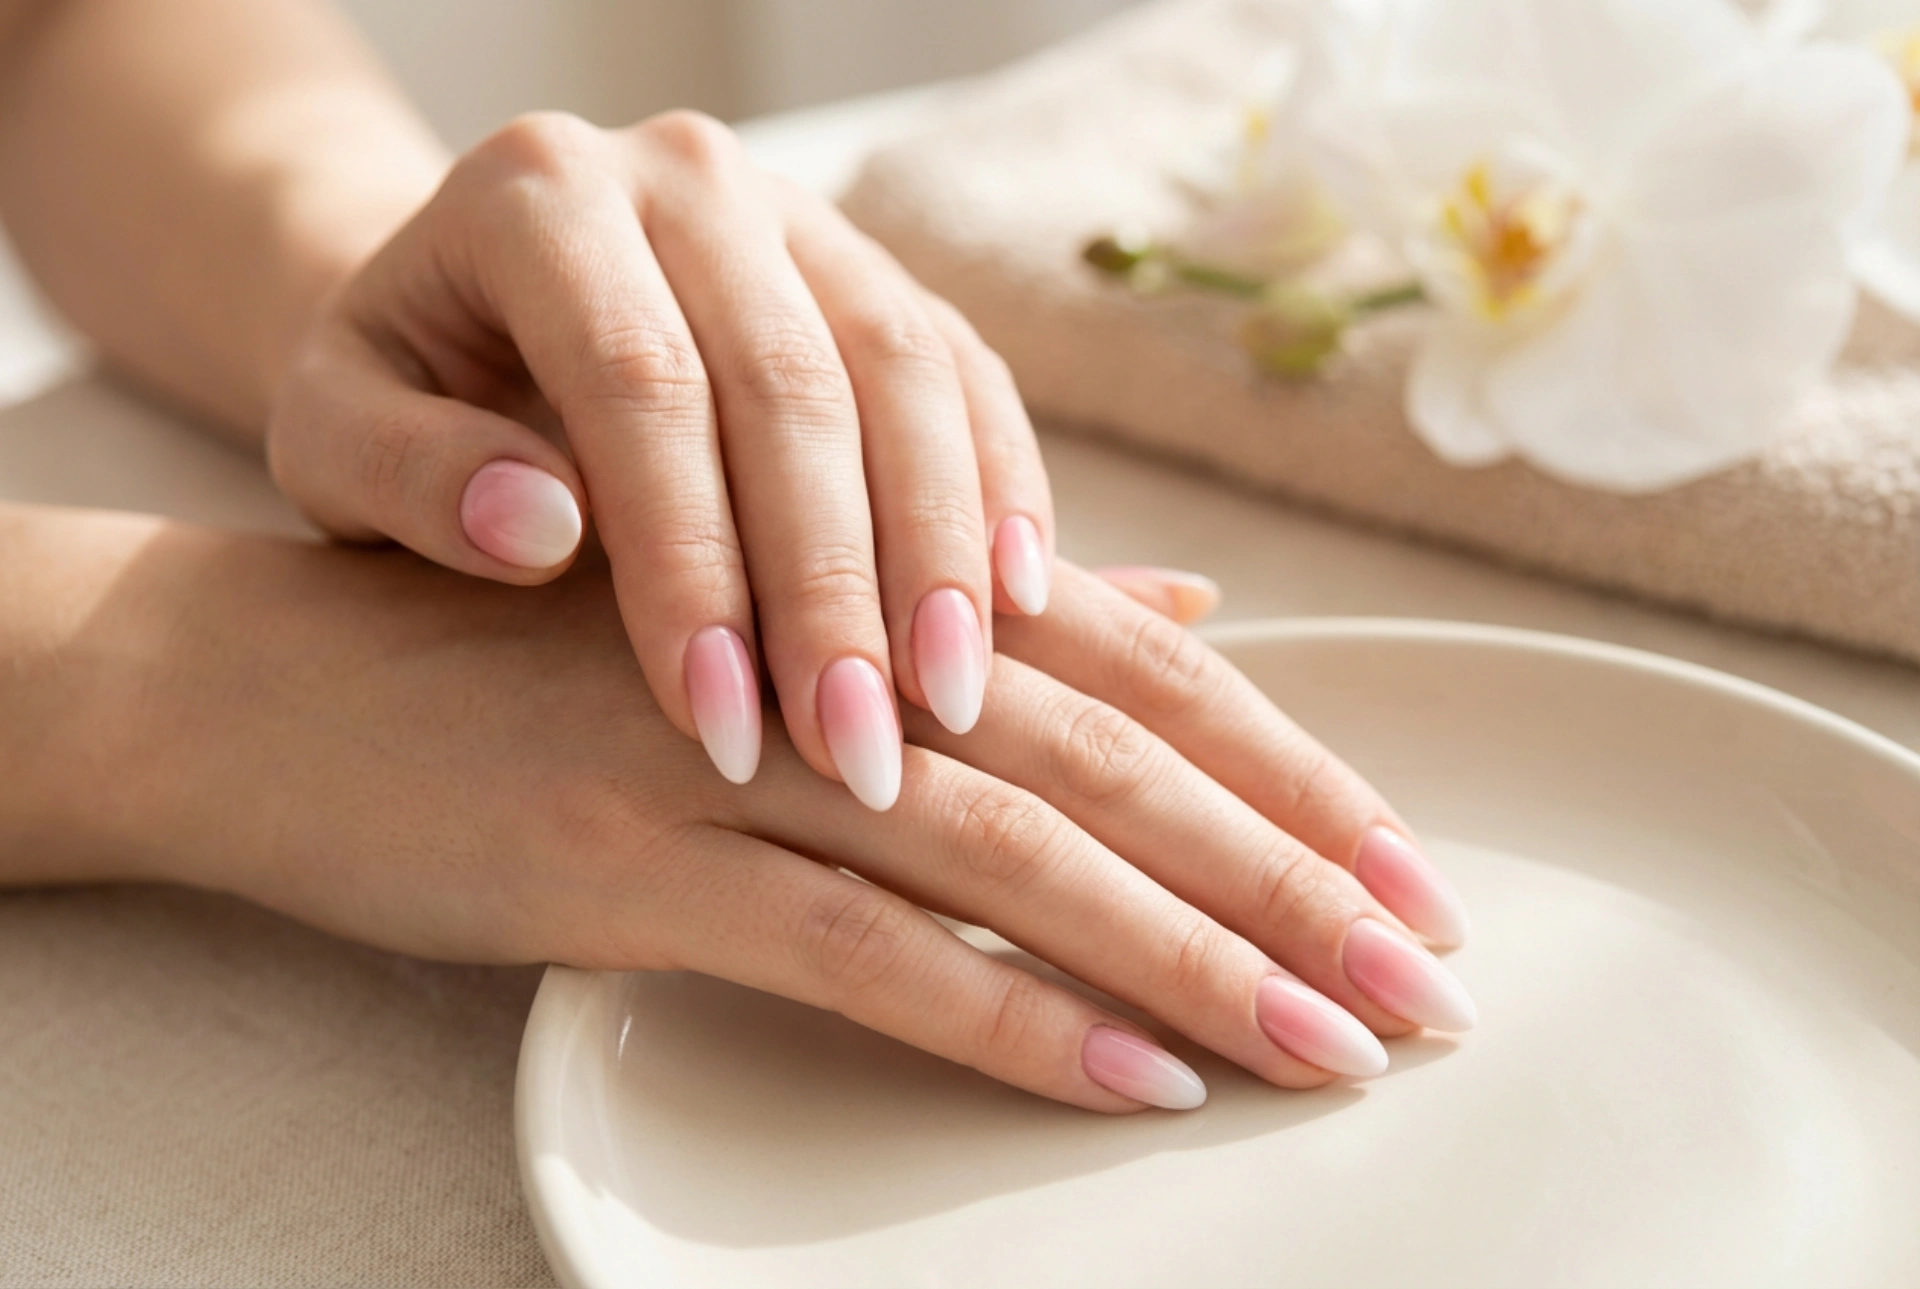


The combination of the elegant almond nail shape and the subtle ombre effect creates a truly timeless and sophisticated manicure. This style is celebrated for its ability to visually elongate the fingers, offering a look of refined grace. Whether you prefer a classic, barely-there gradient or a more vibrant combination of colours, almond ombre nails are a versatile choice that suits any occasion. This guide will walk you through how to achieve this coveted look, from shaping your nails perfectly to creating a seamless colour blend.
Understanding the Almond Ombre Look
Before diving into the techniques, it's important to understand the two key components of this style. The almond nail shape is defined by its slender sides that taper towards the end, finishing with a rounded, soft point, reminiscent of the nut it's named after. It's less sharp than a stiletto but more pointed than an oval, striking a perfect balance of elegance and practicality. The ombre effect, on the other hand, is a nail art technique involving a smooth, gradual transition between two or more colours. The most classic version is the 'baby boomer' or 'French fade', which blends a natural pink or nude base near the cuticle with a soft white at the tip, mimicking a modern French manicure.
How to Achieve the Perfect Almond Shape
Creating a consistent almond shape on all your nails is the foundation of this look. With a bit of patience and a good quality nail file, you can easily shape your nails at home. It's best to work on nails that have some length to them.
Shaping Step-by-Step
- Find the Centre: Begin by locating the exact centre of your nail's free edge. This will be your guide for filing and ensuring symmetry.
- File at an Angle: Place your file on one side of the nail, just where the free edge begins. File towards the centre point you identified, creating a gentle, upward angle. Repeat this process on the other side, ensuring both sides are symmetrical and meet at the centre.
- Soften the Point: Once you have a defined point, gently file the very tip to round it off. The goal is a soft, curved point, not a sharp one. Move the file in one direction to avoid weakening the nail.
- Check for Symmetry: Look at your nail from different angles to ensure the shape is even and balanced. Make minor adjustments as needed until you are happy with the result.
Always file gently and in one direction to prevent nail splitting or damage. Taking your time is key to achieving a beautiful and uniform almond shape across all ten fingers.
Creating a Flawless Ombre Effect at Home
The sponge method is one of the most accessible ways to create an ombre effect without professional tools. It's simple, effective, and allows for a beautifully diffused blend.
The Sponge Technique
First, gather your supplies: a base coat, your chosen nail polish colours, a small piece of a makeup sponge, and a glossy top coat. It's also wise to have some tape or liquid nail barrier to protect the skin around your nails.
- Prepare Your Nails: Start with clean, shaped, and buffed nails. Apply a clear base coat to protect your nails and help the manicure last longer. Then, apply one or two coats of the lightest colour you've chosen for your ombre and let it dry completely.
- Apply Polish to the Sponge: Paint your chosen colours in horizontal stripes directly onto the makeup sponge. The colours should slightly overlap where they meet to help them blend.
- Dab onto the Nail: Gently press and dab the sponge onto your nail. You can roll it slightly from side to side to ensure the entire nail is covered. The first layer may look sheer, but don't worry.
- Build the Intensity: Let the first layer dry for a minute, then reapply the polish to the sponge and dab onto your nail again. Repeat this process two or three times until you achieve the desired opacity and blend.
- Clean Up and Seal: Once you are satisfied with the gradient, carefully remove the tape or peel off the liquid barrier from around your nail. Use a small brush dipped in nail polish remover to clean up any excess polish on your skin. Finish with a generous layer of a glossy top coat. This final step is crucial as it smooths out the texture from the sponge and melts the colours together for a seamless finish.
Colour Combinations and Ideas
While the classic pink-to-white ombre is always in style, don't be afraid to experiment with other colour combinations. A subtle gradient using two similar shades, like a soft lavender and a deeper purple, can be incredibly chic. For a more modern look, try a pastel rainbow ombre across your nails. Seasonal palettes are also a great source of inspiration: think warm oranges and browns for autumn or cool blues and silvers for winter. The key is to choose colours that you love and that complement your skin tone.
Maintaining Your Almond Ombre Manicure
To keep your beautiful manicure looking fresh for as long as possible, a little aftercare goes a long way. Apply a thin layer of your top coat every two to three days to restore shine and add a protective layer against chipping. Keep your cuticles and the skin around your nails hydrated by applying cuticle oil daily. This not only promotes healthy nail growth but also keeps your manicure looking neat and professional. Finally, be mindful of your hands—wear gloves when washing dishes or using cleaning products to protect your nails from harsh chemicals and water exposure.


