


The appeal of a flawless, long-lasting gel manicure is undeniable. Achieving that glossy, chip-free finish at home is not only possible but also deeply rewarding. With the right tools and a little practice, you can create professional-looking results that rival a salon visit. Setting up your own gel nail station, like the neatly arranged tools on a pristine surface, is the first step towards mastering this beauty skill. This guide will walk you through building your starter kit, perfecting your technique, and avoiding common pitfalls.
Assembling Your First Gel Nail Kit
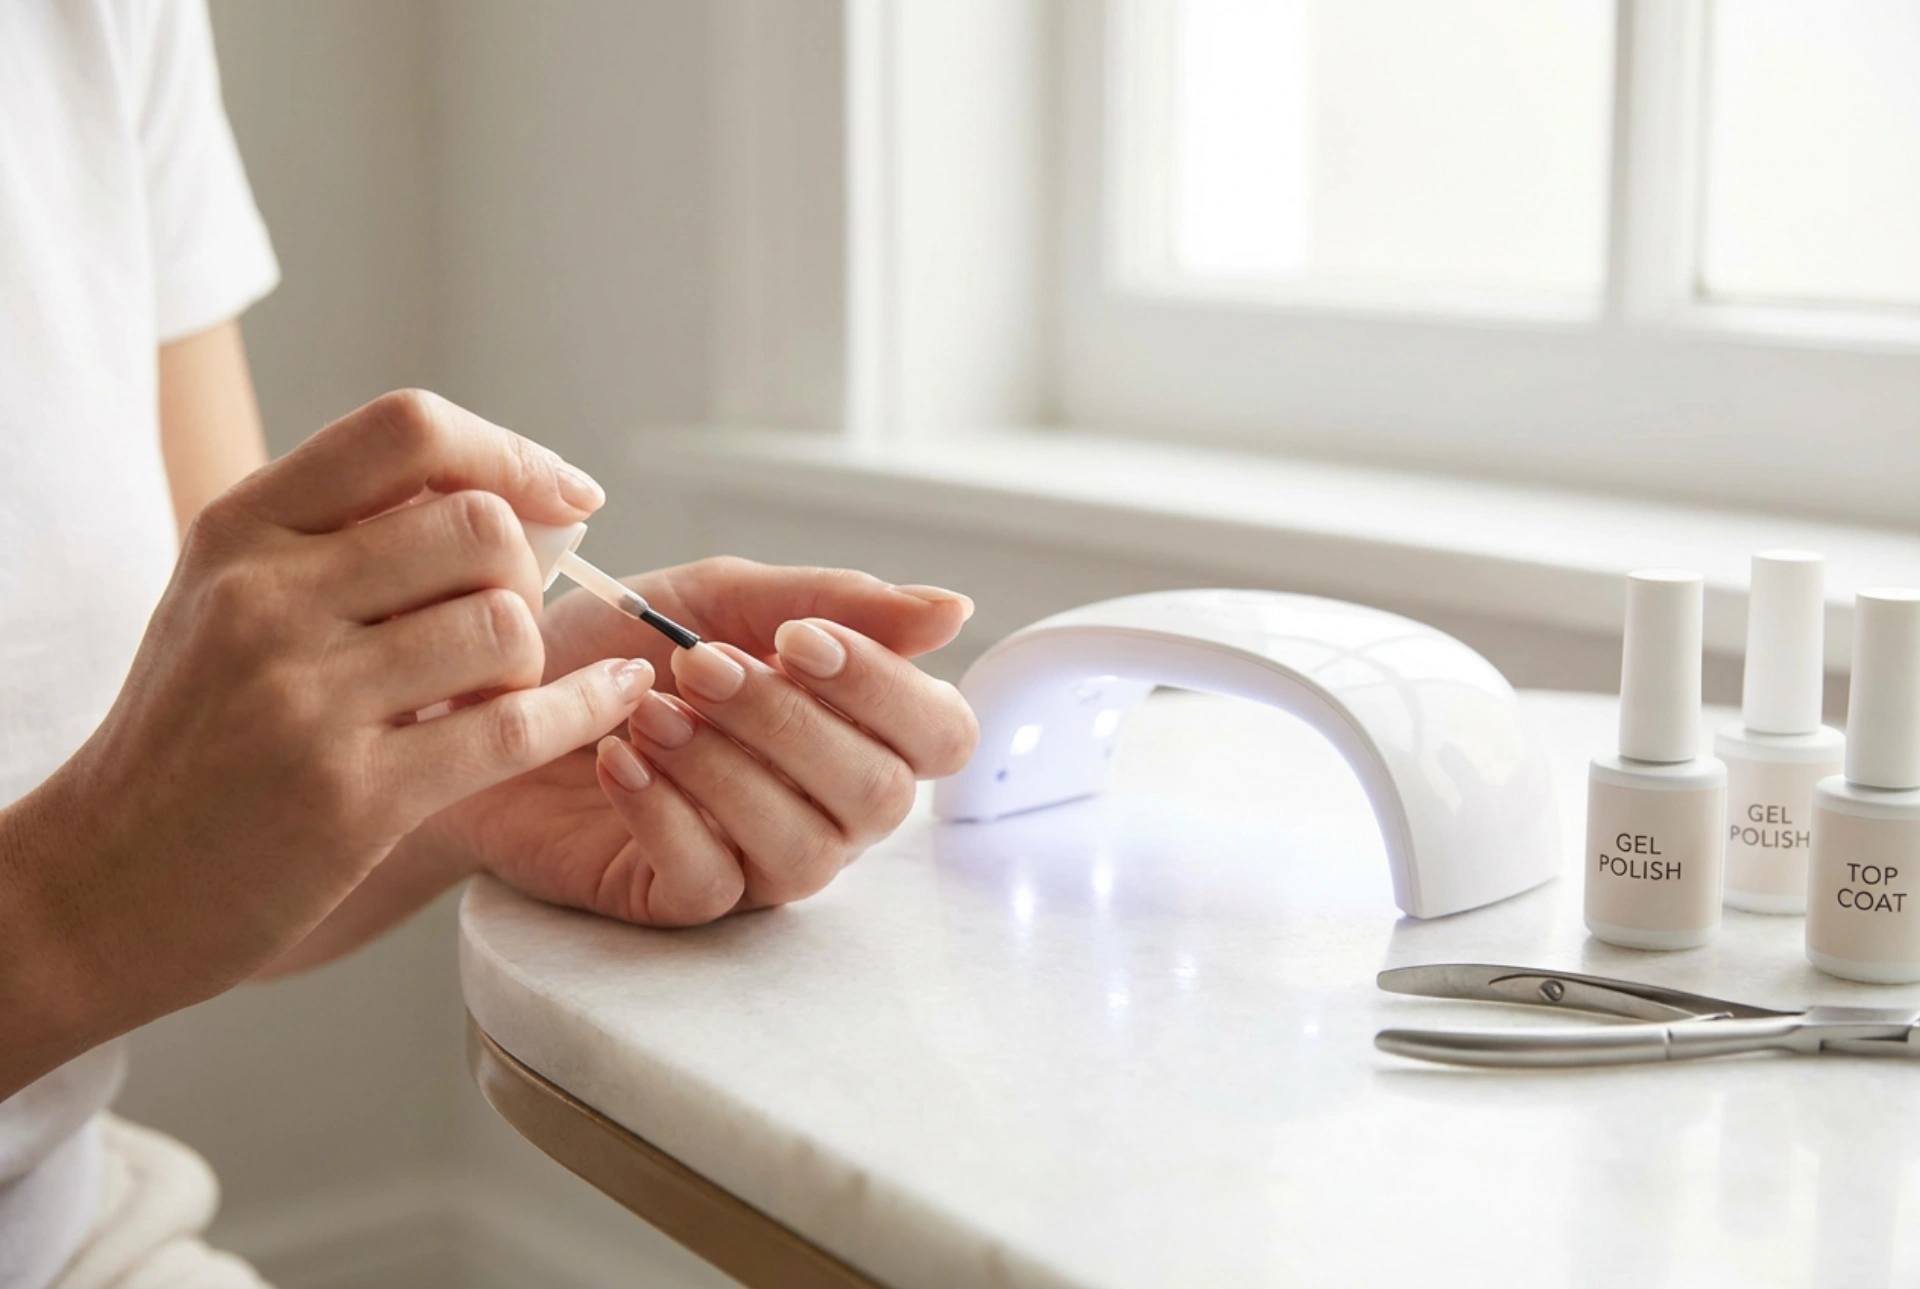
Building a comprehensive kit from the start will make the entire process smoother. While you can buy pre-made kits, selecting individual items allows you to choose components that best suit your needs. Here are the absolute essentials to get you started:
- LED/UV Curing Lamp: This is the most crucial piece of equipment. LED lamps cure gel polish faster than UV lamps and are generally the preferred choice for home use. Ensure the lamp has enough power (at least 36-48 watts) for a thorough cure.
- Base and Top Coats: A gel base coat is vital for adhesion and protecting your natural nail, while a top coat seals the colour, provides shine, and prevents chipping. Look for 'no-wipe' top coats to skip the step of cleansing a sticky layer at the end.
- Gel Polish Colours: Start with two or three versatile colours you love. Remember that gel polish is applied in thin layers, so the colour will build with each coat.
- Nail Preparation Fluids: A nail dehydrator or a pH bonder removes oils from the nail surface, and a primer can be used for extra adhesion, especially if you find your manicures lift easily. A nail cleanser (often isopropyl alcohol) is used to wipe away residue.
- Nail Tools: You will need a nail file (180/240 grit is a good starting point), a buffer block to gently roughen the nail surface, a cuticle pusher (metal or wooden), and cuticle nippers for any hangnails.
- Lint-Free Wipes: These are essential for cleansing the nail plate and removing the tacky layer without leaving behind fluff.
- Cuticle Oil: An important final step to rehydrate the skin around your nails after the process is complete.
Step-by-Step Guide to Your First Manicure
Patience and precision are key to a successful gel manicure. Rushing the process, especially the preparation, is the main cause of poor results. Follow these steps carefully for a durable and beautiful finish.
Nail Preparation: The Foundation of a Lasting Manicure
Start by removing any old polish. Gently push back your cuticles with a pusher. If necessary, carefully trim any non-living tissue or hangnails. Shape your nails with a file and then lightly buff the entire surface of the nail plate with a buffer block. The goal is to remove the shine, not to thin the nail. Finally, wipe each nail with a lint-free wipe soaked in nail cleanser to remove all dust and oils.
The Application Process
The golden rule of gel application is to use very thin, even coats. Thick layers will not cure properly and will lead to bubbling and peeling. Apply the gel carefully, avoiding contact with your cuticles and the surrounding skin. If you do get any on your skin, clean it up with a small brush dipped in cleanser before curing. The sequence is as follows: apply a thin layer of base coat and cure under the lamp as per the product's instructions. Apply your first thin layer of colour and cure. Apply a second layer of colour for full opacity and cure again. Finally, apply a thin layer of top coat, making sure to 'cap' the free edge of the nail, and cure for the final time.
Common Mistakes for Beginners to Avoid
Learning what not to do is just as important as learning the correct steps. Being aware of these common errors will save you from frustration and help you achieve a better outcome.
- Applying Thick Coats: This is the most frequent mistake. Thick layers of gel will feel rubbery and peel off quickly because the light cannot penetrate to cure them completely.
- Getting Gel on the Skin: If gel polish touches the skin or cuticles, it creates a point where lifting can begin. It also means the gel is curing on your skin, which should be avoided.
- Skipping Nail Prep: Failing to properly buff and dehydrate the nail plate means the gel won't have a clean, prepared surface to adhere to, leading to premature lifting.
- Improper Curing Times: Under-curing leaves the gel soft, while over-curing is unnecessary and can sometimes cause the top coat to dull. Always follow the recommended times for your specific lamp and polish.
Ensuring Safe and Gentle Removal
How you remove your gel manicure is critical for maintaining nail health. Never peel or pick off your gel polish, as this will strip away layers of your natural nail and cause significant damage. To remove it safely, first use a file to gently buff away the shine of the top coat. This breaks the seal and allows the remover to penetrate. Soak a small piece of cotton in a gel remover or pure acetone, place it on the nail, and wrap the fingertip tightly in a small piece of aluminium foil. Wait for 10-15 minutes. After soaking, the gel should have softened and lifted, allowing you to gently push it off with a wooden stick or cuticle pusher. If any stubborn spots remain, re-wrap and soak for a few more minutes rather than scraping. Once all the gel is removed, lightly buff the nail and apply a generous amount of cuticle oil and hand cream to rehydrate.


