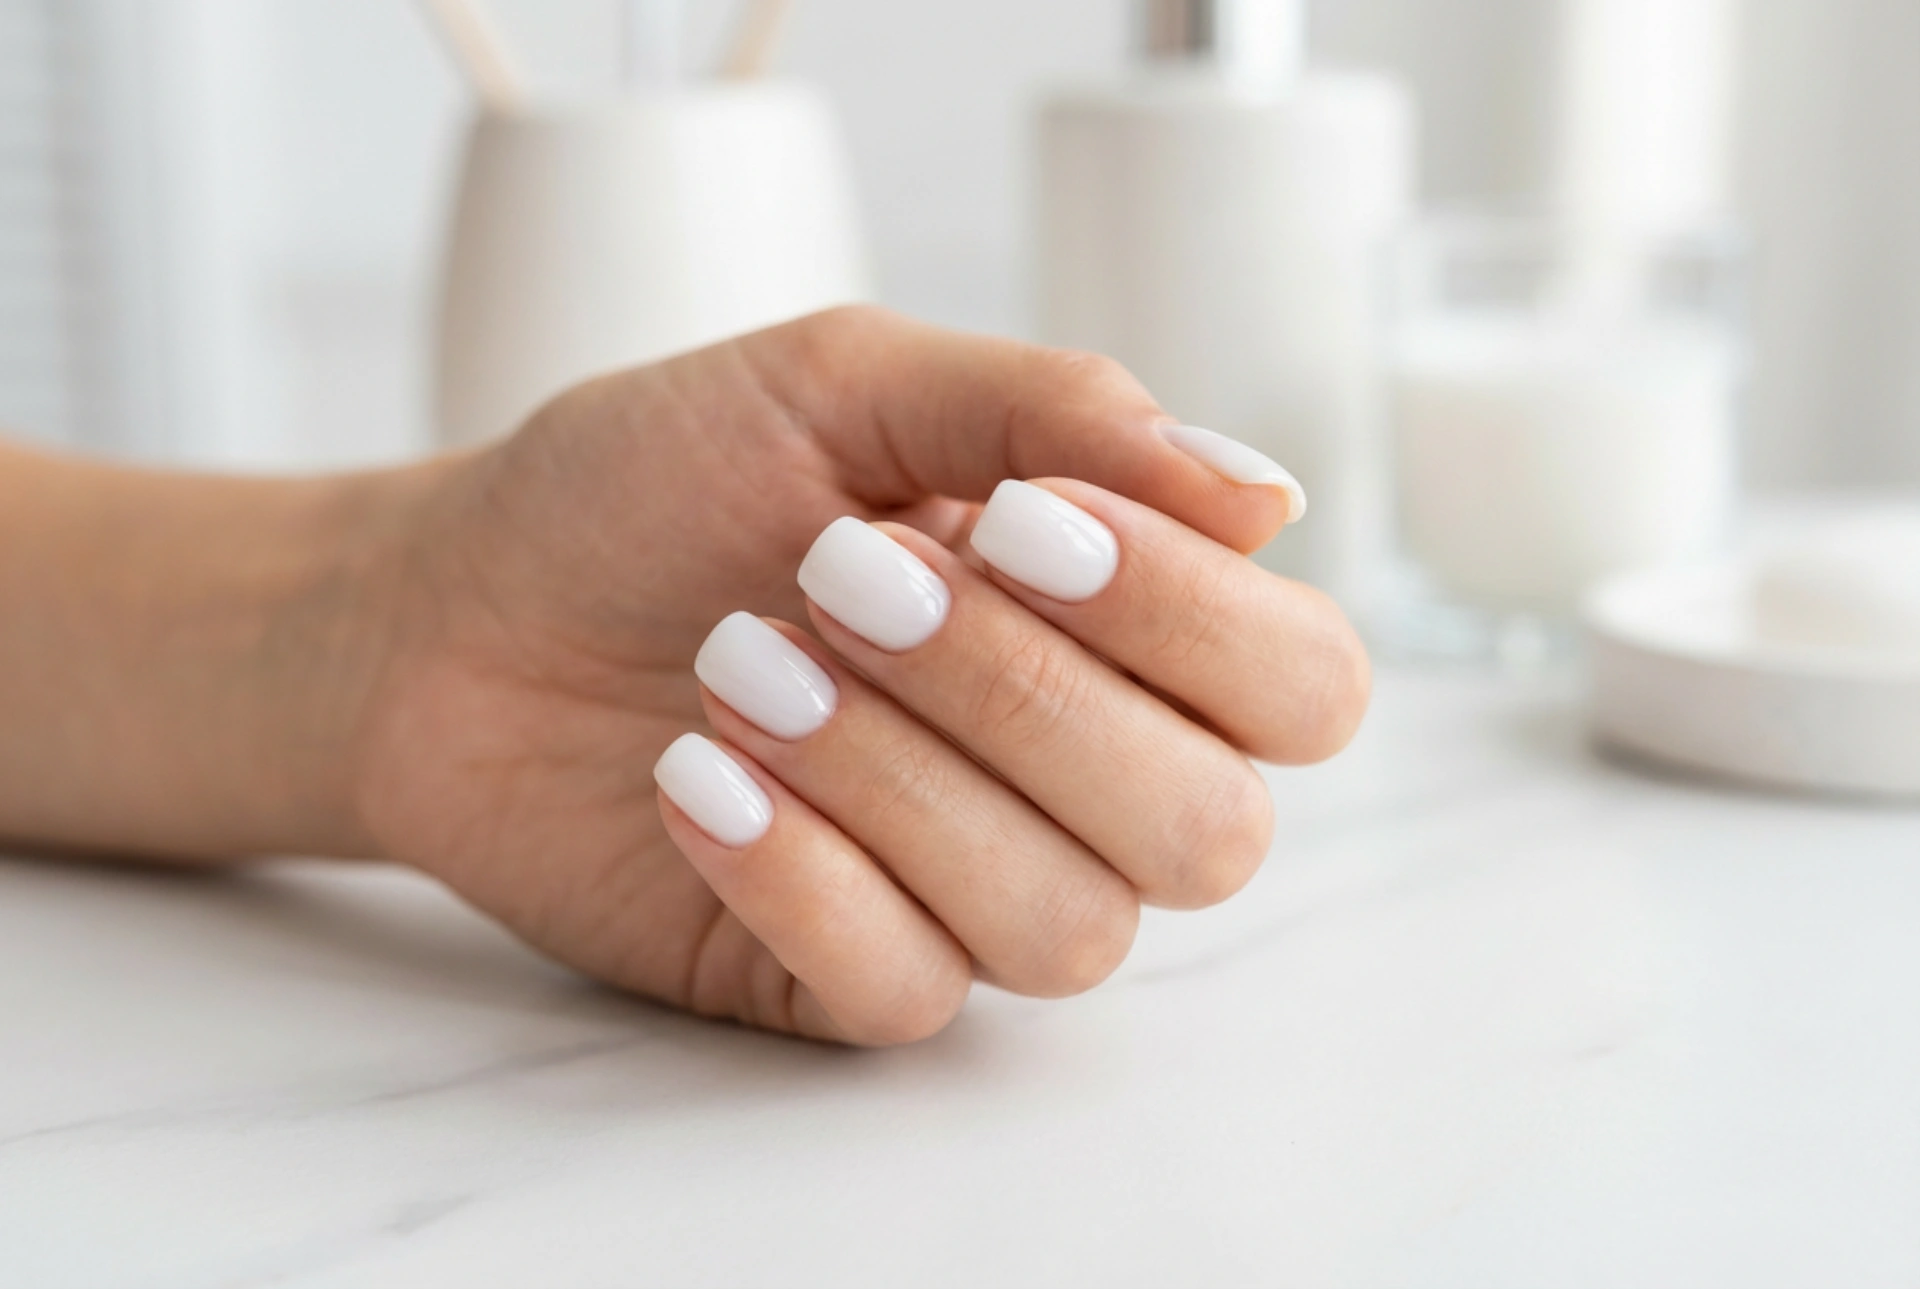


The trend for milky nails continues to charm with its subtlety and elegance. A manicure featuring a perfectly smooth, streak-free milky white finish embodies a modern, clean aesthetic that complements any style. However, achieving this serene, opaque surface can be challenging. Semi-transparent, light-coloured polishes are notorious for showing every imperfection and brush stroke. Fortunately, with the right technique and a little patience, you can master the application and enjoy beautiful, flawless milky nails. This guide will walk you through the process, from preparation to the final glossy top coat.
Preparation is Key: The Foundation for a Perfect Manicure
A beautiful manicure starts long before you open the polish bottle. Proper preparation of the nail plate is the most crucial step for ensuring not only the longevity of your hybrid manicure but also a smooth and even colour application. Any irregularities on the nail surface will be highlighted by a light, milky polish.
Nail and Cuticle Care
Start by gently pushing back and removing any excess cuticles. Shape your nails to your desired form using a file. Ensure all nails are of a uniform length and shape for a cohesive look. Afterwards, it is essential to mattify the nail plate. Use a gentle buffing block to lightly buff the entire surface of the nail. The goal is to remove the natural shine, creating a slightly rougher texture that the base coat can adhere to securely. Be careful not to over-buff, as this can weaken the nail.
Cleansing and Dehydrating
Once the nails are buffed, it is vital to remove all dust and natural oils. Use a lint-free wipe soaked in a nail cleanser or dehydrator. Thoroughly wipe each nail, paying special attention to the cuticle area and side walls. This step ensures maximum adhesion and prevents the polish from lifting. After cleansing, apply a thin layer of primer if your nails are prone to lifting, and then proceed with a quality hybrid base coat. Cure the base coat according to the manufacturer's instructions.
The Art of Application: Techniques for a Streak-Free Finish
Applying milky polish requires a delicate touch. The key is to work with thin layers and allow the polish to self-level. This will prevent the pigment from accumulating unevenly and creating unsightly streaks.
The Right Amount of Product
One of the most common mistakes is loading too much polish onto the brush. For milky shades, less is more. Remove excess polish from one side of the brush on the neck of the bottle. You should have just enough product to cover the nail in a thin, slightly transparent layer. If the layer is too thick, it will not cure properly and is more likely to wrinkle and streak.
Brush Control and Strokes
Apply the polish using gentle, deliberate strokes. Instead of pressing the brush firmly against the nail, try to 'float' it over the surface. Start near the cuticle, gently pushing the polish towards it without touching the skin, then pull the brush straight down to the free edge. Use as few strokes as possible to cover the nail. After applying the polish, wait a few seconds before curing. This gives the polish time to self-level, smoothing out any minor brush marks on its own.
The Power of Thin Layers
The secret to an opaque, yet streak-free, milky finish is building the colour with multiple thin layers. It's much better to apply three very thin coats than two thicker ones. Each thin layer should be cured for the full recommended time in your lamp. This method ensures each layer is fully cured and provides a smooth foundation for the next, gradually building up to the desired milky opacity.
Curing and Finishing Touches
Correctly curing each layer is as important as the application itself. Under-curing can lead to a soft, easily damaged surface and can cause the polish to wrinkle. Always follow the curing times recommended for your polish and lamp. Once you are happy with the opacity after two or three coats, it's time for the final step: the top coat. A high-quality, no-wipe top coat will seal in the colour, protect it from chipping, and provide that beautiful, high-gloss shine that creates the 'milky sheet' effect. Apply a thin, even layer of the top coat, making sure to cap the free edge of the nail. Cure it for the recommended time. If your top coat has a dispersion (sticky) layer, wipe it off with a cleanser to reveal the final, shiny finish.
Common Mistakes to Avoid
To achieve that perfect salon-quality milky manicure at home, be mindful of these common pitfalls:
- Applying layers that are too thick, which leads to streaking, wrinkling, and improper curing.
- Not allowing the polish a few seconds to self-level before placing your hand in the lamp.
- Working with old, thickened, or poor-quality polish that has lost its smooth consistency.
- Using a lamp with insufficient power or not curing for the correct amount of time.
- Applying polish too close to the cuticles and side walls, causing it to flood the area and lift later.
- Skipping the crucial steps of proper nail plate preparation or forgetting to apply a top coat.
Mastering the application of milky hybrid polish takes practice, but the elegant and sophisticated result is well worth the effort. By following these tips, you can avoid streaks and achieve a beautifully smooth, milky finish that lasts for weeks.


