


Many believe that short hair offers limited styling options, but that couldn't be further from the truth. With the right tool, even a pixie cut, a bob, or a lob can be transformed with beautiful texture, waves, or curls. The secret weapon for this versatility is often a small-barrel curling iron. It provides the precision needed to work with shorter lengths, creating everything from tight ringlets to soft, modern waves without overwhelming the haircut. Learning how to use it correctly is key to unlocking its potential while keeping your hair healthy and strong.
Choosing the Perfect Small Curling Iron
Selecting the right curling iron is the first step towards achieving your desired look safely. For short hair, the details matter significantly. The market is filled with options, so knowing what to look for will ensure you invest in a tool that truly works for your hair type and length.
Barrel Diameter
The most crucial feature for short hair is the barrel's diameter. A smaller barrel allows you to wrap the hair around it completely, which is difficult with larger irons. Look for diameters between 10mm and 25mm (around 1 inch).
- 10mm to 19mm: These are ideal for creating tighter, more defined curls. They work wonderfully on very short hair, like pixie cuts, or for adding detailed texture around the face.
- 20mm to 25mm: This size is perfect for creating looser waves, adding volume to a bob, or achieving a more relaxed, tousled look on lob-length hair.
Material Matters
The material of the curling iron's barrel directly affects how heat is distributed and how it interacts with your hair. For home use, safety and gentle heat are paramount.
- Ceramic: A popular and excellent choice, ceramic plates provide even, consistent heat, reducing the risk of hot spots that can scorch hair. They glide smoothly, minimising snagging.
- Tourmaline: Often a coating on ceramic barrels, tourmaline emits negative ions that help to seal the hair cuticle, reducing frizz and enhancing shine. It's a fantastic option for hair that's prone to frizz.
- Titanium: While titanium heats up very quickly and holds high temperatures, it's often better suited for professional use. It can be too intense for fine or delicate hair if not used with extreme care. For home styling, a ceramic or tourmaline iron is generally a safer bet.
Adjustable Temperature Settings
A one-size-fits-all temperature is a recipe for damage. Always choose a curling iron with adjustable heat settings. This allows you to tailor the temperature to your specific hair type. Fine hair requires a much lower temperature than coarse, thick hair. Start at the lowest setting and only increase it if necessary to achieve a lasting curl. Never go to the maximum setting unless your hair is exceptionally thick and resistant.
Prepare Your Hair for Safe Styling
Before you even plug in your curling iron, proper preparation is essential to protect your hair from heat damage. Skipping these steps can lead to dryness, breakage, and dullness over time.
1. Start with Completely Dry Hair: Never, ever use a curling iron on damp or wet hair. This will essentially boil the water within the hair shaft, causing severe and often irreversible damage. Ensure your hair is 100% dry, whether you've air-dried it or used a blow-dryer (with a heat protectant, of course).
2. Detangle Thoroughly: Gently brush or comb through your hair to remove all knots and tangles. This allows the curling iron to glide smoothly, preventing snags and ensuring a more uniform curl pattern.
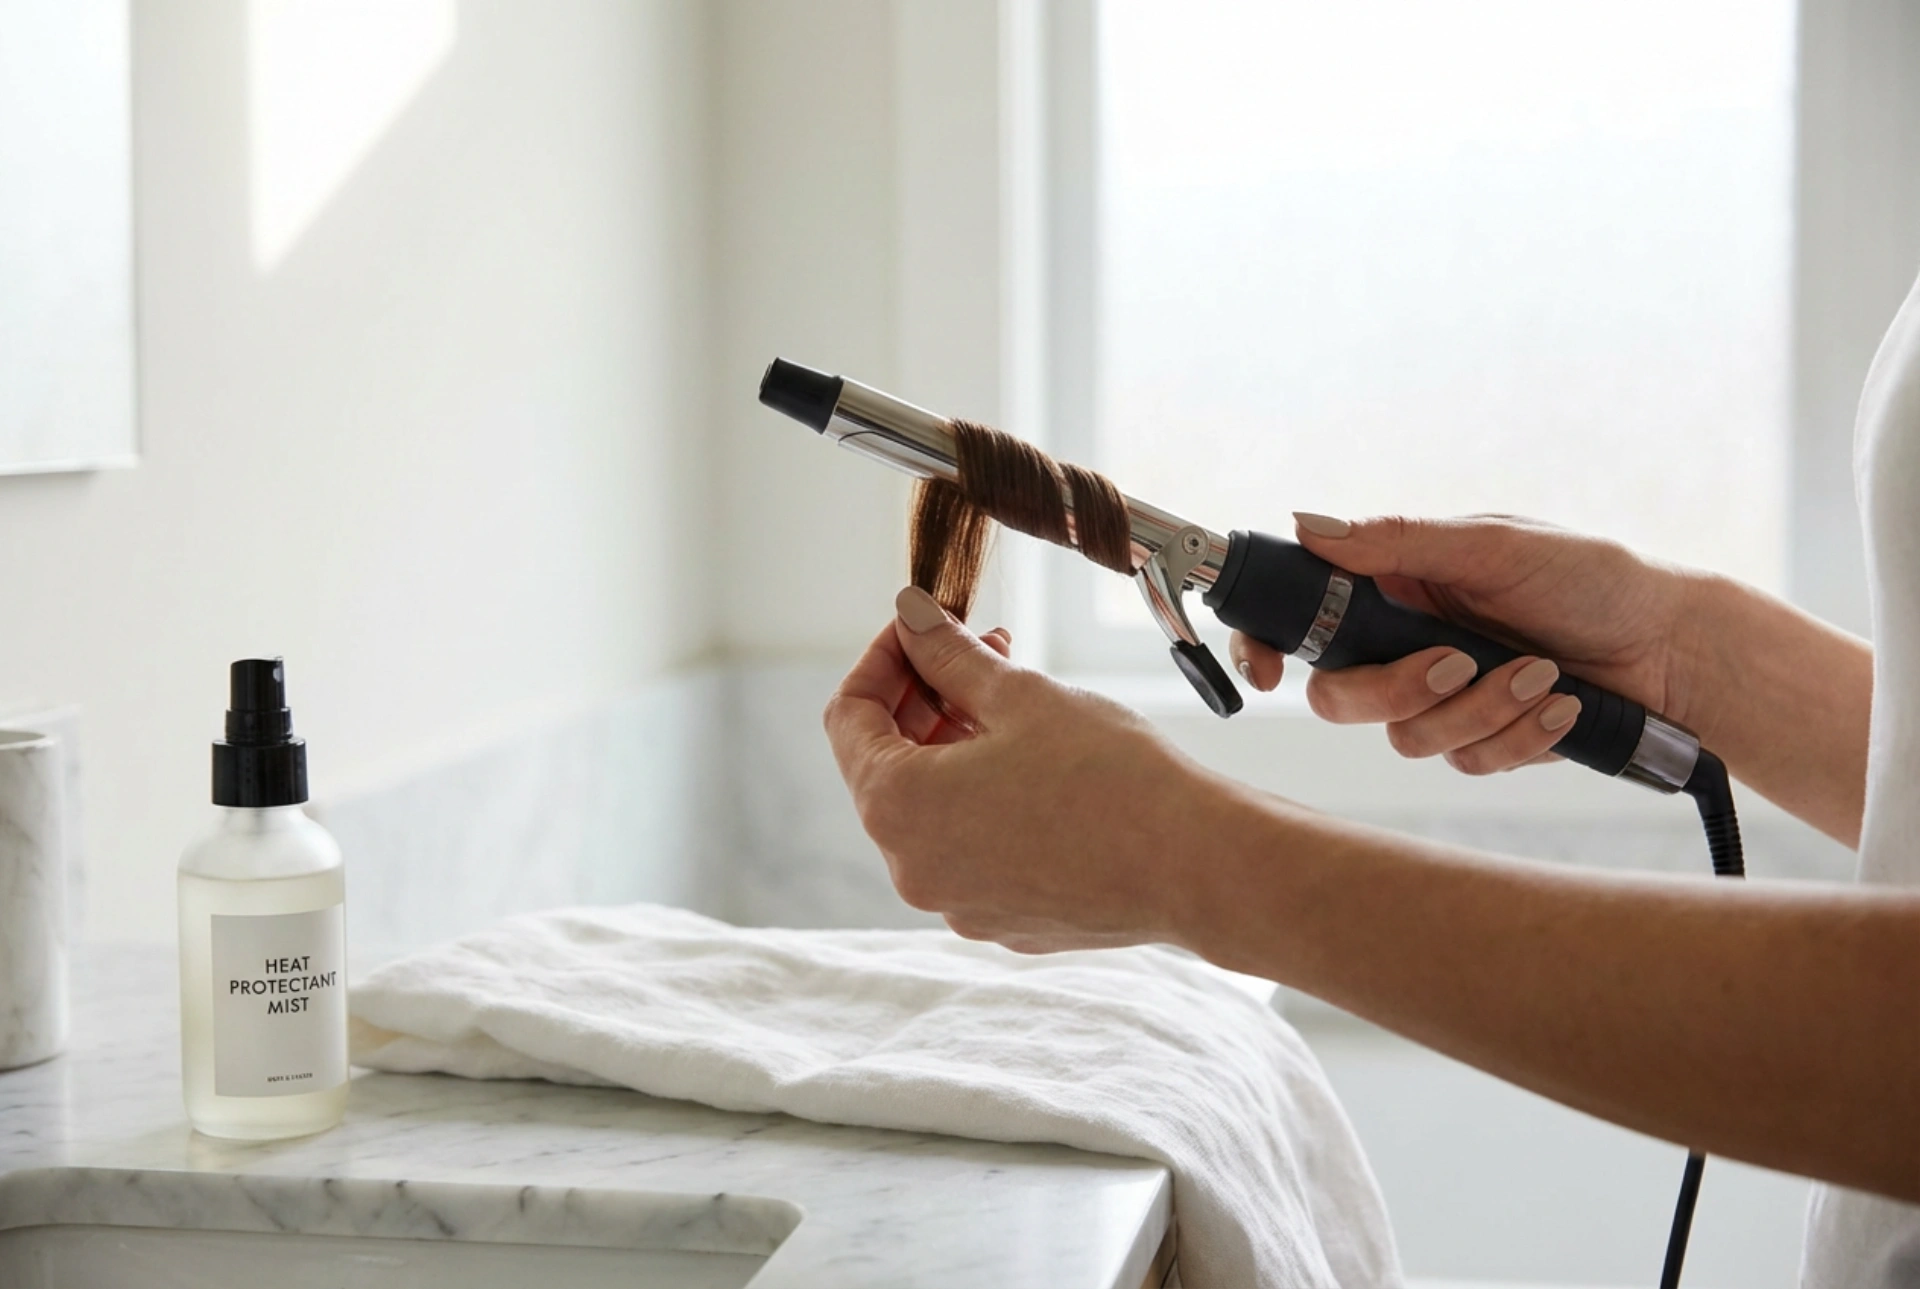
3. Apply a Heat Protectant: This is a non-negotiable step. A quality heat protectant creates a barrier between your hair and the hot tool, minimising moisture loss and reducing the damaging effects of high temperatures. Lightly mist it all over your hair, from roots to ends, and comb it through to ensure even distribution.
A Step-by-Step Guide to Curling Short Hair
Once your hair is prepped, you're ready to start styling. Patience and technique are your best friends here. Working in small, manageable sections will give you the best results.
Step 1: Section Your Hair. Use clips to divide your hair into sections. For short hair, two or three layers might be enough. Start with the bottom layer and clip the rest of the hair out of the way. This prevents you from re-curling sections and helps create a more organised, polished look.
Step 2: Choose Your Wrapping Technique. How you wrap the hair around the barrel determines the final look.
- For Classic Curls: Clamp a small section of hair near the roots (be careful not to touch the scalp) and wrap the hair flat around the barrel. Hold for 5-8 seconds.
- For Modern Waves: Leave the last inch or two of the hair out of the iron. Wrap the middle section of the hair around the barrel, alternating the direction of the wrap with each section (one towards your face, one away). This creates a more undone, natural-looking wave.
Step 3: Hold and Release. The optimal time to hold the hair is typically between 5 and 10 seconds. Any longer risks damage. Gently release the clamp and let the curl slide off the barrel. You can cup the warm curl in your hand for a few seconds to help it set, which will improve its longevity.
Step 4: Cool and Finish. Let all the curls cool down completely before you touch them. Running your fingers through them while they are still warm will cause them to fall flat. Once cool, you can gently separate the curls with your fingers for a softer look. If desired, finish with a light-hold hairspray to maintain the style without making it stiff.
Common Mistakes to Avoid for Healthy Curls
Achieving beautiful curls is one thing; maintaining hair health is another. Be mindful of these common pitfalls to keep your short hair in top condition.
- Using Too Much Heat: It’s tempting to crank up the temperature for a faster, longer-lasting curl, but this is the quickest way to cause damage. Start low and find the minimum effective temperature for your hair.
- Holding Hair for Too Long: You don't need to hold the iron on your hair for an extended period. A few seconds is usually enough. If your curls aren't holding, the issue may be the section size or your prep, not the duration.
- Forgetting to Clean Your Tool: Product buildup (from heat protectants and hairsprays) can bake onto your curling iron, causing it to drag on your hair and distribute heat unevenly. Wipe the barrel with a damp cloth when it's cool and unplugged.
- Styling Too Often: Daily heat styling can take a toll, even with protective measures. Try to give your hair a break a few days a week to recover.
By choosing the right tool and adopting a mindful styling routine, you can enjoy the endless creative possibilities that a small curling iron brings to short hair, all while ensuring it remains vibrant and healthy.


