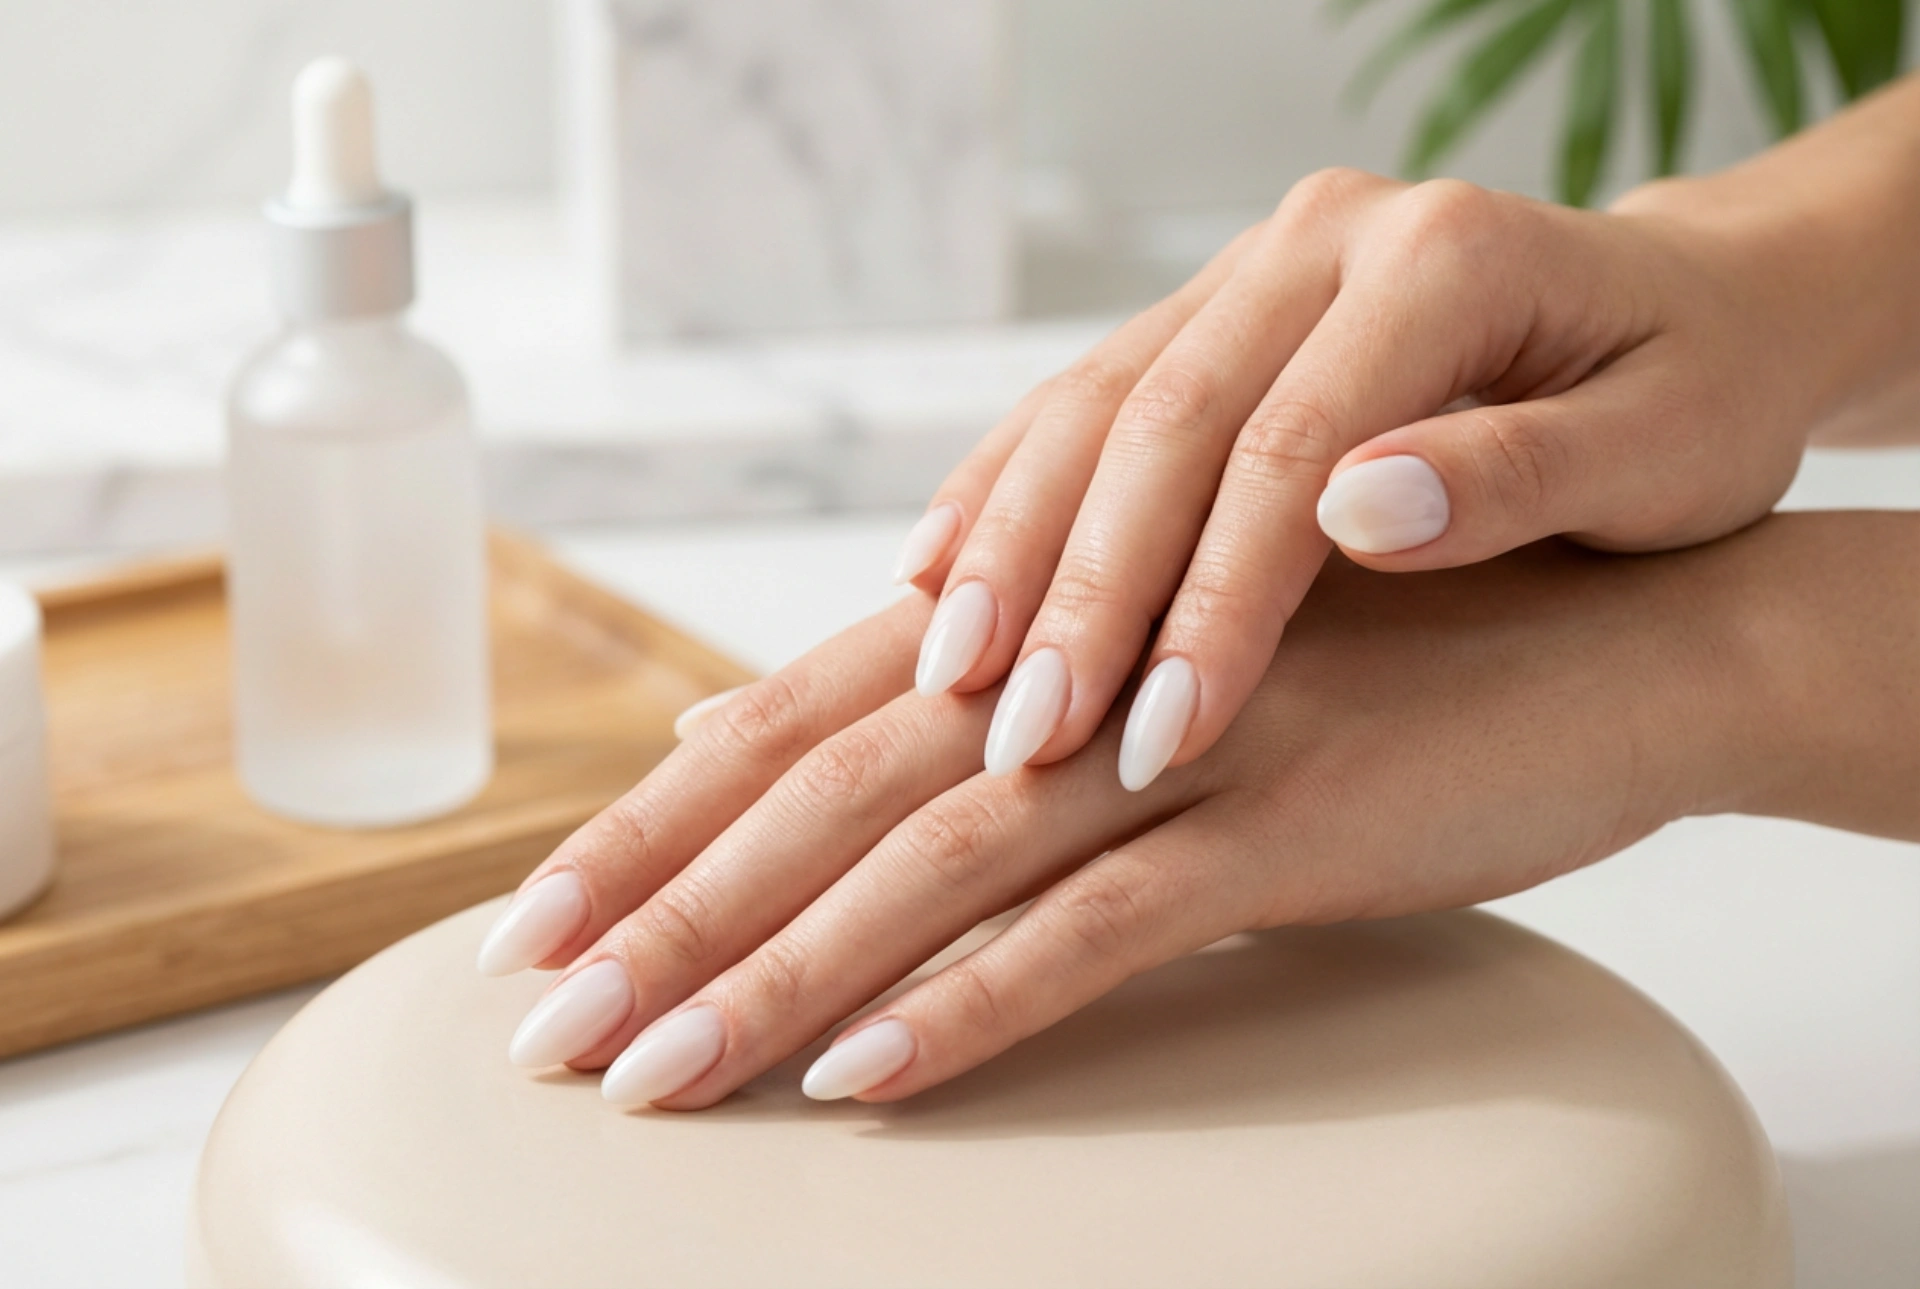


The trend for natural, understated beauty has firmly established itself in the world of manicures. The 'your nails but better' look, celebrated for its elegance and subtlety, focuses on healthy, perfectly groomed nails with a whisper of colour. At the heart of this aesthetic is the milky base coat—a versatile product that can transform the appearance of your natural nails, giving them a clean, polished, and effortlessly chic finish. Mastering its application is key to achieving that flawless, salon-quality look at home.
What is a Milky Base Coat and What Are Its Benefits?
A milky base coat is a type of semi-sheer nail polish, typically in shades of soft white, pale pink, or beige. Unlike fully opaque polishes, its purpose isn't to deliver a bold block of colour, but rather to enhance the natural nail. Its unique formulation offers several key advantages:
- Surface Correction: One of its primary functions is to act as a 'ridge filler'. Many people have nails that are not perfectly smooth, with natural ridges or dents. The slightly thicker consistency of a milky base allows it to self-level, filling in these minor imperfections and creating a perfectly smooth canvas.
- Subtle Concealment: The semi-translucent pigment helps to blur and conceal minor discolourations or spots on the nail plate. It evens out the nail's natural tone, providing a healthy and uniform appearance without looking artificial.
- Buildable Coverage: Milky bases are designed to be buildable. One coat will give a very sheer, natural sheen, while two or three coats will increase the opacity for a more noticeable 'milky nails' effect, all while maintaining a delicate look.
- Versatility: It can be worn entirely on its own for a minimalist manicure, serve as the perfect neutral background for a classic French manicure, or be used as a smoothing base under other sheer or pastel polishes.
Preparing Your Nails for a Flawless Application
Proper preparation is non-negotiable for a long-lasting and professional-looking manicure. Rushing this stage is often the reason for a less-than-perfect outcome. Take your time to create the ideal foundation for your milky base.
Step 1: Clean and Shape
Start by removing any old polish completely. Wash your hands with a gentle soap and dry them thoroughly. Next, file your nails into your desired shape, whether it's a soft square, an almond, or an oval. To prevent splitting, always file in one direction, moving from the side of the nail towards the centre, rather than using a back-and-forth sawing motion.
Step 2: Cuticle Care
Healthy-looking cuticles are essential for a clean manicure. Apply a cuticle remover solution and let it sit for a minute, then gently push back your cuticles using a wooden orange stick or a soft-tipped cuticle pusher. Avoid the temptation to cut your cuticles at home, as this can lead to damage and potential issues. Simply pushing them back creates a neat and larger-looking nail bed.
Step 3: Buff and Dehydrate
This is a crucial step for polish adhesion. Lightly buff the entire surface of your nail plate with a fine-grit buffer block. The goal is not to thin the nail, but simply to remove the natural shine and any surface oils. This creates a slightly textured surface for the base coat to grip onto. Afterwards, wipe each nail with a lint-free pad soaked in a nail dehydrator or isopropyl alcohol. This removes all remaining dust, oils, and moisture, ensuring the base coat adheres perfectly.
Step-by-Step Guide to Applying a Milky Base Coat
The application technique for a self-levelling milky base is slightly different from that of a standard polish. The key is to work with the product's consistency to build a smooth, even structure.
The First Thin Coat: Begin by applying one very thin, even coat of the milky base over the entire nail. Think of this as a 'slip layer'. This initial coat doesn't need to be perfect in terms of coverage, but it should cover the nail from cuticle to tip without touching the skin. This layer creates a wet, smooth surface that will help the next layer level out beautifully.
The Building Coat: Without waiting for the first coat to dry completely, pick up a slightly larger bead of polish on your brush. Apply this bead down the centre of the nail, a few millimetres from the cuticle. Gently guide the polish with the tip of your brush, encouraging it to flow and spread towards the sides. The product's self-levelling properties will do most of the work, filling in any remaining dips and creating a subtle, strengthening arch.
Perfect the Surface: For an extra smooth finish, you can use a simple gravity trick. Immediately after applying the building coat, turn your hand upside down for 5-10 seconds. This helps the polish gather in the centre, creating a perfect, light-reflecting curve and ensuring it doesn't pool near the cuticles.
Finishing Touches: Depending on the desired opacity, you can apply one more thin coat. With every layer, be sure to 'cap the free edge' by running the brush lightly along the very tip of your nail. This helps to seal the manicure and prevent chipping. Finally, once the base is dry to the touch, apply a high-quality, glossy top coat to protect your manicure, add brilliant shine, and extend its wear time.
Common Mistakes to Avoid
Even with a great product, a few common errors can spoil the final result. Watch out for these pitfalls:
- Applying Overly Thick Coats: Applying the base too thickly in one go will lead to bubbling, an extremely long drying time, and a bulky, unnatural appearance. It's always better to build up the coverage with several thin layers.
- Skipping Nail Preparation: Any oil, dust, or residue left on the nail plate will compromise adhesion, leading to the polish lifting or chipping within a day or two. The cleansing step is vital.
- Flooding the Cuticles and Sidewalls: Allowing polish to touch the skin not only looks messy but also breaks the seal of the manicure against the nail plate, causing it to lift prematurely. Work carefully and use a small clean-up brush dipped in nail polish remover to create a crisp, clean line around the cuticle.
- Forgetting the Top Coat: A top coat is not an optional step. It acts as a shield against scratches and wear, provides that sought-after glossy finish, and significantly prolongs the life of your manicure.
By understanding the unique properties of a milky base coat and following these detailed steps, you can easily achieve a sophisticated, durable, and perfectly smooth manicure that elevates your natural nails.


