


The combination of red and black is a timeless classic in the world of style, exuding confidence and sophistication. When translated into nail art, this powerful duo can create a look that is both bold and elegant. Adding the texture of glitter introduces another layer of dimension, but achieving a refined finish requires a delicate balance. Mastering the art of combining a smooth, vibrant red with the sparkle of black glitter allows for a manicure that is perfect for special occasions or simply when you want your hands to make a statement.
The Foundation: Achieving a Flawless Red Base
Before any glitter is applied, the key to a professional-looking manicure is a perfect canvas. A smooth, opaque red base will make the black accents stand out beautifully. Start by preparing your nails properly. Ensure they are clean, filed to your desired shape, and gently buffed on the surface to remove any natural oils. Pushing back the cuticles creates a cleaner area for polish application. Always begin with a quality base coat; this not only protects your natural nails from staining but also gives the coloured polish something to grip onto, extending the life of your manicure.
When choosing your red, consider the undertones of your skin. Cooler skin tones often suit blue-based reds, like cherry, while warmer skin tones are complemented by orange-based, fiery reds. Deep, vampy shades like burgundy or wine offer a universally flattering and dramatic option. Apply your chosen red polish in two thin, even coats, allowing the first coat to dry for a few minutes before applying the second. This technique prevents streaking and results in a much richer, more uniform colour than one thick, goopy layer.
Applying Black Glitter: Techniques for a Sophisticated Finish
Once your red base is completely dry, it's time to introduce the black glitter. The goal is to enhance, not overwhelm, the red. There are several ways to incorporate glitter for an elegant effect, ranging from minimalist to more decorative.
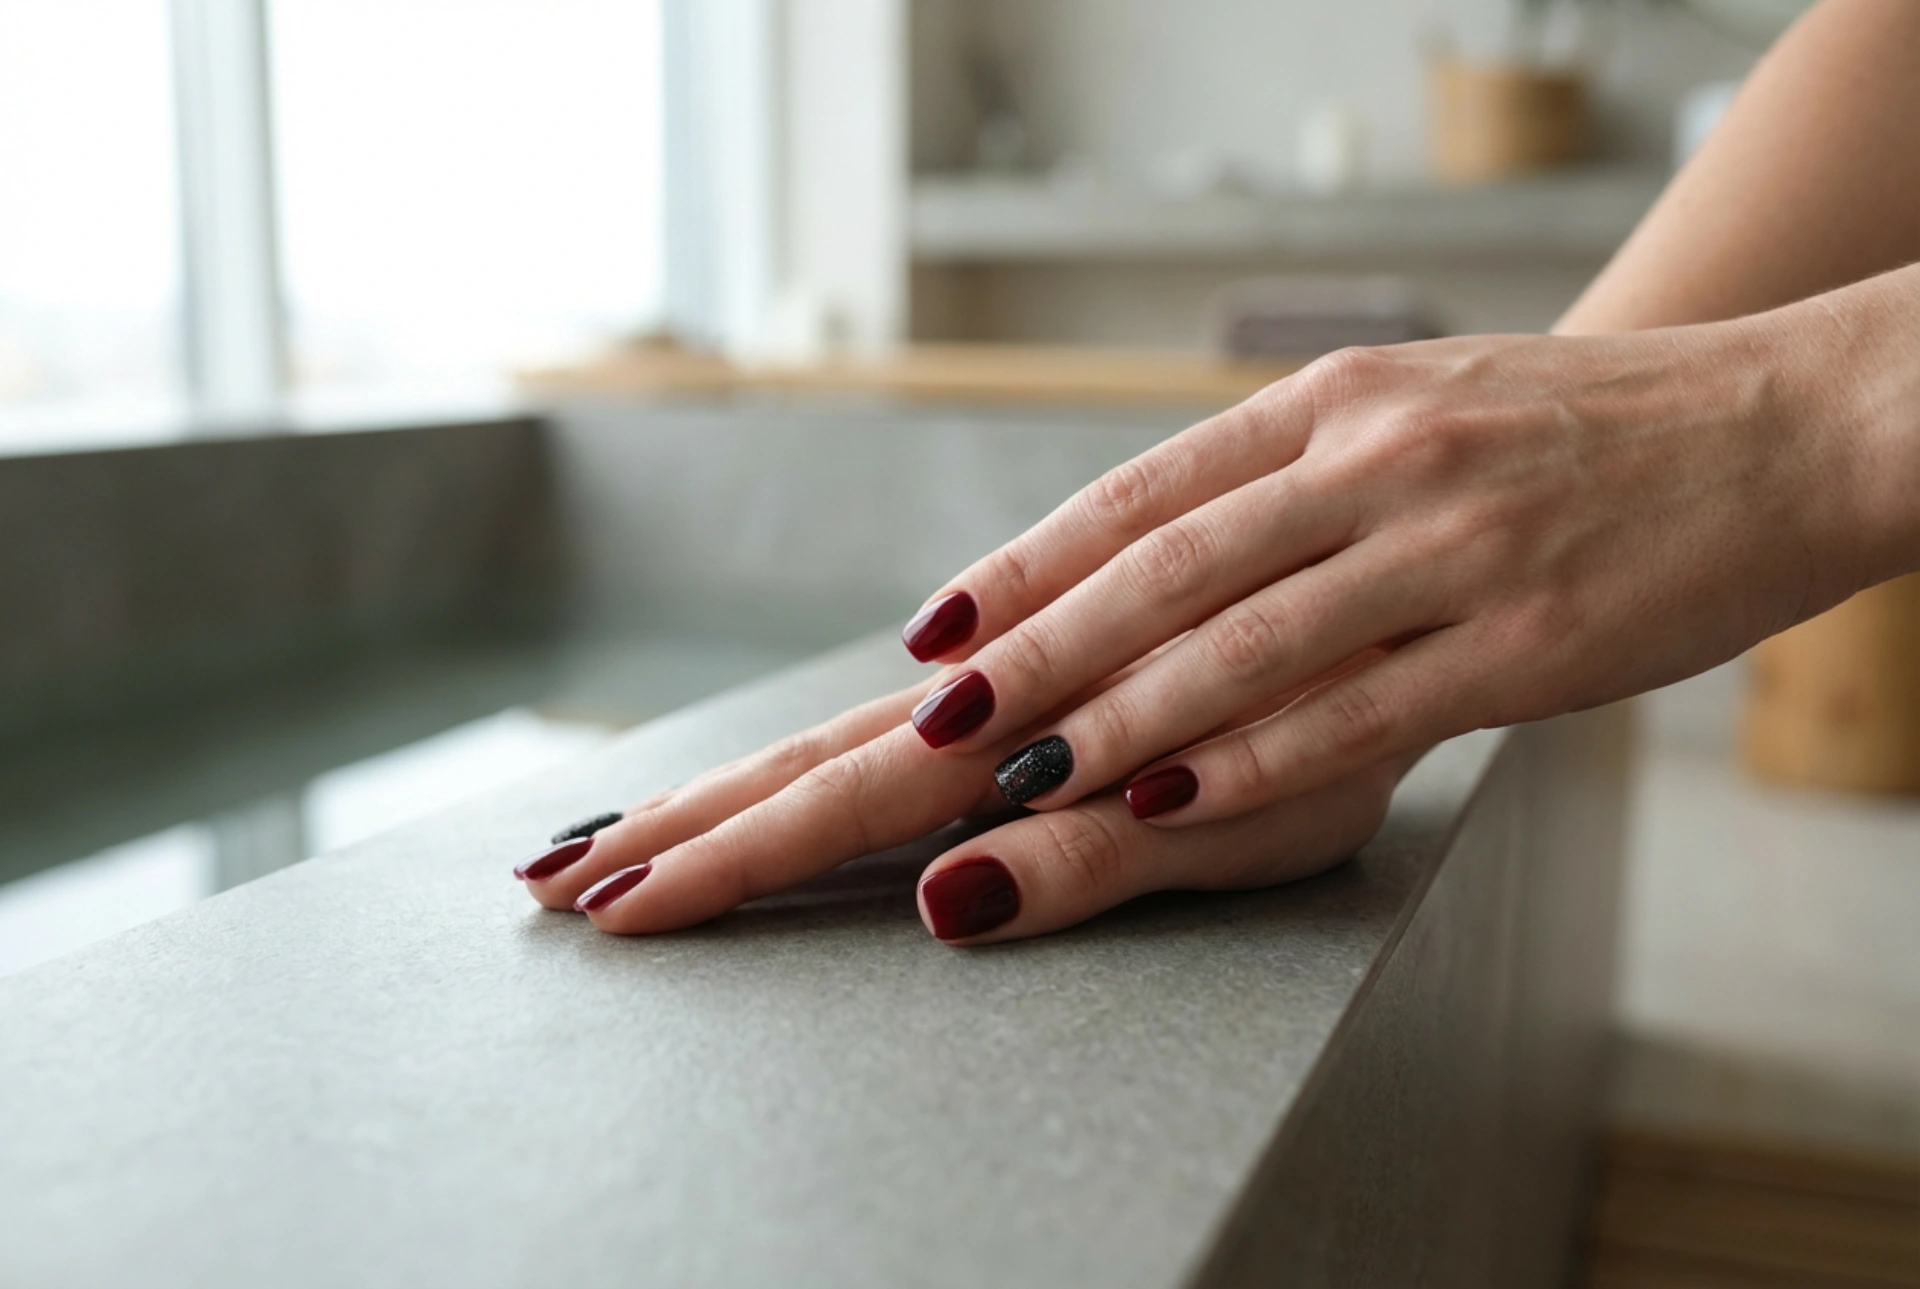
- The Classic Accent Nail: This is the simplest and most popular method. Apply the black glitter polish to a single nail on each hand, typically the ring finger. This creates a focal point without being too distracting.
- The Glitter Gradient: For a more dynamic look, try a glitter ombre. You can achieve this by applying a small amount of glitter polish to a makeup sponge and dabbing it onto the tip of the nail, building up the density at the very edge and fading it towards the cuticle. Alternatively, reverse the gradient by concentrating the glitter at the base of the nail.
- Subtle Glitter Details: A minimalist approach can be incredibly chic. Use a thin nail art brush to trace a French tip with black glitter. Other options include creating a half-moon design at the cuticle (a reverse French manicure) or a single, delicate vertical stripe down the centre of the nail.
- Texture Over Colour: Another technique involves using a sheer black glitter polish over the red base on all nails. This adds a subtle, dark sparkle and texture to the entire manicure, transforming the red into a deeper, more complex shade when it catches the light.
The type of glitter you choose also impacts the final look. Fine glitter dust creates a more uniform, shimmery surface, while chunkier hexagonal or irregularly shaped glitter offers a more dramatic, light-reflecting texture.
Finishing Touches and Common Mistakes to Avoid
The final step is arguably the most important for a long-lasting, professional finish. Sealing your design with a high-quality top coat is non-negotiable. A top coat not only adds a glossy shine but, more importantly, it smooths out the rough texture of the glitter, preventing it from snagging on clothes and protecting the design from chipping. For particularly coarse glitter, you may need to apply two layers of top coat to achieve a perfectly smooth surface.
A common mistake is applying too much glitter or applying it to every nail, which can make the manicure look heavy and dated. Remember that with a bold combination like red and black, less is often more. Another pitfall is uneven application, resulting in clumps or bald spots. The dabbing technique with a sponge usually provides more even coverage than simply brushing the glitter polish on. Finally, don't forget cleanup. Applying a liquid latex barrier or even some craft glue around your nail before working with glitter can save you a lot of time. If you do get glitter on your skin, a small brush or cotton bud dipped in nail polish remover will help you create a clean, sharp line around the nail.


