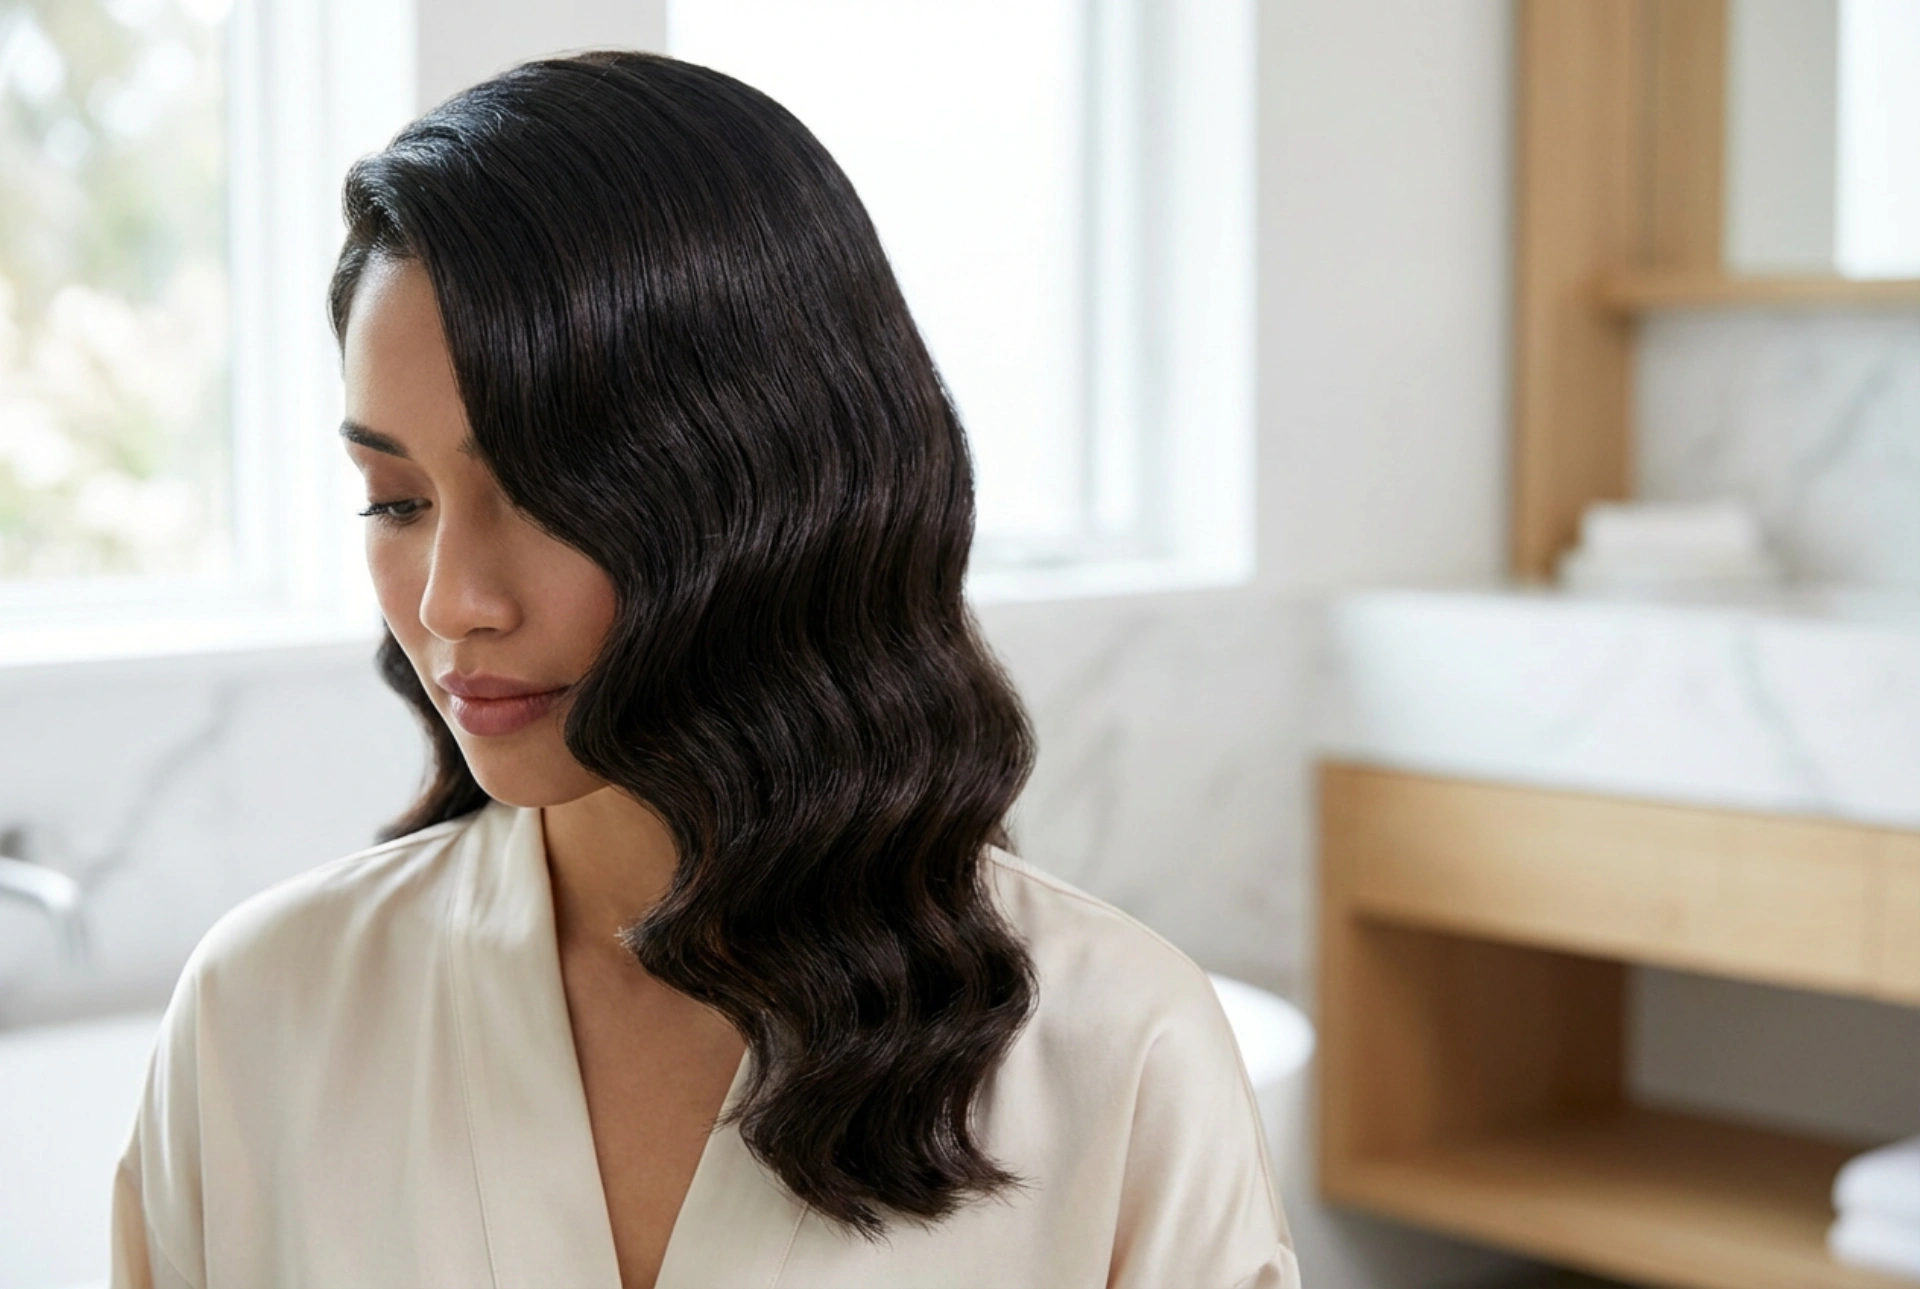


The allure of the 1920s is timeless, evoking an era of glamour, elegance, and liberation. Central to this aesthetic is the iconic hairstyle: structured, glossy water waves, often paired with a dramatic deep side parting. This sophisticated look has graced red carpets and special occasions for decades, proving its enduring appeal. While it may seem complex, recreating this vintage masterpiece at home is entirely achievable with the right techniques and a little patience. This guide will walk you through the process, from preparation to the final polished touch, helping you capture the spirit of the Roaring Twenties.
The Foundation: Preparing Your Hair for Styling
Achieving the perfect 1920s wave begins long before you pick up a styling tool. The right preparation creates a smooth, manageable canvas that will hold the style and exude that signature healthy shine. Rushing this stage is a common mistake that can lead to frizz and a lack of definition.
Start with freshly washed and conditioned hair. Opt for smoothing or hydrating products to minimise frizz and create a sleek base. After washing, gently squeeze out excess water with a microfibre towel or an old cotton t-shirt instead of rubbing vigorously, which can roughen the hair cuticle and cause flyaways. While your hair is still damp, apply a generous amount of styling mousse or a lightweight styling gel. This is a crucial step for providing the structure and hold necessary for the waves to form and last. Use a wide-tooth comb to distribute the product evenly from roots to ends, ensuring every strand is coated.
Finally, and most importantly, if you plan to use any heat-styling tools, a heat protectant is non-negotiable. Mist it thoroughly through your hair to shield it from potential damage. Once your hair is prepped, you can either let it air-dry or use a hairdryer with a nozzle attachment, directing the airflow downwards to keep the cuticles flat and smooth.
Crafting the Iconic Water Waves: A Step-by-Step Guide
With your hair prepped, it's time to create the signature 'S' shape of the water waves. While traditionally created on wet hair using only fingers, a comb, and clips (a technique known as finger waving), a more accessible modern approach involves using heat tools on dry hair.
1. Create the Parting: Before you begin styling, establish your deep side parting. Use the tail end of a comb to draw a clean, sharp line from your hairline back towards the crown of your head. The deeper the part, the more dramatic and authentic the look will be.
2. Section Your Hair: Working with manageable sections is key to achieving uniform waves. Clip away the top sections of your hair, starting with the bottom layers first. The sections should be about one to two inches wide.
3. Form the Waves: A hair straightener is a surprisingly effective tool for this. Take your first section of hair. Starting near the root, clamp the straightener and turn your wrist downwards to create the first curve of the 'S'. Move the straightener slightly down the hair shaft and immediately turn your wrist upwards to create the reverse curve. Continue this alternating motion all the way to the ends. The goal is to create a fluid, continuous wave pattern rather than separate curls. An alternative is to use a three-barrel waver, which stamps this 'S' pattern into the hair for you.
4. Work Methodically: Continue this process section by section, working your way up towards the parting. Ensure you start the wave at the same height for each section on the same layer to create a cohesive look. For the front pieces, direct the waves away from your face for a flattering effect.
The Finishing Touches: Parting, Shine, and Hold
Once all your hair has been waved and has completely cooled down, it's time for the final steps that elevate the style from simply wavy to truly vintage-inspired. This stage is all about precision, shine, and setting your work in place.
First, reinforce your deep side parting, ensuring the line is crisp and clean. You can use the end of your comb to perfect it. Next, address the iconic glossy finish. The secret is to add shine without weighing the hair down or making it look greasy. Take one or two drops of a lightweight hair serum or shine oil, rub it between your palms to warm it up, and then gently skim your hands over the surface of your hair. Avoid the roots and concentrate on the mid-lengths and ends. Alternatively, a fine-mist shine spray can be applied from a distance for a more even, weightless application.
To soften the waves for a more unified, glamorous look, you can gently brush through them with a soft bristle brush. This will meld the sections together seamlessly. For a more defined, sculpted appearance, you can skip this step. Finally, lock in your style with a light- to medium-hold hairspray. Mist it over your entire head to control flyaways and ensure your beautiful waves last all day and night.
Avoiding Common Styling Pitfalls
Creating this hairstyle can present a few challenges. Knowing the common mistakes and how to avoid them will ensure a flawless result.
- Problem: The waves look crunchy or feel stiff. This is usually caused by using too much product, especially heavy gels or strong-hold hairsprays. To fix this, always start with a small amount of product and build up if needed. Choose lightweight formulas designed for flexible hold.
- Problem: The final look is frizzy instead of smooth. Frizz often starts during the prep stage. Ensure you use a smoothing conditioner and avoid rough towel-drying. When styling, make sure your hair is completely dry before applying heat, and always use a heat protectant.
- Problem: The waves are uneven or lack definition. This happens when you rush the process or use sections of hair that are too large or inconsistent in size. Work patiently and methodically, using uniform sections. Practise is key to developing a consistent technique.
- Problem: The hair looks greasy, not glossy. The line between a healthy sheen and a greasy finish is thin. This is caused by over-applying shine products, especially heavy serums. Use only a minimal amount of product and focus it away from the roots. A shine spray is often a safer bet for finer hair types.


