


Achieving perfectly shaped and uniform nail extensions at home can seem like a challenge, but the dual form method has revolutionised the process. These reusable, transparent moulds act as a guide, allowing you to create a flawless structure with gel before it's even applied to your natural nail. This technique is celebrated for its ability to produce a smooth, professional-looking finish with a beautiful C-curve, even for those who are relatively new to nail styling. Let's explore how to master this popular method, from meticulous preparation to the final, glossy result.
Why Choose the Dual Form Method?
Dual forms, sometimes called reverse forms, offer several advantages over traditional paper forms or tips. Their primary benefit is consistency. Since the gel is shaped inside the form, each nail extension will have an identical structure and arch. This eliminates much of the guesswork and extensive filing typically required to create a perfect shape. The process is also generally faster once you get the hang of it. Furthermore, the top surface of the extension comes out incredibly smooth and glossy, as it cures against the slick interior of the form, minimising the need for top coating and finish filing.
- Uniformity: Guarantees a consistent shape and length across all nails.
- Speed: Reduces the time spent on building and shaping the nail structure.
- Smooth Finish: Creates a flawless surface that requires minimal buffing.
- Strength: Helps in creating a strong apex (the highest point of the arch), which is crucial for the durability of the extension.
Essential Nail Plate Preparation
The longevity of any nail enhancement depends almost entirely on proper preparation. Skipping these steps can lead to lifting, chipping, and a manicure that doesn't last. Your goal is to create a clean, dehydrated, and slightly rough surface for the gel to adhere to.
Step 1: Cuticle Care and Shaping
Begin by gently pushing back your cuticles with a wooden stick or a metal pusher. It is crucial to remove any non-living tissue from the nail plate itself, as any product applied over it will lift. If you are experienced, you can carefully trim any excess hangnails or raised cuticle skin with nippers, but avoid cutting the living tissue of the eponychium. Next, gently shape the free edge of your natural nail with a fine-grit file (e.g., 180/240 grit) and lightly buff the entire surface of the nail plate with a buffer block. The aim is to remove the natural shine, not to thin the nail.
Step 2: Cleansing and Dehydrating
After buffing, there will be fine dust on and around your nails. It is absolutely essential to remove this completely. Use a lint-free wipe saturated with a specialised nail cleaner or high-percentage isopropyl alcohol to thoroughly wipe down each nail. This step removes dust and oils, dehydrating the plate to ensure maximum adhesion. Be careful not to touch your nails with your fingertips from this point on, as this will transfer oils back onto the surface.
Step 3: Priming
Apply a thin layer of a bonder or acid-free primer specifically designed for gel products. This product acts like double-sided tape, creating a strong bond between the natural nail and the base coat that follows. Allow it to air dry completely according to the product's instructions before proceeding.
Step-by-Step Gel Application with Dual Forms
With your nails prepped, you're ready for the application process. Work on one nail at a time to ensure you have full control.
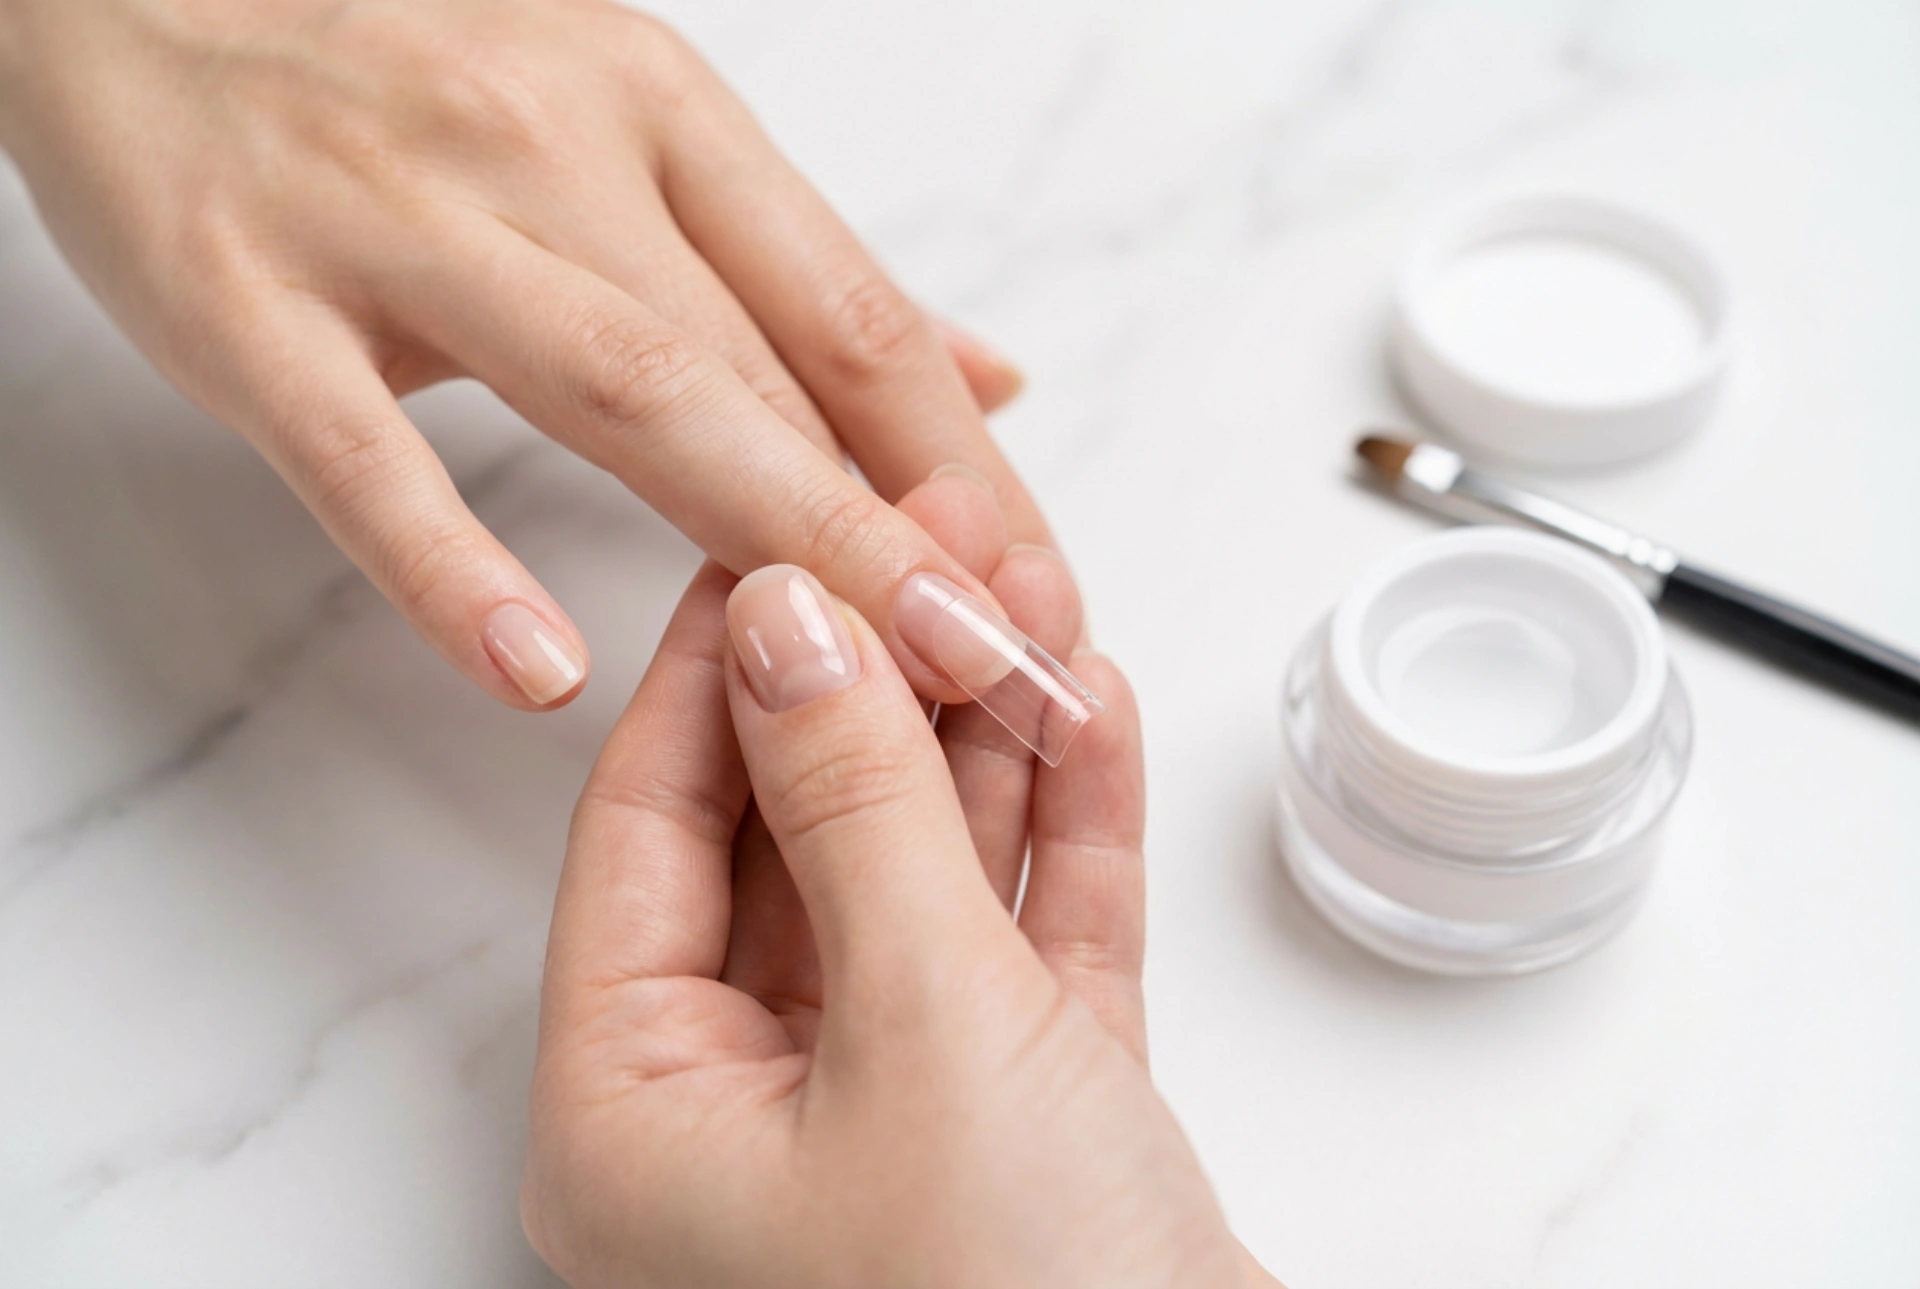
1. Select the Right Form Size
Choose a dual form for each finger. The form should be slightly wider than your natural nail plate, covering the nail from one side wall to the other without pressing into the skin. If it's too narrow, it will pinch the nail and create a weak structure. If it's too wide, the gel will spill onto the surrounding skin. Check the fit for all ten nails before you begin applying any product.
2. Apply Base Coat
Apply a thin layer of a gel base coat to your entire natural nail and cure it under a UV/LED lamp according to the manufacturer's instructions. This creates the foundational layer for the building gel.
3. Apply Gel into the Dual Form
Using a spatula, scoop a small bead of building gel and place it inside the dual form. With a gel brush slightly dampened with slip solution or cleaner, spread the gel evenly inside the form to your desired length and thickness. Pay attention to the side walls, ensuring the gel is thick enough there, but keep it thinner near the cuticle area to create a natural transition.
4. Place the Form on the Nail
Carefully place the gel-filled form onto your nail. Start at the cuticle area, leaving a tiny gap (about 1mm), and slowly press it down towards the free edge. Apply gentle, even pressure. You should see the gel spread to cover the entire nail plate underneath the form. If a significant amount of gel oozes out from the sides or the cuticle, you have used too much. You can use your brush and cleaner to wipe away any excess before curing.
5. Cure and Remove the Form
While holding the form securely in place, perform a quick 'flash cure' for 10-15 seconds with the lamp. This will set the gel enough for you to let go. Then, complete a full cure, usually for 60 seconds in an LED lamp or 120 seconds in a UV lamp. It's often helpful to flip your hand over and cure the underside as well to ensure the gel is fully hardened. Once cured, gently wiggle the dual form from side to side at the tip to break the seal and pop it off. You'll be left with a perfectly shaped, smooth extension.
Common Mistakes to Avoid
Even with a straightforward method, a few common errors can occur. Being aware of them will help you achieve a better result.
- Air Bubbles: These are often caused by improperly spreading the gel in the form or pressing the form down too quickly. Work the gel slowly with your brush to eliminate bubbles before application.
- Flooding the Cuticles: Using too much gel or placing the form too close to the skin will cause it to flood the cuticles, which inevitably leads to lifting. Always clean up excess gel before curing.
- Incorrect Form Sizing: A form that is too small will create weak stress points, while one that is too large will result in a bulky, unnatural look. Take the time to size each nail correctly.
- Under-curing: Insufficient curing time will leave the gel soft underneath, leading to a weak extension that can bend or break. Always follow the curing times for your specific lamp and gel.
After removing all the forms, you may have a sticky inhibition layer on the surface. Wipe this off with cleaner. Now you can file the free edge to your desired final shape (e.g., square, almond) and gently buff the transition near the cuticle area if needed. Finally, apply a gel top coat to seal everything in, cure it one last time, and finish with some cuticle oil for hydration.


