


Achieving a professional-looking manicure at home is more accessible than ever, thanks to a wide range of available tools. While the results can be stunning, using equipment like nail lamps and electric files requires knowledge and care to ensure a beautiful finish without compromising nail health. This guide will walk you through the essential equipment, how to use it safely, and the common mistakes to avoid on your journey to the perfect home manicure.
Choosing Your Core Equipment
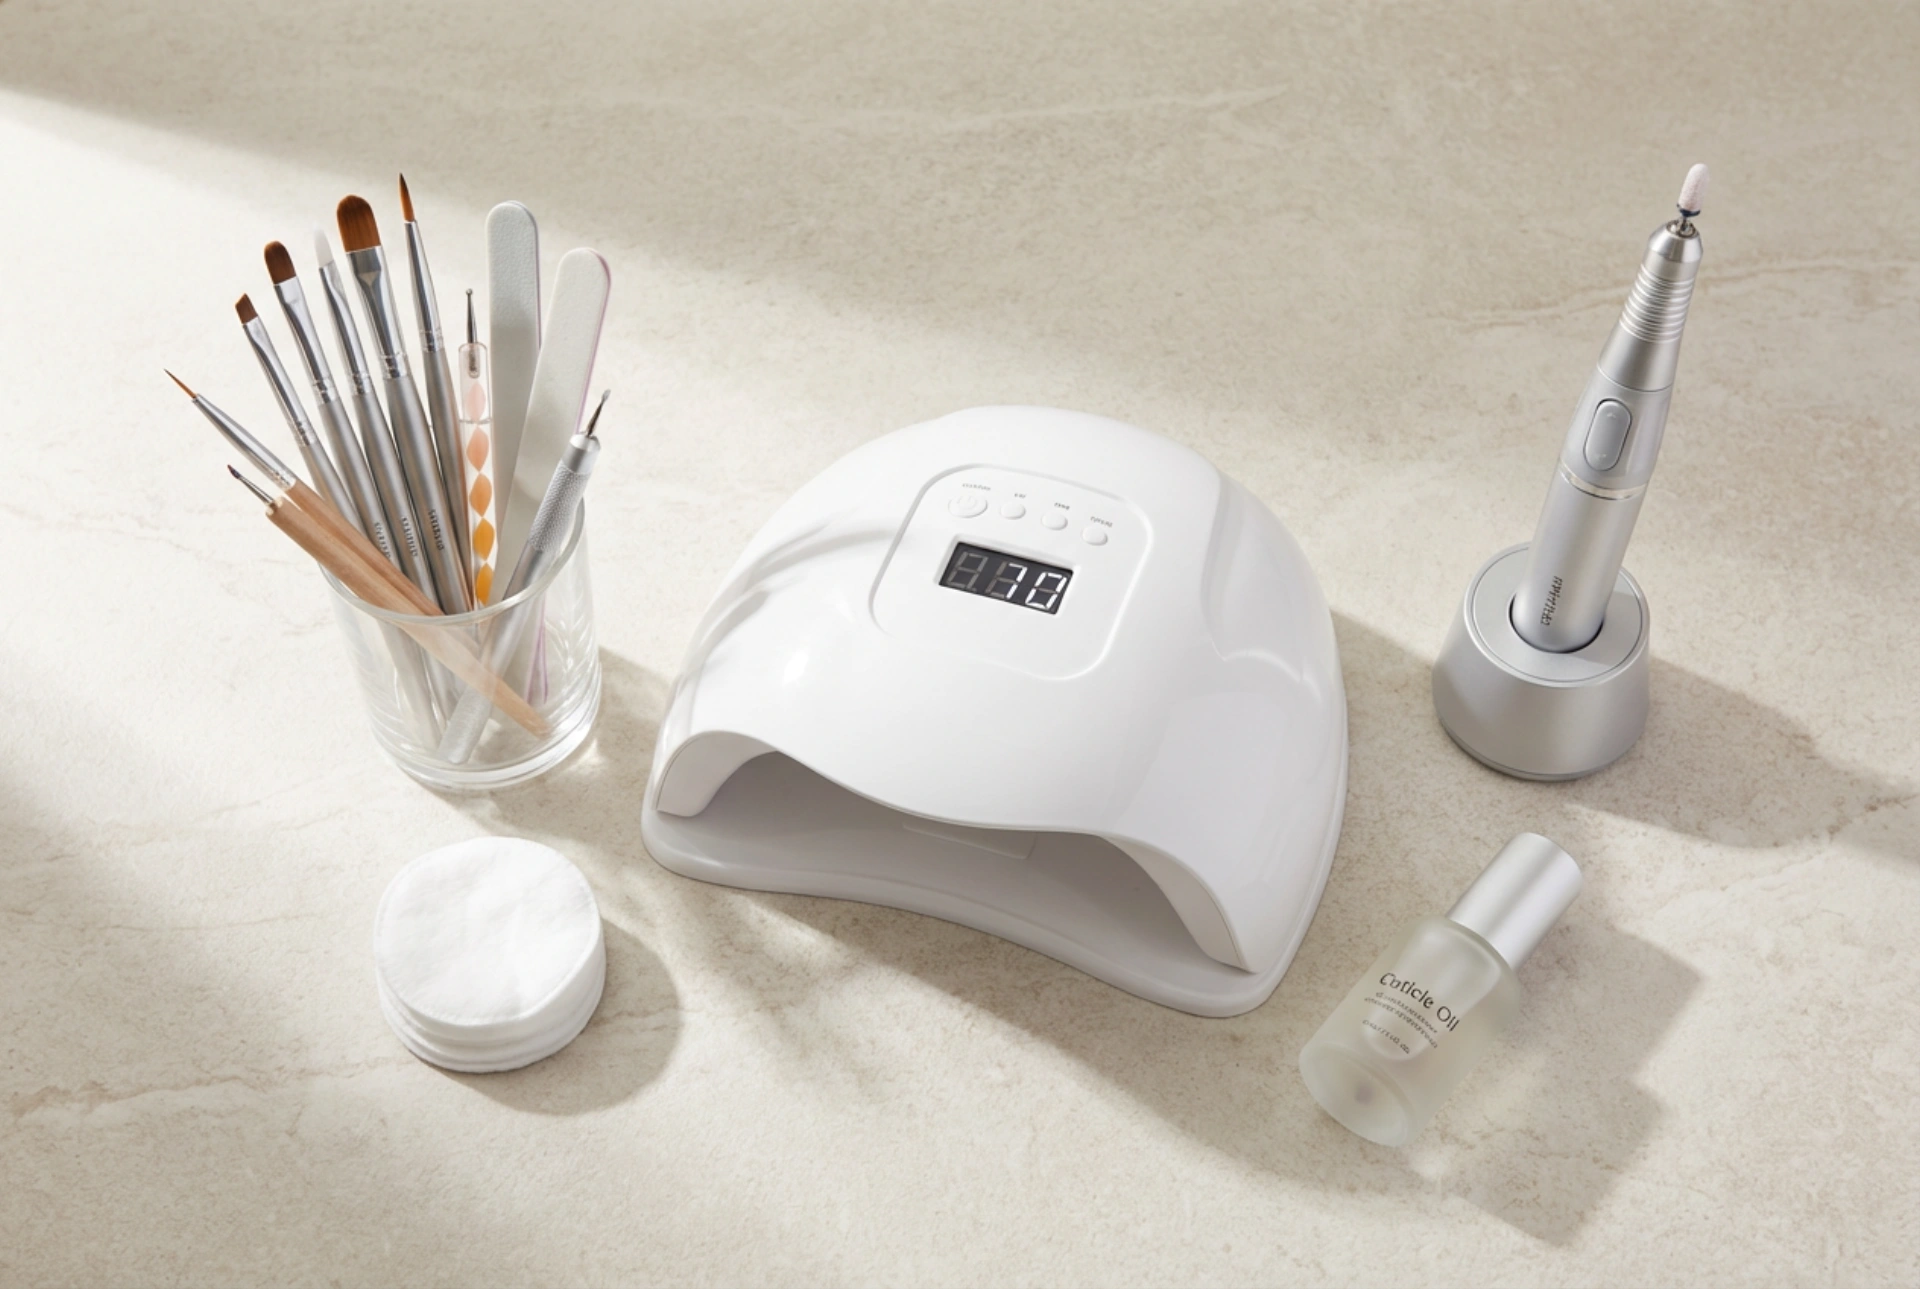
Building your home nail kit starts with understanding the two main powered devices: the lamp and the electric file. Selecting the right models for home use is crucial for both safety and quality.
The Nail Lamp: UV vs. LED
A curing lamp is non-negotiable for gel polishes and certain nail enhancements. Its purpose is to emit light that hardens or "cures" the gel product. The two main types are Ultraviolet (UV) and Light Emitting Diode (LED).
- UV Lamps: These are the traditional option. They can cure almost any brand of gel polish but typically take longer to do so (usually around 2 minutes per coat). The bulbs in UV lamps also need to be replaced periodically, typically every few months with regular use.
- LED Lamps: This is the newer technology. LED lamps cure polish much faster, often in 30-60 seconds. They are more energy-efficient, and the bulbs last for thousands of hours, effectively for the lifetime of the device. While most modern gel polishes are formulated to work with LED lamps, it's always wise to check the polish manufacturer's recommendations.
For home use, an LED lamp is generally the more convenient choice due to its speed and longevity. Look for a lamp with a reflective interior for even curing, a timer with multiple settings (e.g., 30s, 60s), and enough space to comfortably fit your whole hand.
The Electric Nail File (E-File)
An electric nail file, or e-file, is a powerful tool used for shaping, shortening nails, managing cuticles, and removing old product. For a beginner, it's vital to choose a model designed for home use, not professional salon use. Key features to look for include:
- Adjustable Speed: The ability to control the rotations per minute (RPM) is the most important safety feature. Always start on the lowest possible setting and only increase it slightly as you gain confidence.
- Low Vibration and Noise: A quality motor will run smoothly without excessive vibration, giving you more control and a more comfortable experience.
- Forward and Reverse Directions: This is helpful for working on both hands and from different angles.
An e-file comes with various attachments called 'bits'. For starting out, you only need a few basic ones: a fine-grit barrel bit for shortening or shaping, and a small, pointed bit for gentle cuticle work. Always opt for finer grits to avoid removing too much of the natural nail.
Preparing Your Workspace and Nails
A successful manicure begins before you even open a polish bottle. First, set up a clean, stable, and well-lit area. Good ventilation is important, so consider opening a window. Lay down a towel to protect your surface and keep your tools organised and within reach.
Next, prepare your nails. Start by removing any old polish. Wash and dry your hands thoroughly. Gently push back your cuticles with an orangewood stick or a metal pusher. If you need to trim them, do so sparingly. Shape your nails to your desired length and form using a traditional hand file (180/240 grit is ideal for natural nails). Finally, lightly buff the surface of your nails with a fine-grit buffer block. This removes shine and creates a slightly textured surface for the gel to adhere to. Cleanse the nail plate with an alcohol-based solution to remove any dust and oils.
A Step-by-Step Guide to Using Your Tools
With your nails prepped, you're ready to use your powered equipment. The key is to work slowly and methodically.
Using the Nail Lamp Correctly
Curing is a straightforward process, but precision matters. Apply a very thin layer of your chosen base coat, gel colour, or top coat. Thick layers will not cure properly and can lead to wrinkling or peeling. Be careful to avoid getting any product on your skin or cuticles. If you do, clean it up with a small brush dipped in cleanser before curing. Place your hand in the lamp and cure for the time recommended by the polish brand. Repeat this process for each layer of colour and the final top coat. Most manicures involve a base coat, two coats of colour, and a top coat, with each layer being cured separately.
Mastering the E-File Safely
The e-file requires respect and practice. Before ever using it on your nails, practice on a plastic swatch stick to get a feel for the tool's power and movement. When you're ready to work on your own nails, remember these rules:
- Start on the lowest speed. You can always increase it slightly if needed, but you can't undo damage from a speed that's too high.
- Never apply pressure. Let the weight of the handpiece and the rotation of the bit do the work. Pressing down causes friction, heat, and can easily create dips in the nail.
- Keep the tool moving at all times. Do not hold the bit in one spot on the nail, as this will quickly generate heat and can cause damage. Use light, sweeping motions across the nail surface.
- Hold the bit parallel to the nail. Angling the bit can dig into the nail plate and cause significant damage.
Common Pitfalls and How to Avoid Them
Many common manicure issues stem from improper tool use. Here are a few to watch out for:
- Over-filing the Natural Nail: Using an e-file or a coarse hand file too aggressively on the natural nail can thin it out, causing weakness and sensitivity. Always be gentle and use fine-grit tools.
- Incorrect Curing: Under-curing can leave the gel soft and prone to peeling, while some believe over-curing can make it brittle. Always follow the manufacturer's specified curing time for your specific lamp and polish combination.
- Poor Preparation: Skipping the nail prep steps—especially cleansing the nail plate of oils—is the number one cause of gel polish lifting or peeling prematurely.
- Flooding the Cuticles: Allowing gel polish to touch the skin or pool in the cuticle area will cause lifting as the nail grows. It can also lead to skin irritation. Work with thin coats and maintain a tiny gap between the product and the skin.
- Neglecting Tool Hygiene: Always clean your e-file bits and metal tools after each use with a suitable disinfectant solution to maintain hygiene and prevent the transfer of bacteria.
By investing in the right tools and taking the time to learn safe techniques, you can create durable, beautiful manicures in the comfort of your own home.


