


Perfectly groomed eyebrows can beautifully frame your face and complete your entire makeup look. While it might seem daunting at first, mastering the art of eyebrow makeup is simpler than you think. With a few basic tools like a brow pencil, a pot of pomade, and a spoolie brush, you can achieve polished, natural-looking brows at home. This guide is designed for beginners, walking you through essential techniques and helping you sidestep common errors for a flawless finish every time.
Preparing Your Brows for Makeup
Before you pick up any product, a little preparation goes a long way. Start with a clean, dry face, ensuring there is no moisturiser or foundation residue on your brow hairs, as this can affect how the makeup applies and lasts. Use a clean spoolie brush to comb your eyebrow hairs upwards and outwards. This helps you see their natural shape, identify any sparse areas that need filling, and sets them in a uniform direction. For a truly tidy look, you can carefully trim any overly long hairs that extend far beyond your natural brow line, but this step is optional and should be done with caution.
Choosing the Right Eyebrow Product
The market is filled with different types of eyebrow products, each offering a unique finish. Understanding the main categories will help you choose the best one for your desired look and skill level.
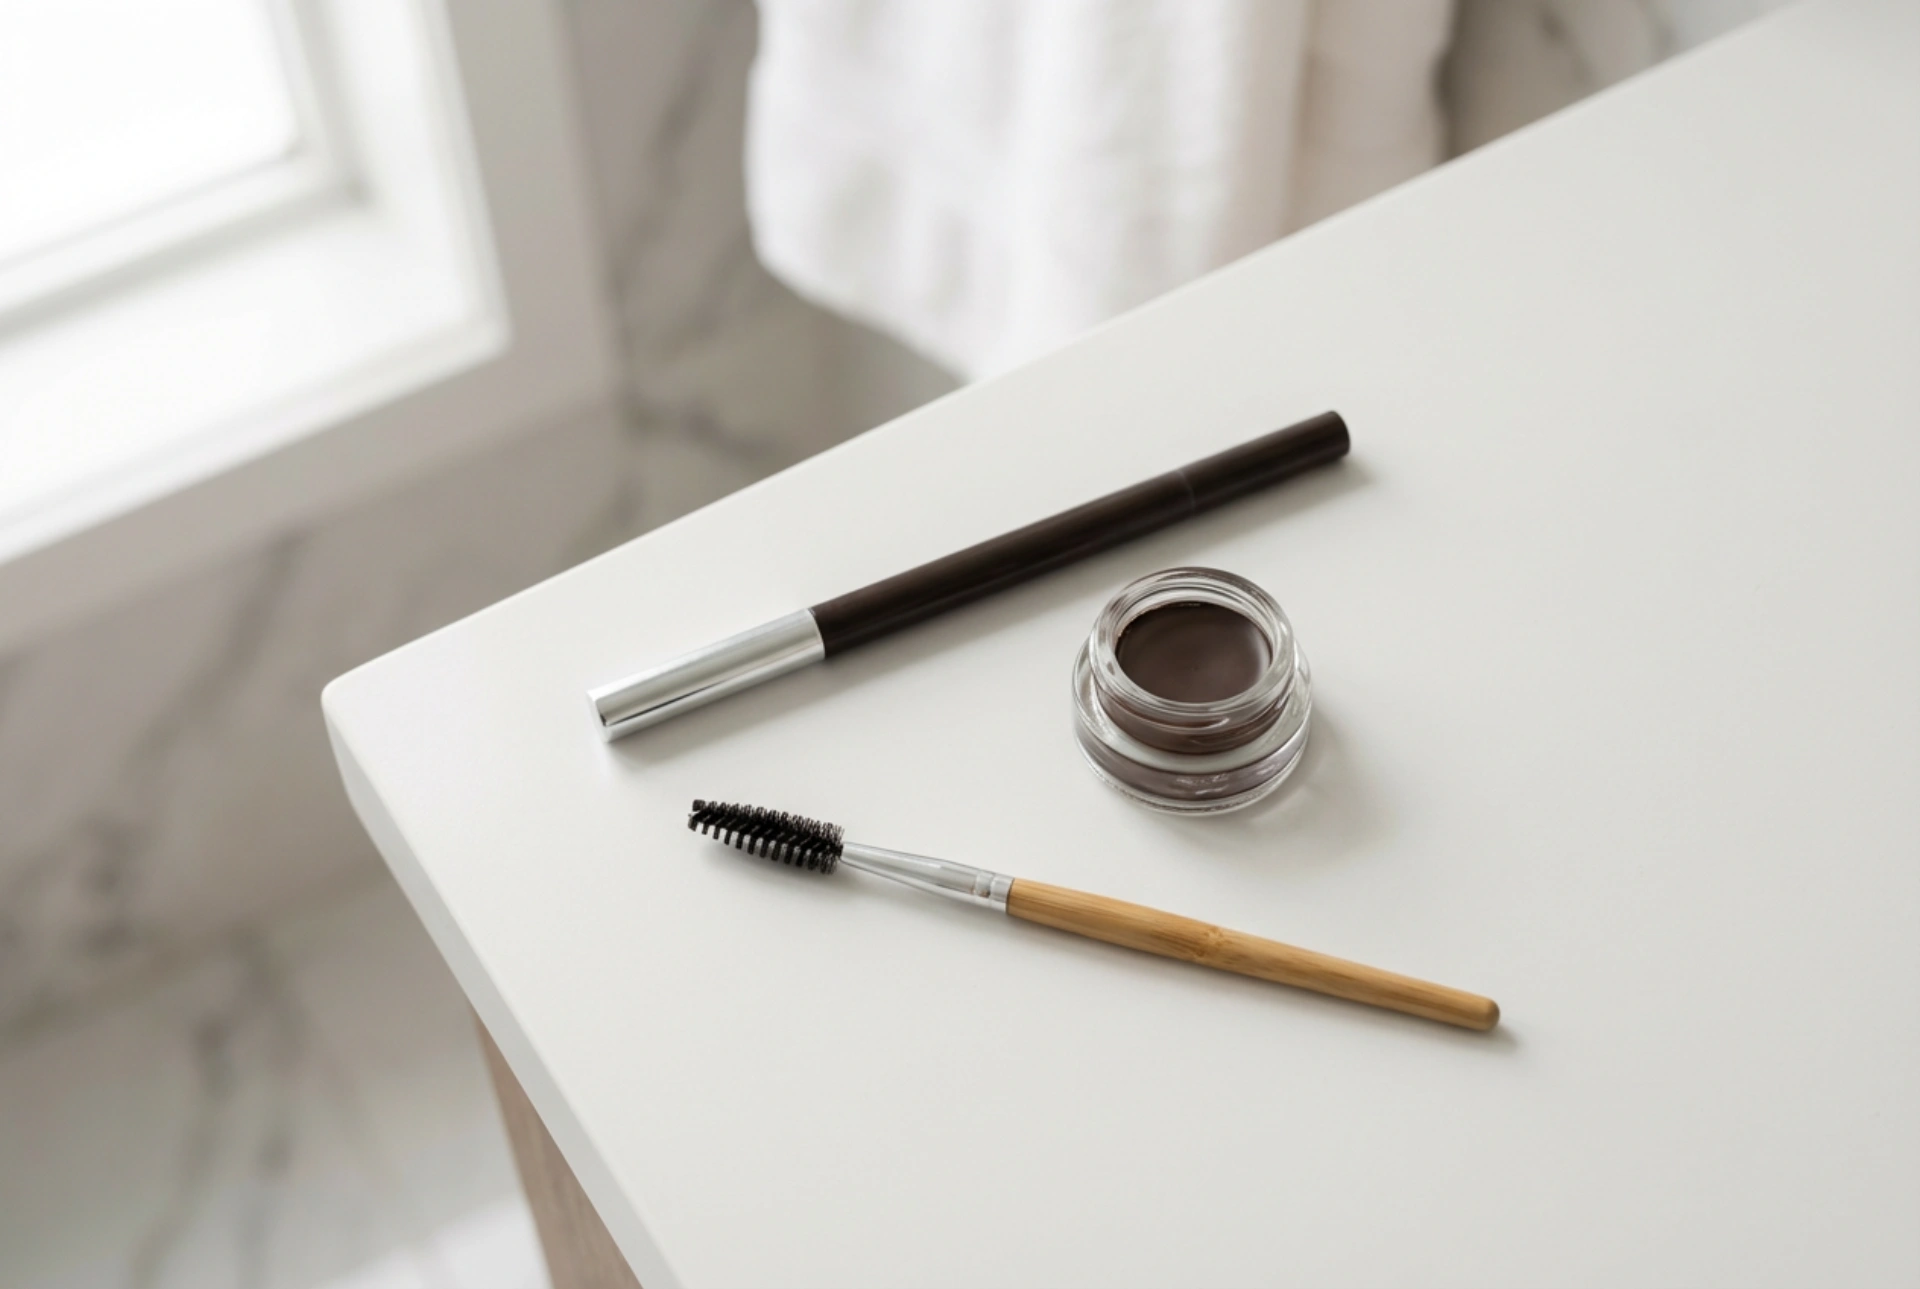
Brow Pencils
Pencils are perhaps the most user-friendly option for beginners. They are excellent for outlining the brow shape and drawing fine, hair-like strokes to fill in sparse patches. Look for a pencil with a fine tip for precision and a built-in spoolie on the other end for easy blending.
Brow Pomades
Pomades come in small pots and are applied with an angled brush. They offer a more pigmented, defined, and long-lasting finish. While they require a bit more practice to master a light hand, they are perfect for creating a bold, sculpted brow look.
Brow Powders
Brow powders provide a softer, more natural finish than pencils or pomades. They are applied with an angled brush and are great for adding gentle fullness to the brows. Often, they come in duos with two shades, allowing you to create a natural gradient effect.
Brow Gels
Available in clear or tinted formulas, brow gels act as a finishing touch. They comb through the hairs to set them in place all day, adding texture and hold. A tinted gel can also add a hint of colour and volume, making it a great one-step product for those in a hurry.
A Step-by-Step Guide to Filling in Your Brows
Once you've chosen your product, it's time to apply it. This simple, universal technique works well with pencils, powders, or pomades.
- Step 1: Map Your Brows. To find your ideal shape, use a pencil or brush handle as a guide. Hold it vertically from the side of your nose upwards – this is where your brow should start. Next, angle it from the side of your nose through your pupil – this is where your arch should be. Finally, angle it from the side of your nose to the outer corner of your eye – this is where your brow should end.
- Step 2: Outline the Shape. Using your chosen product, lightly trace a line along the bottom of your brow, following your natural shape from the start to the tail. This line will act as your main guide and create a clean, defined look. Avoid making the top outline too harsh.
- Step 3: Fill in Sparse Areas. With light, feathery strokes that mimic the direction of your hair growth, begin to fill in any gaps. Concentrate most of the product from the arch to the tail, as this area is naturally darker and more defined.
- Step 4: Create a Natural Front. Use the remaining product on your brush or apply your pencil very lightly at the front of your brow. A softer, less-defined start creates a more natural-looking gradient and avoids a 'blocky' appearance.
- Step 5: Blend, Blend, Blend. Take your clean spoolie and gently brush through your entire eyebrow. This softens any harsh lines, distributes the product evenly, and creates a seamless, polished finish.
- Step 6: Set the Hairs. If you wish, finish by combing a clear or tinted brow gel through your brows to hold them in place all day.
Common Eyebrow Makeup Mistakes to Avoid
A few common errors can make the difference between natural and unnatural-looking brows. Being aware of them is the first step to avoiding them.
- Choosing a Shade That's Too Dark: This is the most frequent mistake. It creates a harsh, artificial look. As a rule of thumb, choose a shade one or two tones lighter than your hair colour if you have dark hair, and one or two tones darker if you have very light or blonde hair.
- The Blocky Start: Avoid drawing a square or harsh vertical line at the beginning of your brow. Always aim for a soft, diffused start for a more natural effect.
- Over-Extending the Tail: A brow tail that extends too far down can visually drag your eyes down. Use the mapping technique to find the correct endpoint.
- Using Too Much Product: Always start with a small amount of product and build up gradually. It's much easier to add more than it is to take it away.
- Forgetting to Blend: Skipping the blending step with a spoolie can leave you with obvious lines and patches of colour. Blending is key to a flawless, integrated look.
Mastering your eyebrows takes a little patience and practice, but it's a skill that can significantly enhance your features. Don't be afraid to experiment with different products and techniques to find what works best for you. With these tips, you'll be well on your way to achieving your perfect brows.


