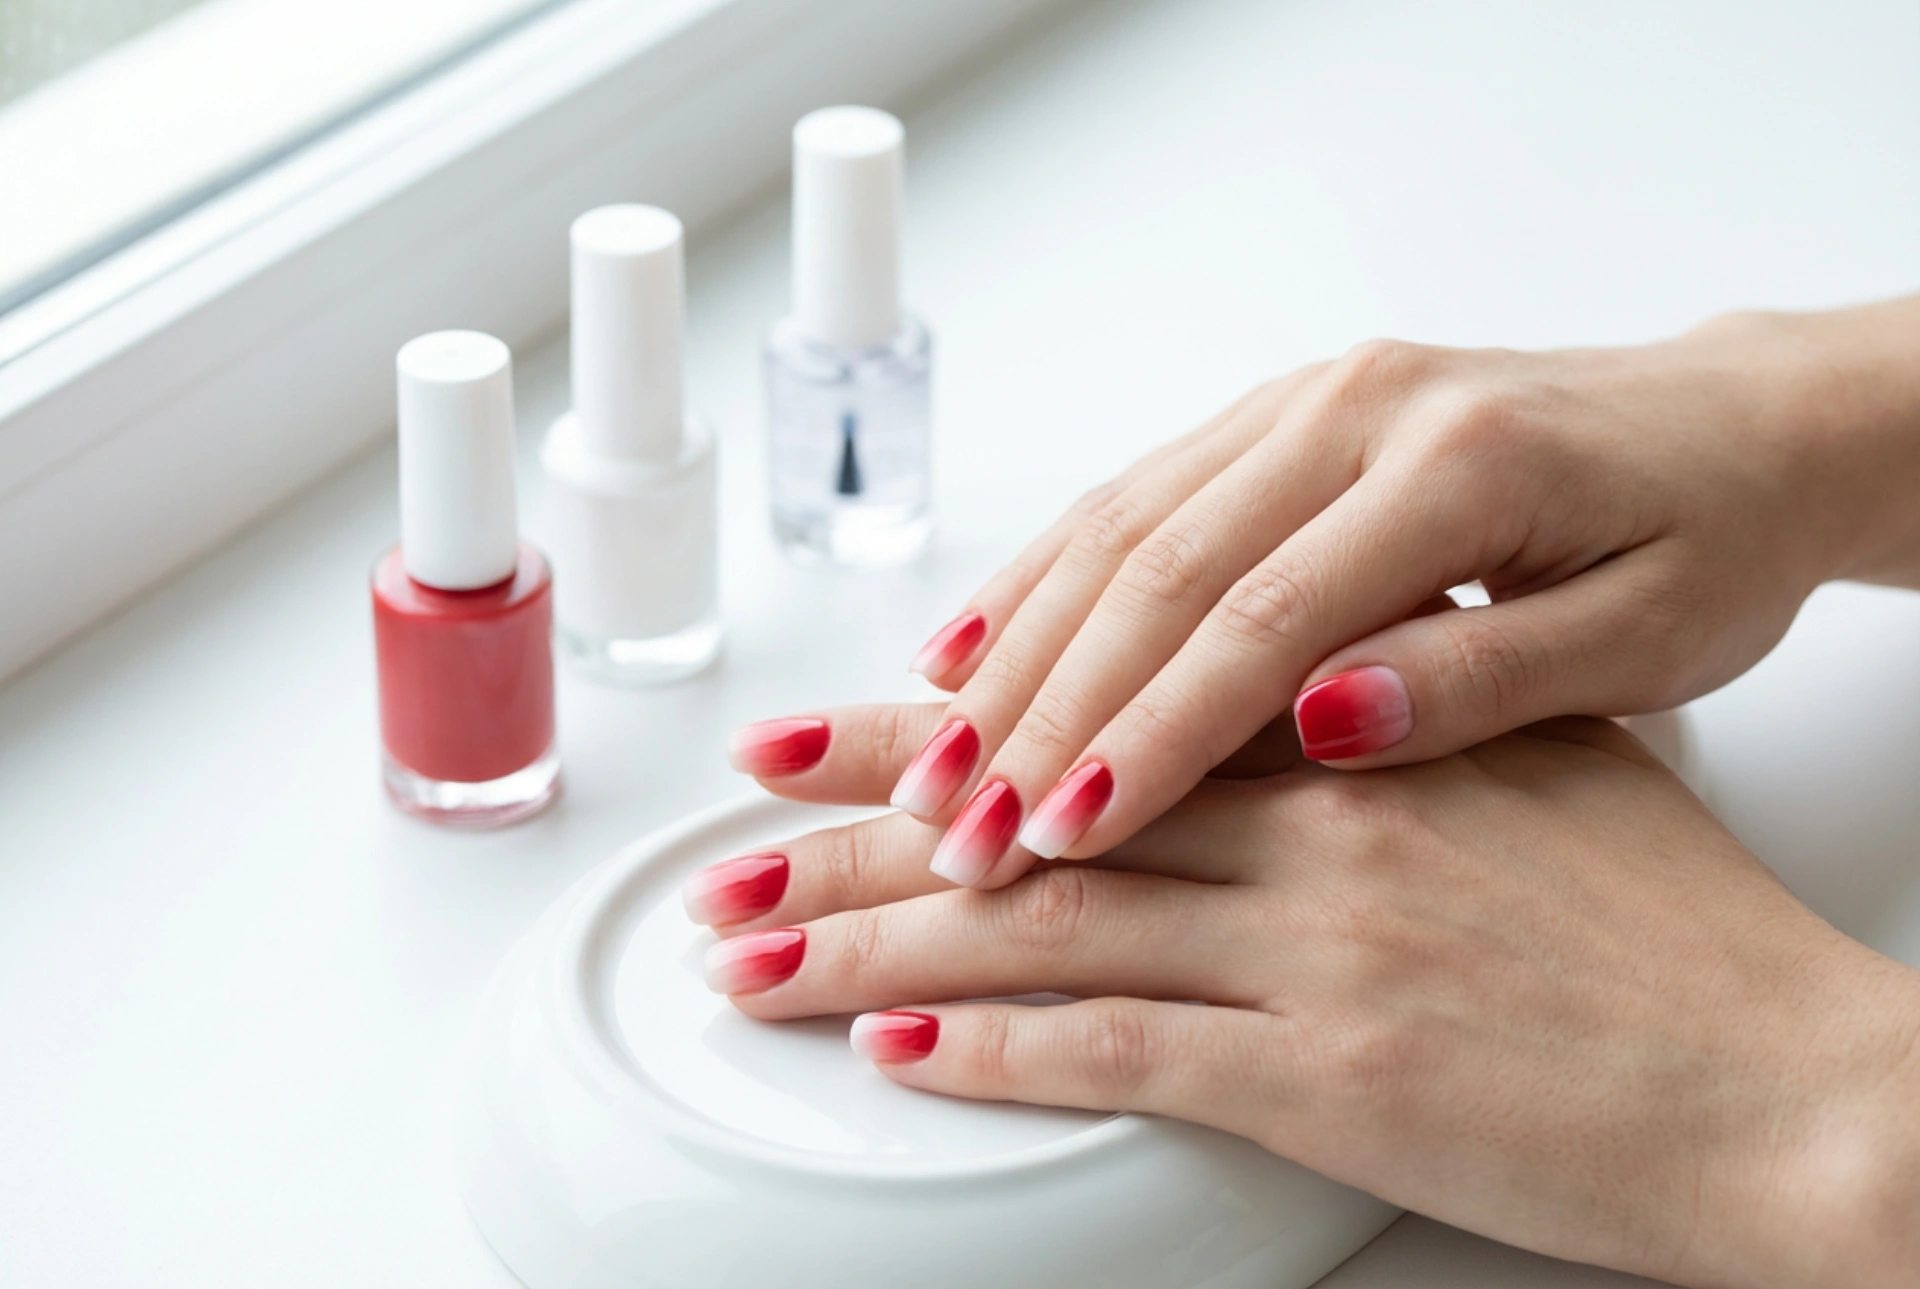


The ombre effect on nails remains a timeless choice, offering a sophisticated transition between colours. The classic combination of red and white is particularly striking, creating a look that is both bold and elegant. Achieving this beautiful gradient at home is easier than you might think. With the right techniques and a little patience, you can create a flawless red and white ombre manicure that looks professionally done. This guide will walk you through the process, from preparing your nails to sealing your design for a long-lasting, glossy finish.
Preparing Your Nails for the Ombre Effect
Proper preparation is the foundation of any great manicure. Before you start applying polish, it's crucial to ensure your nails are clean, shaped, and ready for the design. A well-prepared canvas not only makes the application process smoother but also helps your manicure last longer.
- Clean and Shape: Start by removing any old nail polish. Wash your hands and nails thoroughly. Gently push back your cuticles, but avoid cutting them to prevent irritation. File your nails to your desired shape, whether it's square, oval, or almond. Ensure all nails are of a uniform length and shape for a cohesive look.
- Buff the Surface: Lightly buff the surface of your nails. This creates a slightly rougher texture that helps the polish adhere better, increasing the longevity of your ombre design. Be gentle to avoid thinning or damaging your nails.
- Apply a Base Coat: Never skip the base coat. It serves multiple purposes: it protects your natural nails from staining (especially important with a vibrant colour like red), creates a smooth surface for polish application, and helps the manicure last longer. Apply one thin layer and let it dry completely.
Creating the Perfect Red and White Gradient
The key to a beautiful ombre is a seamless blend between the colours. The most popular and effective method for creating this effect at home is using a simple makeup sponge. This technique allows you to dab the colours on, creating a soft, diffused transition.
The Sponge Technique Step-by-Step
First, you need to create your base. You can either apply a solid coat of the lighter colour (white) to all nails and let it dry, or apply white on one half of the nail and red on the other. The first method is often easier for beginners. Once your white base is completely dry, you're ready to create the gradient.
- Prepare Your Sponge: Take a small piece of a disposable makeup sponge (a triangle wedge works well). Paint a stripe of white polish and an adjacent stripe of red polish directly onto the sponge. Make sure the colours slightly overlap in the middle. The band of polish should be wide enough to cover your entire nail.
- Apply the Gradient: Gently dab the sponge onto your nail. Reposition and dab a few times to ensure the entire nail is covered and the colours start to blend. Don't press too hard; a light, bouncing motion works best. The first layer may look sheer, which is normal.
- Reapply for Intensity: Let the first gradient layer dry for a minute or two. Reapply the polish to your sponge and dab it onto your nail again, trying to align the colours in the same position as before. Repeat this process until you achieve the desired opacity and blend. Two to three layers are usually sufficient.
Protecting the Skin and Cleaning Up
The sponge technique can be messy, often leaving polish on the skin around your nails. Preparing for this in advance will make the clean-up process much faster and easier. You can apply a liquid peel-off barrier or petroleum jelly to the skin around your nail before you start sponging. Once your design is dry, you can simply peel off the barrier, taking the excess polish with it.
For any remaining polish on your skin, use a small, flat brush or a cotton bud dipped in nail polish remover. Carefully trace around your cuticle line to create a sharp, clean edge. This step makes a significant difference and gives your manicure a professional, polished look.
Sealing and Protecting Your Ombre Manicure
Once you are happy with the blend and have cleaned up the edges, it's time to seal your design. This final step is crucial for smoothing out the slightly textured surface left by the sponge and giving your nails a high-gloss shine. A good top coat will also protect the design from chipping and fading, extending its wear time.
Apply a generous layer of a quick-drying, glossy top coat over the entire nail. Be sure to 'cap' the free edge of your nail by running the brush along the tip. This helps to prevent chipping. For maximum longevity, you can reapply the top coat every two to three days to maintain the shine and add an extra layer of protection. Finally, once the top coat is completely dry, apply some cuticle oil to nourish the skin around your nails, keeping them healthy and hydrated.


